
Content and Data
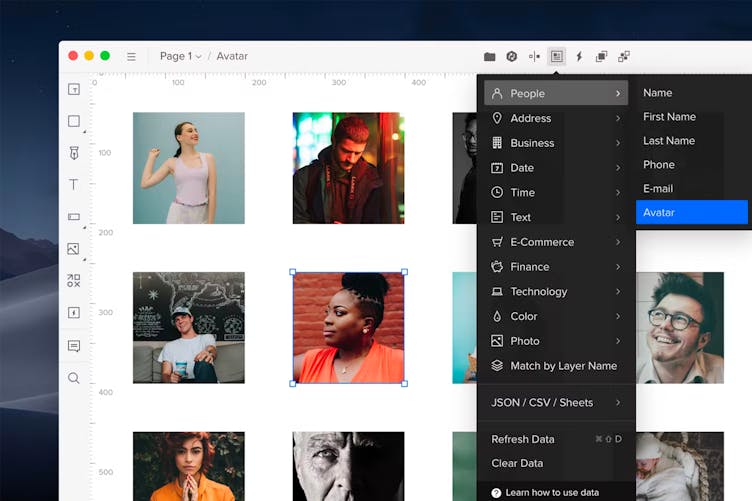
In UXPin, it's possible to fill elements with real data from JSON, CSV or Google Sheets with just one click. You can also use a bunch of different sample data like avatars, names, addresses, etc. Select an element and choose Fill with Data from the Top Bar. Then, choose the category you want to fill your element/s with.
- To update it with new data, select the element and click Refresh Data or use the shortcut
Ctrl
"Shift"
"D"
. - Clicking Unlink Data will clear the connection but won’t restore the original layer content.
- Duplicating an element will copy it with the original content.
Tip
To quickly duplicate elements with refreshed content, select an element or a group of elements, hold Alt and drag the bottom right handle.
Unsplash Images
To add an image from Unsplash:
- Select an element.
- Click Fill with Data in the Top Bar.
- Choose Photo and select the category.
Or, you can use the search to look for more specific photos, such as Trees instead of Nature.
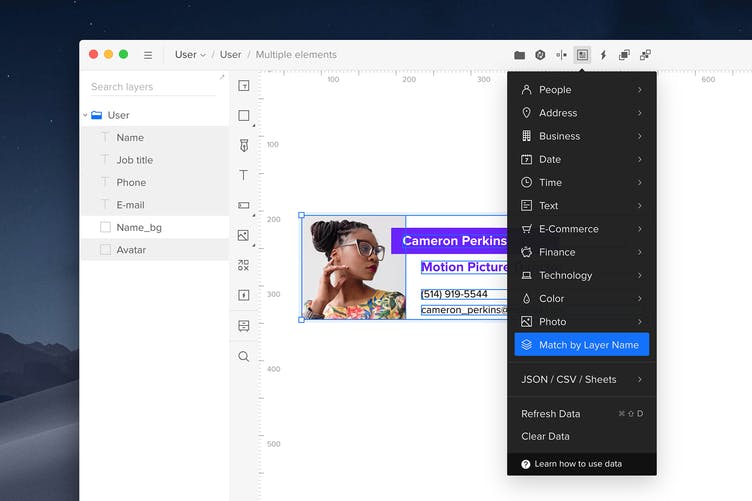
Match Content by Layer Name
To generate content for a group of various elements on the canvas, you can use the Match by Layer Name option. This will generate content according to the name of each layer.
- First, name each layer using keywords of the type of data you want to update them with.
- Then, select the elements you want to update and choose Match by Layer Name from the dropdown. All elements with names matching the keywords will be automatically filled with data from the selected content types.
In the majority of cases, the keyword is the actual name of the type of data, but we’ve included the additional variants as well. The only exception is date which uses the following notations: d=day, m=month, y=year (for example, the keyword for 05/25/2018 format is mm/dd/yyyy and for 25.5.2018 — dd.m.yyyy).
Also, the keywords for the specific theme groups in the Image category always include the ‘image’ prefix, e.g. image-city/imagecity.
Additional keywords include: tel for Phone, photo for Avatar, date for 2018-05-25, time 24h for 24-Hour, time for AM/PM, exp date and valid for CC Expiration date, login for Username.
Remember these naming conventions while creating the prototype. It’ll allow you to populate a bunch of elements in just a couple of clicks.
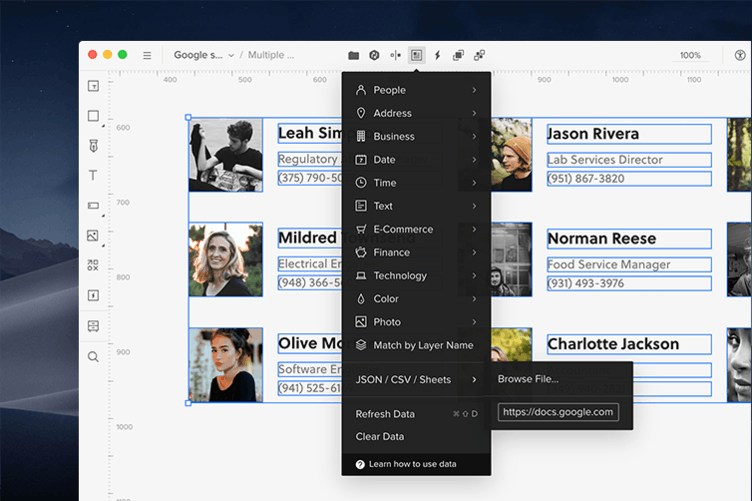
Generate Data from Google Sheets
To use data from a Google Sheet, paste a proper URL to the actual file and hit
"Enter"
to update the elements.
When using Google Sheets, it is important to organize both the file and the UXPin prototype properly.
The structure of a Google Sheet needs to resemble a table so the first row should contain the headers. Once you specify them, include the actual data in the columns below.
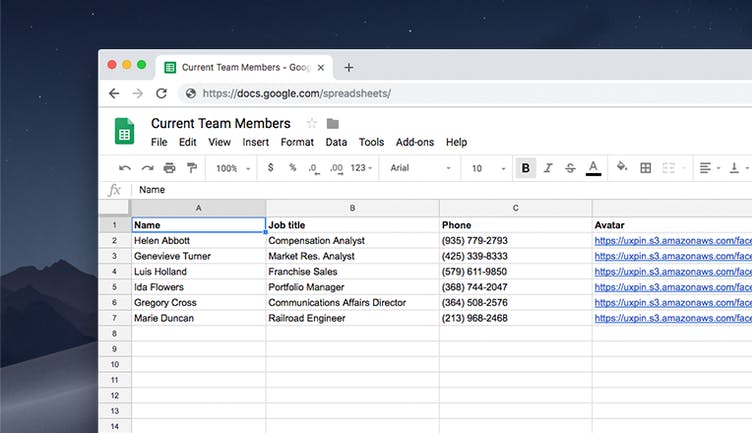
UXPin uses the layer names to connect the elements with the specific columns in the Google Sheet, so make sure to name the elements the same as the column headers.
Also, please note that for updating the data from Google Sheets, it’s necessary to use the URL in the Comma-separated values (.csv) format. To access it, choose the Publish to the web option from the File menu in the sheet. Next, change its format and copy the URL.
You can download the example Google Sheet in the .csv format here.
Generate Data from a CSV File
To generate data from a CSV file, choose the Browse file option in the JSON/CSV/Sheets section and add the file.
Each CSV file resembles a table as it consists of rows and columns — the rows are separated with a new line and columns by a comma. As mentioned before, UXPin uses the layer names to generate the content, so you’ll need to use the headers from the first row of your file to name the elements.
Generate Data from a JSON File
You can also generate the data from the JSON files, either owned by your company or from a publicly available API. JSON is a file format that uses text to transmit data in an organized and easy-to-access manner.
You can get the example JSON files from the free online generators such as randomuser.me or lists.design.
Here UXPin also uses the layer names to connect the elements with the specific node in JSON — for example, if you want to apply the name from the JSON file below, name the text element in UXPin as 'users.name'.
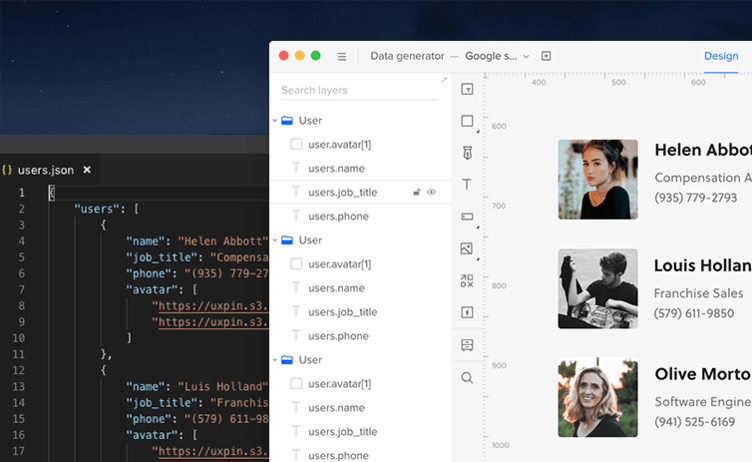
Additionally, to point to the exact node, you can use its number in square brackets, for example, 'users.avatar[1]'. This option is useful when multiple nodes with the same name exist in the JSON file.
To update the design with data from JSON, paste the JSON URL in the Fill with data section. Hit
"Enter"
and all the elements will be automatically populated.
Adding links
Here's how you can add links to different text parts while typing inside a text box:
1. Highlight Text: Select the part of the text you want to turn into a link.
2. Add Link: Click on the hyperlink icon in the top bar. This icon looks like a 🔗 and is labeled 'Add Link To Text.'
3. Insert URL: A space for the URL will appear. Paste the link you want to associate with the highlighted text.
That's it! The highlighted text will now serve as a clickable link. Give it a try and enhance your content with relevant references.