
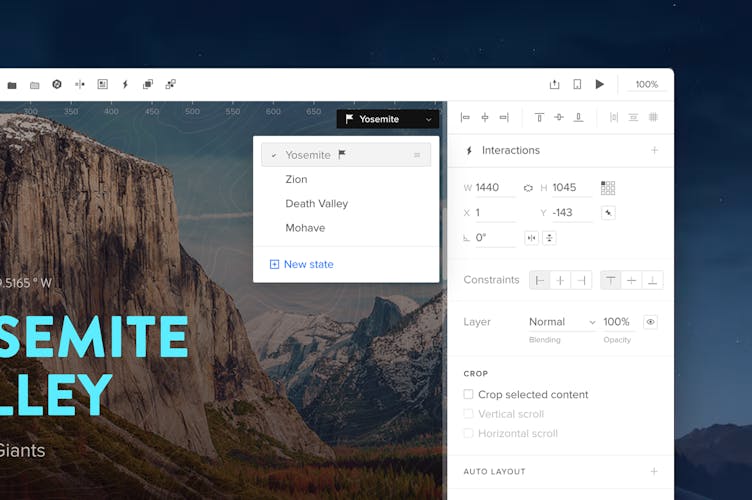
States
In UXPin each element can have several states with a different set of properties and interactions. For example, you’ll be able to create a single button that has a default, hover, active and disabled state and switch between these states once a specific action is triggered. States let you also build complex components like drop-down menus or navigations.
For each state, you can determine an alternative set of properties — in the case of a button, it could be different fill and content. The important fact is that you’ll still have the same elements, just with various styling options.
You can also use states in Components to create reusable components and animate elements between states easily with interactions.
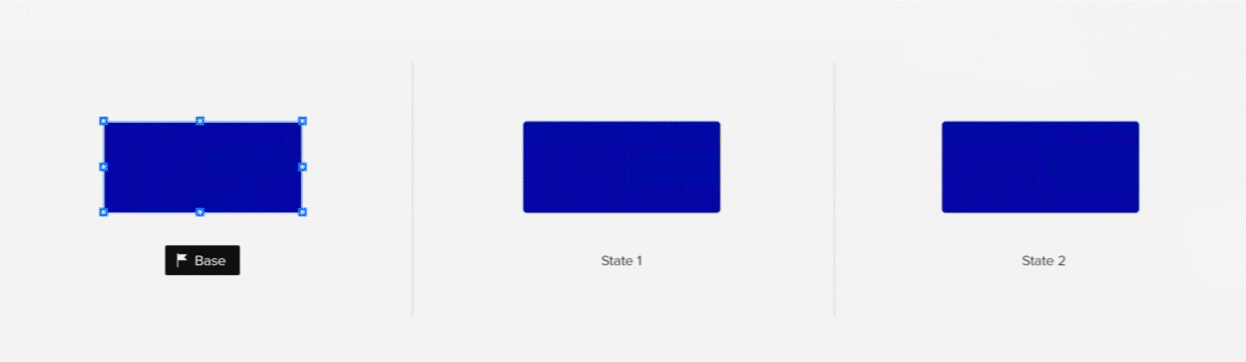
Base State
Each element with states has a base state. It’s a primary state of an element — a foundation on top of which other states are built. The base state is marked with the flag icon, so you can easily see it in the States menu.
Whenever you update the base state, changes will automatically appear in all other states.
Editing the base state will affect all states, but you can also edit these states separately. In other words, you can edit them all at the same time when changing the base state, or one by one. However, properties already edited in other states before won’t be updated. You can always reset the edited properties or the whole state whenever you want.
In the case of interactions, you’ll be able to set them:
- for the base state — the interaction will be automatically added to for all states unless there are some interactions already set for other states;
- for the other states — the interaction will be added to the specific state only.
Adding and Removing Elements
Adding or removing elements in the base state will add or remove them in all states.
If you add an extra element to the base state, it’ll be automatically included in other states as well. However, if the element is added to any other state, it will be visible for this state only — it will be included as a hidden layer for other states and you’ll be able to make it visible by clicking the eye icon in the Layers panel.
Also, since you’re not able to delete elements from the selected states only, you can simply hide them in the Layers panel.
Please note that including elements is possible only for groups – if you’ve added a state to a single object, you won’t be able to add more elements.
Resetting to Base State
You can reset the selected properties for an element or even the whole state with all its elements to its base state properties.
Click Reset all changes (marked with the arrow icon) from the States drop-down menu.
If you want to make sure that some changes on the base state are not being overridden on the state, you can reset the specific properties only. To do that, first, select the element inside that you want to reset. Next, click Reset props to the base state button on top of the Properties panel and choose the property from the list or use Reset all option to restore all the properties at once.
Moving Single Elements
The position of a single element with several states always stays the same for all states. Therefore, even if you move an element in a non-base state it will be moved in every state. A best practice here is to use states with groups, even if it’s a single element. Here are three easy steps to make:
- Group the element
- Add a state
- Move one state of the element to the desired position
Active State
An active state is a state that you are currently editing on the canvas. It will also be displayed as the default state in Preview mode. It’s marked with a checkmark in the States menu.
To set a state as active, select it from the States menu which is in the top right corner of the canvas or in the layers panel.
You can also use the Active State option from the context menu or a keyboard shortcuts
"Shift"
"+"
to switch between active states quickly.
Adding States
To add a state to the element, select it on the canvas and click the Add new state icon in the top bar
Ctrl
"Shift"
"S"
. You can access it also in the context menu. Next, set the name of the state and confirm with Enter.
Managing States
You can manage states from the States menu. Once you open the menu, you can do the following actions:
- Switch between the states — click on a state from the list to set it as an active state on the canvas
- Add state — click +New state
- Rename — double-click the state’s name
- Reorder — grab the first icon next to the state’s name and drag it to the desired place
- Delete — click on the red x icon
- Reset all changes to base state — click the arrow icon to reset properties to the base state
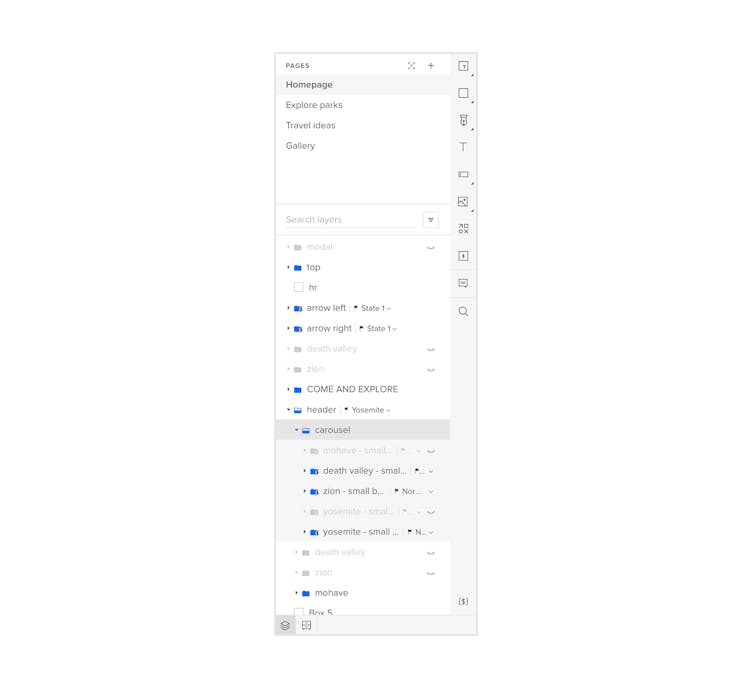
Nested States
You can create nested structures with states. Consider building a form component which consists of an input with 2 states (empty and with added email) and a button with an active and inactive state.
By setting the active states in the Layers panel, you can determine which state of the nested elements should be displayed once the state of the parent element is changed. This way, you’ll be able to build a relationship between the state of an input and state of a button to display a proper combination.
Controlling States with Interactions
Controlling states with interactions lets you add dynamics to your design right away by animating between states. The asset below shows an example of three different carousels all created in UXPin with the use of states and various interactions.
There are two types of interactions related to states:
- Triggering an interaction when the state changes.
- Setting the element's states to Next/Previous or to a specific state.
To see and learn how to control states with interactions, go to our how-to tutorials and check out the following use cases:
- How to Create a Carousel
- How to Create an Accordion Menu
- How to Create a Multilevel Dropdown Navigation
States as Component Overrides
If you create a Component that has States, for example a button with different states, every change to a State in the instance is automatically set as a Component override. It gives you the possibility to edit every State independently in every Component Instance.