
Stepper
This tutorial shows you how to create a stepper in a shopping cart. There are two stages – can complete only one or both:
- Creating a click stepper
- Creating a stepper that accepts input
→ Download a ready .uxp file for this tutorial.
Setting Up the Design
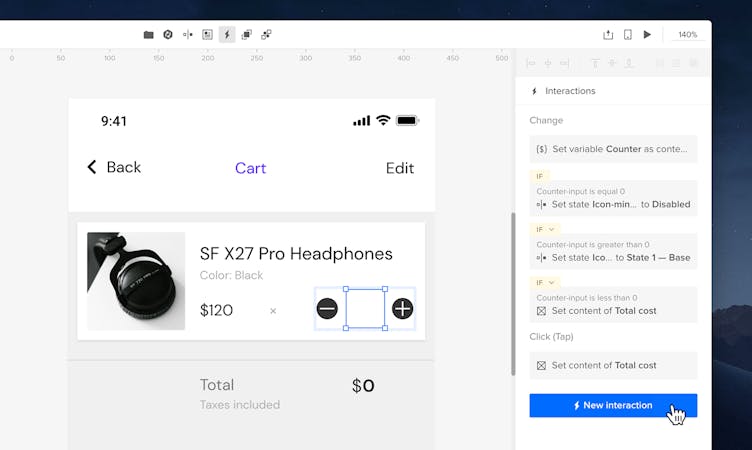
- Start by creating your design. Add a product image and use separate text elements for the product price, the currency sign, and the total cost itself.
- Create the stepper using the Input element from Forms in the Quick Tools menu, and two icons on both sides – a plus and a minus.
Click Stepper
Creating States
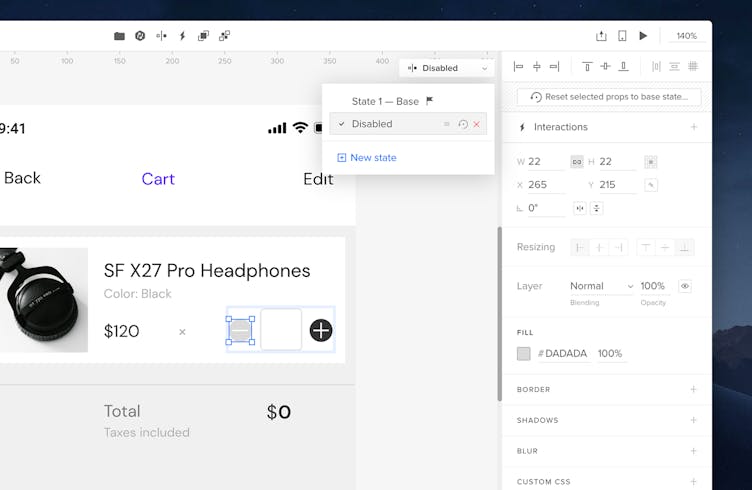
- Select the minus icon and click Add State from the Top Bar. The State 1 (Base) will already be created.
- Add another one and name it Disabled.
- In the Disabled state, change the color to gray.
Creating Variables
- Click Variables at the bottom of the Quick Tools panel.
- Create two variables, Counter and Price. Then, set your default value for the price.

Note
You can’t change the names of variables after you create them.
Adding On-Click Interactions
You can now add on-click interactions on each icon that add, take away, and display the total amount inside the input.
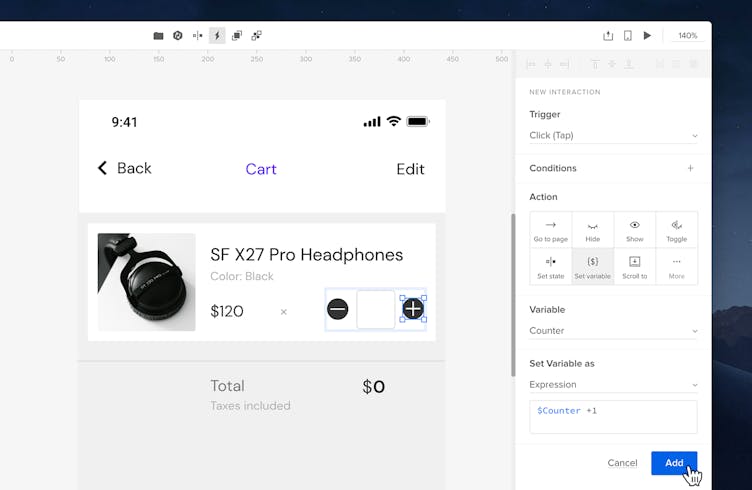
- Select the plus icon and click the + icon at the top of the Properties panel to add an interaction.
- In the Action section choose Set variable.
- In Variable, choose your Counter.
- In Set Variable as, choose Expression and type in
$Counter +1so that it adds 1.
The next interaction needs to take away 1 from values greater than 0 inside the input.
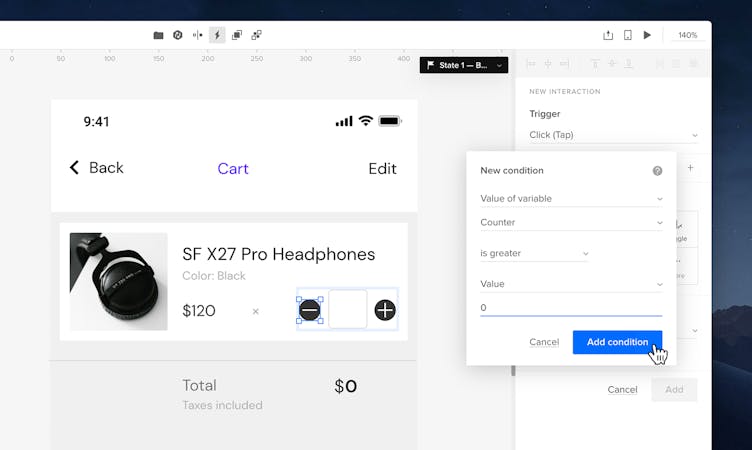
- Select the minus icon and add a new interaction.
- Create a condition and choose Value of variable in the first dropdown.
- Choose your counter in the second one.
- Select is greater in the third one and set the Value to 0.
- Click Add condition.
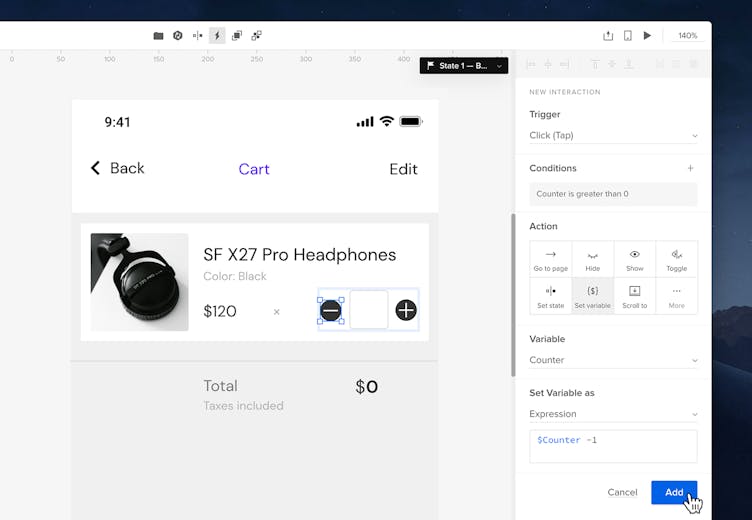
6. Next, in the Action section, choose Set variable.
7. In Variable choose your counter
8. In Set variable as, select Expression and type in $Counter -1.
9. Click Add.
Displaying Amount in the Input
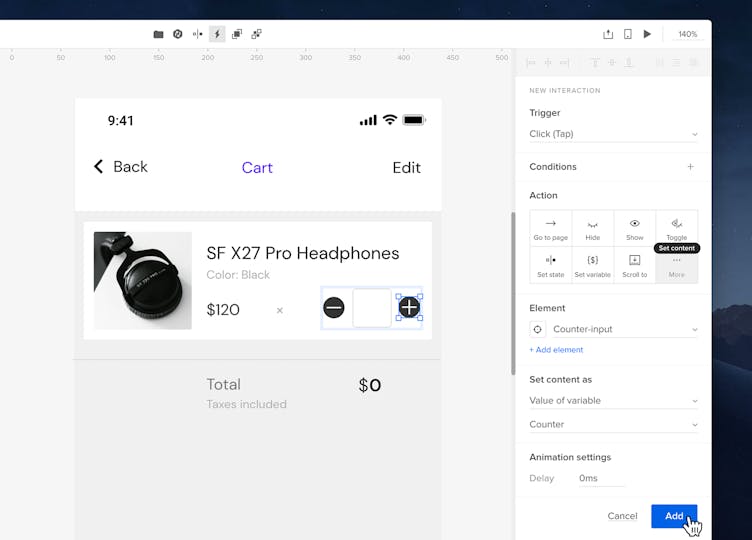
- Add an interaction on the plus icon.
- In the Action section, choose More and select Set content.
- In Element choose the input.
- In Set content as choose Value of variable and choose your counter as the variable.
- Add the interaction.
- Now add the same interaction on the minus icon.
Tip
You can quickly copy an interaction and paste it onto another element from the context menu.
Changing States for Different Values
You can now add interactions to change the state of the minus icon to Disabled when the value inside the input comes down to 0, and turn it back to the Base state when the input value is greater than 0.
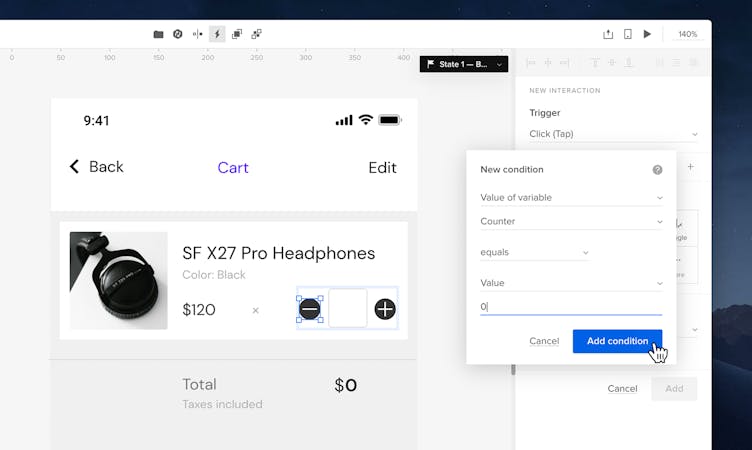
- Select the minus icon and add a new interaction.
- Create a condition with the first input is set to Value of variable. Choose your counter in the second dropdown, equals in the third and the fourth to Value. Type in 0 in the input.
- Click Add condition.
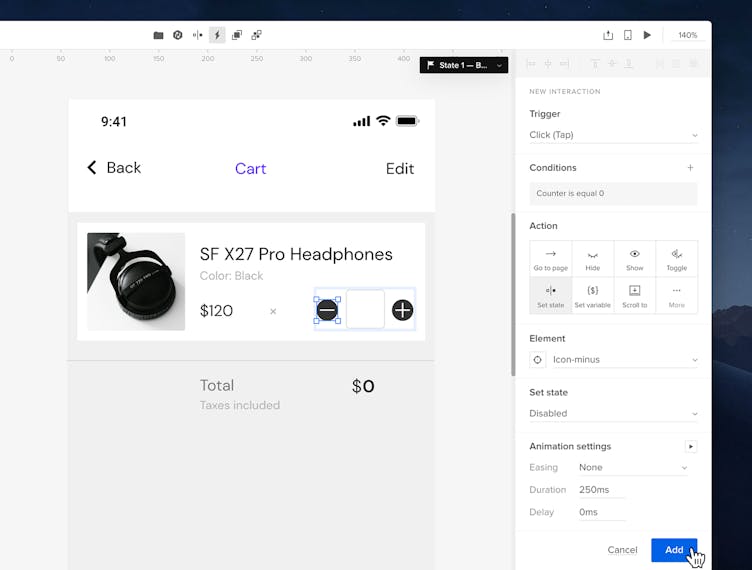
4. In the Action section, choose Set state.
5. In Element, choose your icon.
6. In Set state, select Disabled.
7. Click Add.
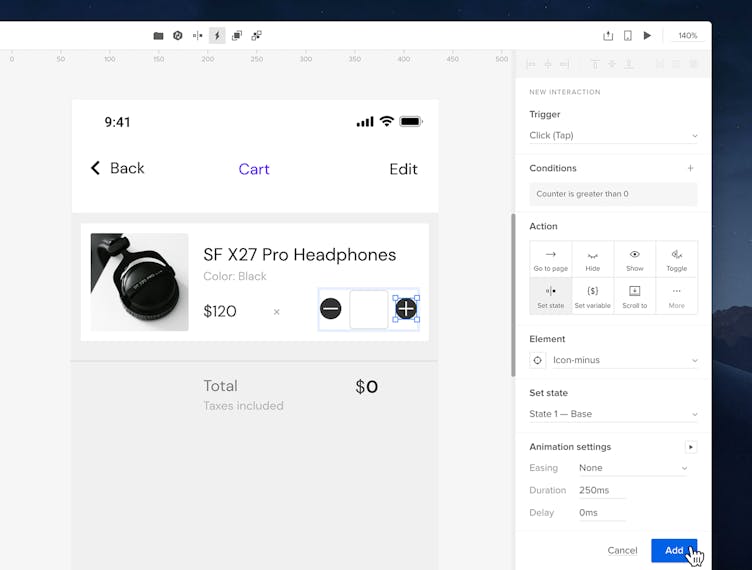
Now select the plus icon and add the same interaction for a change of state, but choose is greater for the Value 0 in the condition and set the Set state dropdown to State 1- Base.
Summing up Total Cost
To sum up and display the total price based on the number in the input, add the following interaction on either icon.
- In the Action section, click More and choose Set content.
- In the Element section, choose the text element for your total price.
- In Set content as, choose Expression and multiply both variables the Counter and Price by typing in
$Counter*$Price. - Click Add.
- Then add the same interaction onto the other icon.

At this point, you have created a counter that adds and deducts the total amount of items in the input by clicking on the icons and sums up the total cost. If you want to allow typing in the input, continue with the following steps.
Stepper that Accepts Input
If you want to sum up the total price based on what you type into the input, you will need to create 5 different interactions with the Value Change trigger.
- In the 1st one, set the variable Counter as the content of the input element.
- In the 2nd one, set the content of the Total price text element as the Expression that multiplies both Variables
$Counter*$Price. - In the third one, set the state of the minus icon to Disabled if the value inside the input is equal 0.
- In the 4th one, set the state of the minus icon to State 1- Base if the value inside the input is greater than 0.
- In the 5th one, set the content of the Total Price text element to value 0 if the value inside the input is less than 0.
You can preview your prototype
Change Input Border on Focus
Optionally, you can add an interaction that will change the color of the input’s border on Focus and on Focus Lost.
- Select the input and add a new interaction.
- In Trigger, choose Focus.
- In the Action section choose More and select Color.
- In Element, choose the input.
- In the Color section, change the color of the Border.
- Click Add.
- Add another interaction and set the Trigger to Focus Lost.
- In the Action section choose More and select Color.
- In Element, choose the input and don’t change anything in the Color section.
- Click Add.
You can now preview your design