Timer
In this tutorial you will learn how to create a timer.
→ Download a ready .uxp file for this tutorial.
Setting Up the Design
- Add a Text element and an Icon on the canvas from the left-side toolbar.
- Type in
"00:00"
inside the Text element. - Select the Icon and click the Add State option from the Top bar.
- Create two States; Pause and Start. The Pause should be the Base state. You can change the icons in both States in the Icons section of the Properties panel.
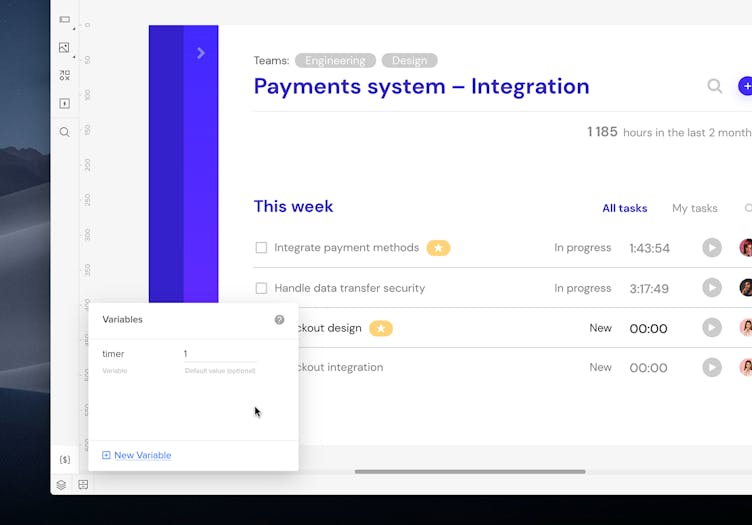
Create a Timer Variable
- Click the Variable icon [$] at the bottom of the left toolbar.
- Click New Variable
- Name it timer.
- Set its default value to
1. - Press Enter to save it.
Change Icon States On Click
You will add interactions on the Icon. The first one on the Base state (Pause) and the second on the other state. Adding an interaction on the Base state also adds it to the other states so, as a result, you will have two interactions on the other state.
- Set the Trigger to Click (Tap).
- In the Action section, click More and choose Next State.
- Under Element, choose the Icon.
- Set the Easing to None.
- Click Add.
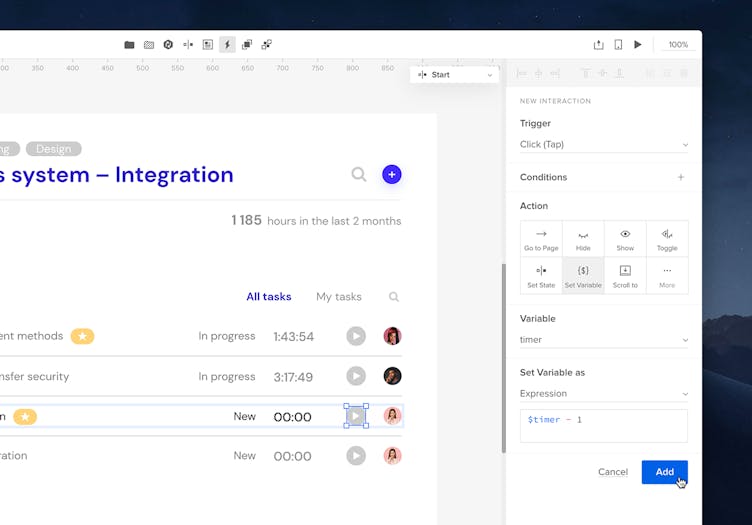
Start the Timer
- Add an interaction on the Start state of the Icon.
- Set the Trigger to Click (Tap).
- In the Action section, choose Set Variable.
- Choose the timer variable in the variable dropdown.
- In Set Variable as select Expression and type in the following expression in the text area:
$timer - 1. This is because the default value of the variable is set to1, so you want to subtract 1 when you click Start so that the time counts up from0.
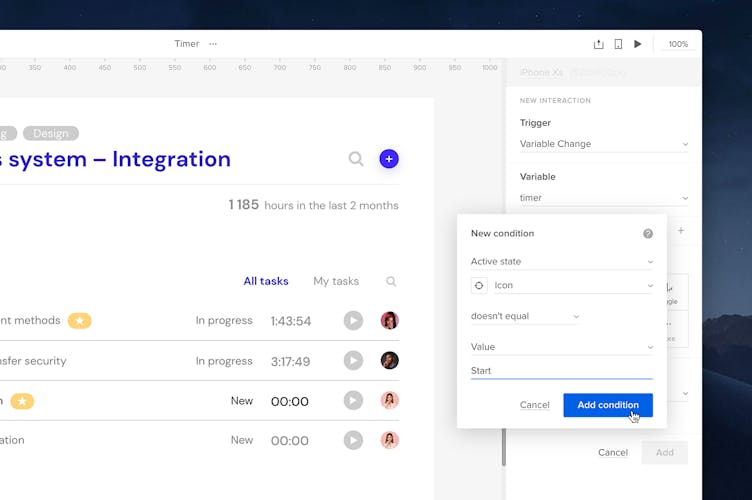
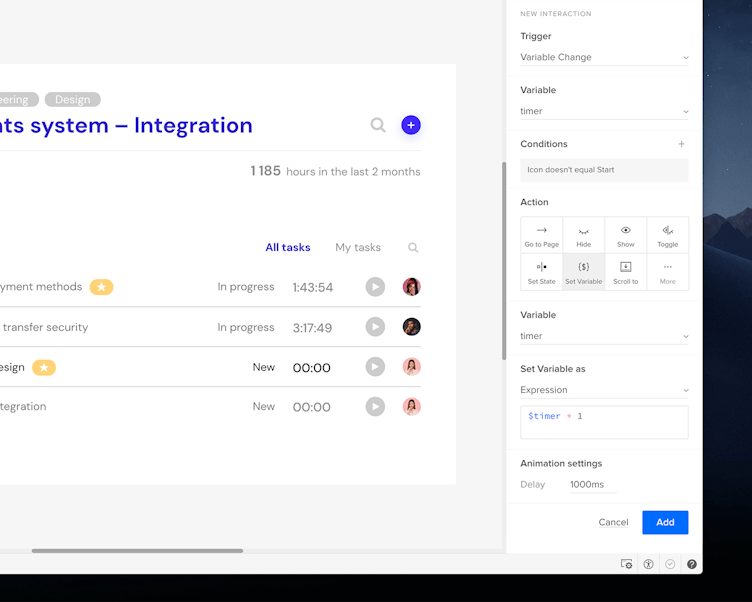
Create a Counting Interaction
- Add a new interaction on the canvas.
- In the Trigger dropdown, choose Variable Change.
- In Variable, choose your variable timer.
- Create a condition for when the Icon doesn’t equal Start. To do that, set the first dropdown to Active state, and choose the Icon element in the dropdown below. Then, choose doesn’t equal.
- The last dropdown is set to Value. In the input below, type in the State name exactly the way you named in at the beginning. i.e. Start.
If the State name starts with a capital letter, you need to type it in the same way in that input. - Click Add condition.
Set a Delay for the Interaction
Now that you added the condition to your interaction, you need to add a delay to enable counting up in seconds for your timer.
- In the Action section, choose Set Variable.
- As the Variable below, choose your timer.
- In Set Variable choose Expression and type in
$timer + 1. This will increment the variable's value. - In Animation Settings, type
1000 msin the Delay input. - Click Add.
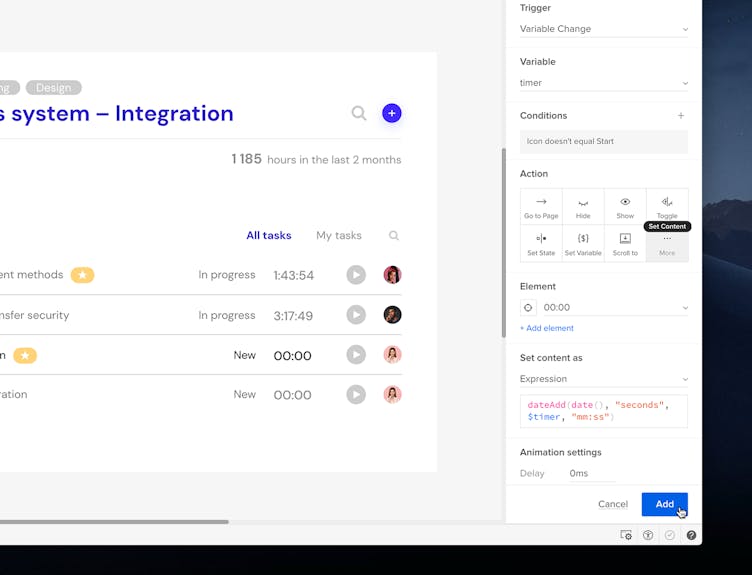
Display the Time
Add another interaction on the canvas that sets the time format as the content of the text element.
- Choose Variable Change as the Trigger.
- For Variable, choose the timer.
- Add the same condition as in the first interaction.
- In the Action section, click More and choose Set Content.
- In Element, select the Timer text element.
- In Set content as, select Expression.
- Type in the following in the text area:
dateAdd(date(), "seconds", $timer, "mm:ss")8. Click Add and preview your prototype.