How to Master App Prototyping and Handoff to Developers?

Not many businesses can survive the first interaction with their customers. And when we speak of mobile app investors and stakeholders, they get a plethora of development pitches in their inboxes on a daily basis. But, if you have a clear understanding of how to prototype your mobile app you will have a competitive advantage when pitching your idea to potential investors.
We all know what low-fidelity wireframes are, these skeletal frameworks can be understood by tech-savvy people, but if you really want to sell your idea, you will have to focus on more interactive and visual details. If your investors and developers can’t picture the final product, how will they feel comfortable moving on to the next stages?
Wireframes are solely created to answer layout, structure, and organization questions before the developers and designers move on to the visual details. If your client wants to interact with the elements, click some buttons, flip between screens, the Prototyping is to the rescue.
But What is An App Prototype?
An app prototype is a mid-to-high-fidelity app design model that represents the user interface of your mobile app. Prototypes enable you to demonstrate the complete functionality of your app design by adding animations, advanced interactions, and other variables.
Now let’s head on the elephant on the room, what steps can a mobile app development company take to create an exceptional app prototype that stakeholders will find impossible to reject?
From my experience of working with app designers, developers, and my interactions with potential investors; I’ve compiled a list of best practices for mastering your app prototypes.
Prototype for The Prototype
Just like we have to create a prototype for the final version of the product, a sketch is also required for creating the final version of the prototype. The overall procedure looks something like this:
- Sketching
- Wireframing
- Mockups
- Prototyping
- Development
Some people tend to skip wireframing and creating mockups and jump straight to prototyping, while some people choose to build their wireframes and then directly start creating the code. No matter which approach you choose to take, make sure that you start off with a rough sketch of your app.
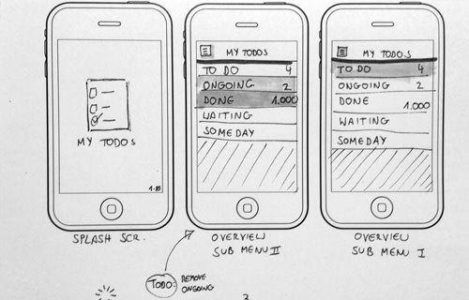
This will help you organize your ideas, the concept of your app, and help you analyze and turn your ideas into something a bit more concrete.
Keep Your Audience in Mind
The type of prototype you create should depend on the audience that you will be presenting to. Something that may work for your designers and developers, might be too technical for your client. When you create your prototype, your aim should be to be as transparent as you can be with your stakeholders.
A low fidelity prototype would be suitable for showing your conceptual design at the very early stages of your mobile app. On the contrary, a high-fidelity prototype is fairly easy to understand for not so technical folks. This is because it is visually and functionally closer to the final product. If you’re having a collaborative design session amongst your client as well as all your team members, then a mid-fidelity prototype will get the job done.
Make sure it’s ‘Good Enough’
A high-fidelity prototype doesn’t necessarily mean that it has to be pixel-perfect. Don’t confuse ‘prototyping’ with production and development.
Have you heard of the phrase “Investment is the enemy of creativity”?
Try not to invest too much of your time and resources on prototyping. Putting too much effort into your mockups and prototypes will divert your focus from other important tasks. Get everything looking ‘good enough’ and move on to the other stages.
Involve Users and Iterate
If you’re going to develop a strong mobile app, you will have to go through multiple iterations to get everything right.
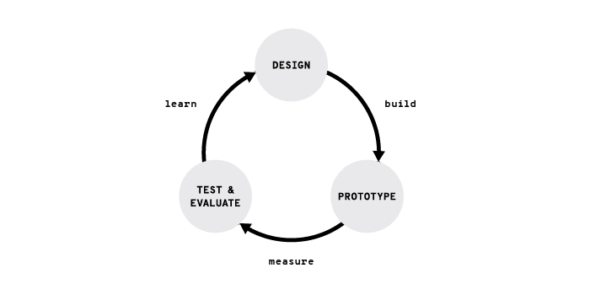
A mobile that is prototyped, developed, and tested by only one person will rarely attract the attention of the clients as well as users. On the contrary, a mobile app that is the combined effort of a team and that has been iterated by multiple users, will be more successful and will also have fewer errors.
Create Reusable Styles and Symbols
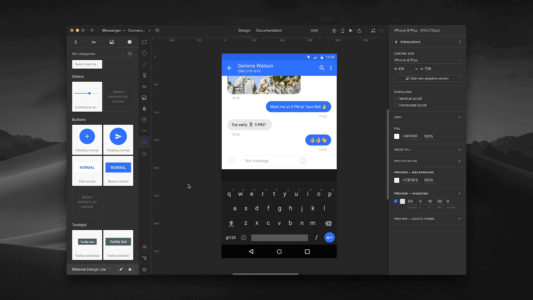
Some of the major design tools incorporate reusable styles and symbols that can help you make edits within no time. For example, if you want to change the background color of around 10 elements on your app, then by using reusable styles you can do it all at once.
Elements that you will have to utilize multiple times, such as buttons, media objects, content sliders, etc. can be reused. You probably wouldn’t want to code the same CSS styles over 10 times, so why would you do it with Photoshop layers. The UXPin design editor is an excellent tool for creating reusable elements. You can easily create symbols for a group of elements and then you can insert them wherever it’s required in your design.
Test Your Prototype on Real devices
When the Apple Watch came out, app development companies rushed to create new mobile apps for wrist wearables. One of the airline companies even went ahead and launched mobile boarding passes. It was too late when they found out that not all wrists with the Apple watch can fit into the scanner at different boarding gates.
What do we learn from this?
Using an emulator for your PC can make something look native, but nothing can replace experiencing your design in a real environment. Essentially, app prototypes should be tested in real devices before developing the final product, this will surely prevent your app from failing.
How to Present Your Prototype to Your Stakeholders?
As a designer or a developer, you can easily pick up on new software, and things like Photoshop, Lightroom, and Sketch can seem normal to you. However, you can’t expect the same efficiency from stakeholders. It’s important that you don’t project your familiarity with different software to your stakeholders. Small CEOs and even founders of global fashion brands can have a hard time understanding your prototype and this can affect your ability to move forward (therefore, reducing the chance of approval).
Follow these tips for a smooth prototype presentation for stakeholders:
- Start off by showing a simple interaction to get the ball rolling
- Make your audience feel savvy, their empowerment will help you get approval much faster
- While presenting, keep your presentation on track. Guide your audience throughout the prototype. Make sure that if you’re talking about the ‘home’ page your audience doesn’t take a leap and start asking you questions about the ‘contact us’ page. Try to steer the ship.
- Ensure that the stakeholders can directly comment on your prototype. There shouldn’t be any need to toggle between slack and the prototype.
Presenting Your Prototype to Developers
Developing a user interface isn’t a simple task. This is why it’s your job to make the development process as easy as you can. Prototypes help designers understand the animations, gestures, interactions, and the behavior of your design.
Make sure to prepare documentation for the developers which includes information that you can’t share via prototypes. Comment about your design and things that the developers will have to stay strict on.
Use Your Design Tool for the Entire Process
If you can create a solid foundation with prototypes, the final product that you get will be loved by your clients as well as app users. If you have an amazing app idea and you’ve been thinking about bringing it to reality, UXPin is an excellent tool for serving all your prototyping needs.
If you have any questions or you’d like to discuss your app idea with us, feel free to get in touch with us right away.
