Git for Designers – All You Need to Know

As designers, our final goal is to make great products for the end user. This is why our collaboration with developers is paramount in every product we build. We come up with a product’s concept. Create mockups and prototypes. Then hand over the final design to developers to get the project live.
In this scenario, a designer’s role is supposed to end once the final design is delivered to the development team.

But in reality, this linear system (from designer to developer) barely exists in the product development lifecycle. Here’s why:
- Designers need to be part of the product development, from concept to launch for the project to be successful.
- The fact that the first prototypes rarely become the final product. So designers must follow up to make changes based on reviews from users and other team members – as well as provide guidance on how to implement certain designed elements for proper user experience.
This is why real-time collaboration, even during launch, between designers and developers, is vital to the success of every project. Your team needs to go back and forth on features, change design elements, and get reviews from other team members.

This is no big deal for us as designers. Of course, there are a lot of tools and features for us to collaborate.
But the trouble arises when we need to collaborate with developers. Here’s why:
- Designers don’t work with code, and developers don’t work with design resources.
- As teams, we also use different tools to get the work done.
Question is, as teams that need to work together, how can we collaborate when we don’t even use the same tools?
Ultimately, the solution lies in finding a common ground – a single source of truth.
UXPin with Merge technology allows developers and designers to work together to get projects live. UXPin Merge allows you to pull your git elements into the UXPin design editor, so you can easily design with components that already exist on your site or other teams have developed. On top of that, those components are production-ready, so you don’t need to add interactions or wonder if they are in line with the standards.
You also don’t need to know how to code or dive in Git as the component is presented visually, whereas for developers that is still ready code that they can use to build a product. Apart from Git integration, UXPin offers syncing with Storybook libraries to bring ready UI components from there as well.

What is Git?

Git, in technical terms, is a version control software. It is a program that tracks changes made by developers to code and saves these changes for future references.
It allows developers to revisit their previous changes. You can undo code changes without messing with the entire source code. In short, it helps to quickly find the issue and fix it.
Git is open-source, free software that can be downloaded and used on your personal computer. Since it works locally on your PC, once installed, you don’t need an Internet connection to use it.

As a designer, the closest example of how Git works is how the “History Panel” in Photoshop operates. In Photoshop, the history panel lists all the moves, additions, edits, effects, and everything that you added to get your final image. That’s what Git does for developer teams.
What is Github?
In technical terms, Github is a cloud-based, repository hosting service. Thus, it’s an online interface for storing and accessing all your Git resources. Most popular GitHub alternatives are BitBucket and GitLab.

All the edits developers make to their code, which are tracked and saved by Git, are stored inside Github. Here, developers are able to access this code once they’re online. They can share their code with other developers, and receive feedback and edits. They can also make changes to code shared by other developers.
Github offers seamless collaboration for developers to work on one another’s code.
If Git represents the images, documents, files, and pages of a website, then Github is the hosting provider where these resources (Git repos) are stored.
Git and Github differences summarized
- Git can be used to track your changes offline without sharing it with the others. Github, on the other hand, is cloud-based and is more of a collaboration platform.
- Git creates snapshots or paper trails of all the changes developers make to a project, and saves these changes. Github is where these paper trails or snapshots are stored and made accessible to other developers for collaboration.
- Git is completely free and open-source. Github offers free plans for individuals and small organizations, and paid plans for big teams and enterprises.
So in short, these two are complementary tools that help you collaborate, build softwares, record and rewind any change to fix errors real quick.
Git for Designers: When Designers Need Git
Git may be built primarily for developers and IT teams, but the need for designers to work closely with developers these days means Git has become an important tool for us as well.
But at what point Git will come in handy for a designer?
- When you create mockups and prototypes and need to submit your final work to developers.
- When you need to make certain design changes to a product that is already in production or already launched.
- You also use Git when you need to give guidance to developers on how to implement certain design elements for excellent user experience.
- When you need to build a shareable workflow that is accessible by both design and developer teams.
Git for designers: Using Git vs Github
These days, everybody is using Github. But that journey starts from Git. With Git, you’re able to build a design workflow that can be shared with developers. Every change or addition you make is saved, allowing you to go back in time to make changes.
While Git gives you this paper-trail power, Github gives you the power to collaborate with other designers and share your designs with developers.
How to get started with GitHub using the GitHub desktop app?
While you could just use Github from your browser, the desktop app offers great features as well and allows you to contribute to projects from your operating system. Here’s how to get started:
How to create a Github Account
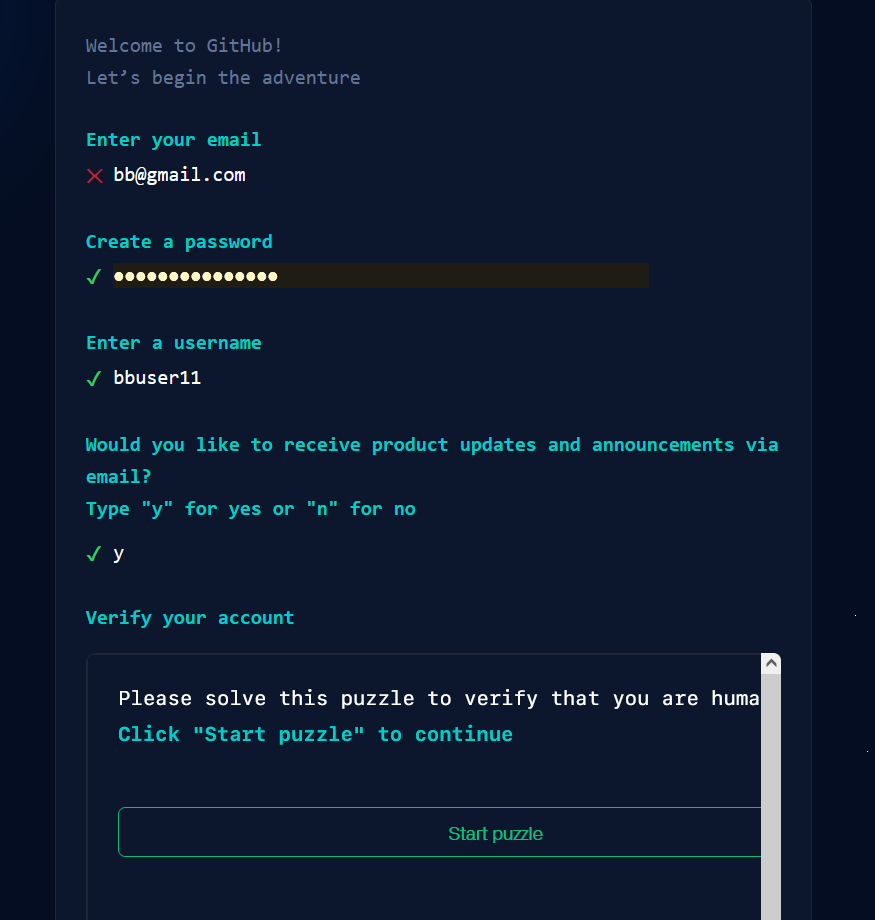
To get started, go to https://github.com/. Once on the homepage, go to the top-right corner of the page and click on the “Signup” button.
Follow the prompts to enter your email address, create a password for your account as shown below:
In your next steps, head over to your email and enter the launch code from Github into the next window. This will take you to your first dashboard.
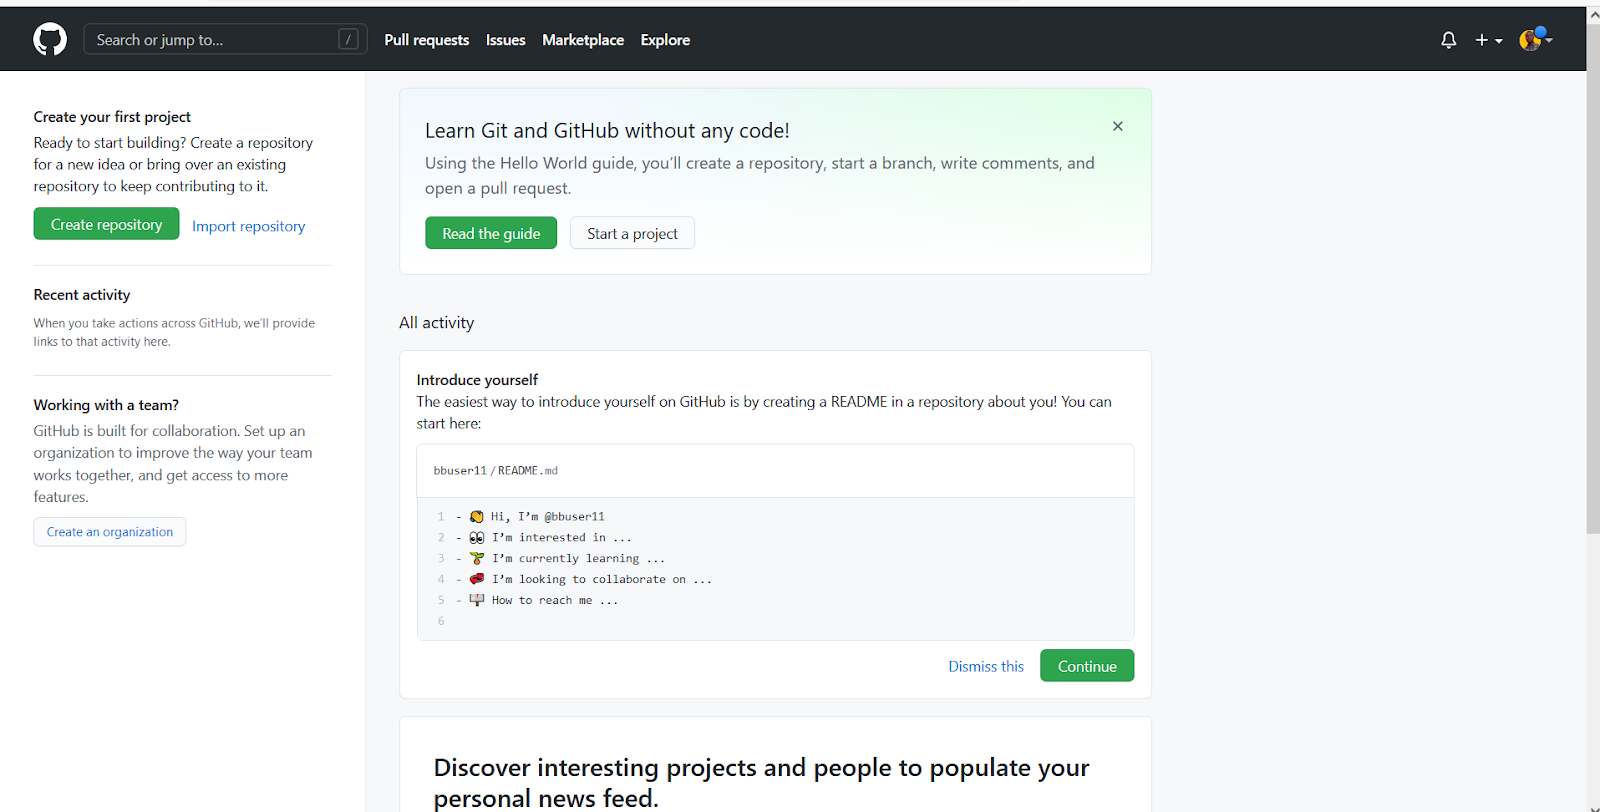
Once in your dashboard, you can configure your two-factor authentication and add a bio to your profile using the “Settings” pane, which you can access by clicking on the arrow beside your profile picture.
How to Install Github on your computer
To get the Github desktop app, you need to visit https://desktop.github.com/ and select the appropriate operating system to download.
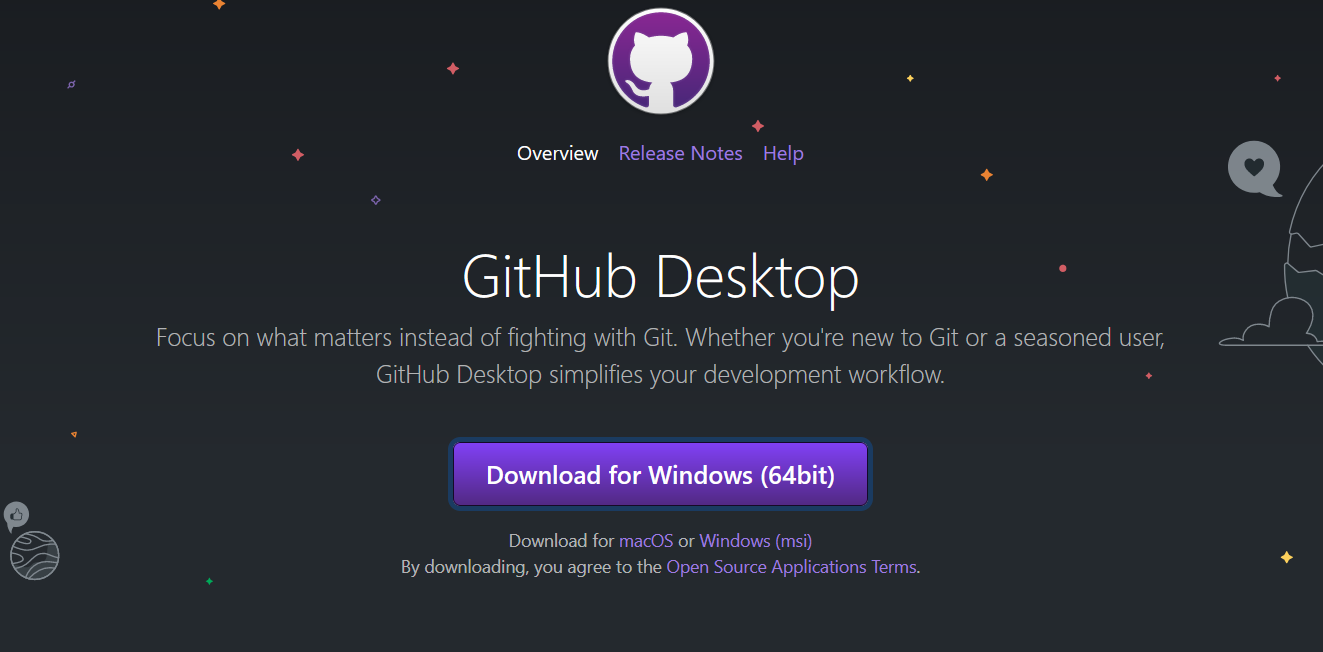
Launch the application after the download is complete and follow the prompts to install Github on your desktop.
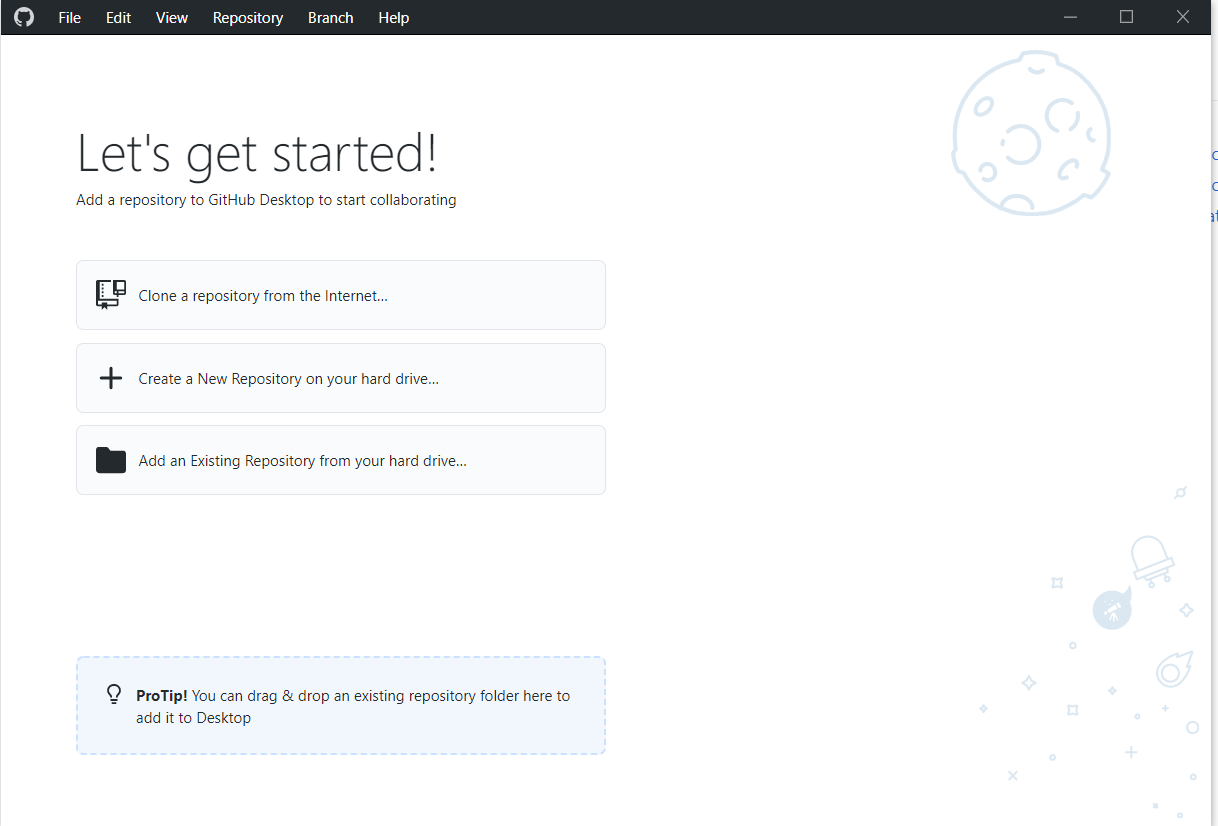
You’ll be taken to the welcome page once the app is done installing.
Once installed, you may get prompts to help you link your desktop app to your account – Github calls this Authentication.
If you don’t get these prompts, here’s how to link your desktop app and your Github account you created a while ago:
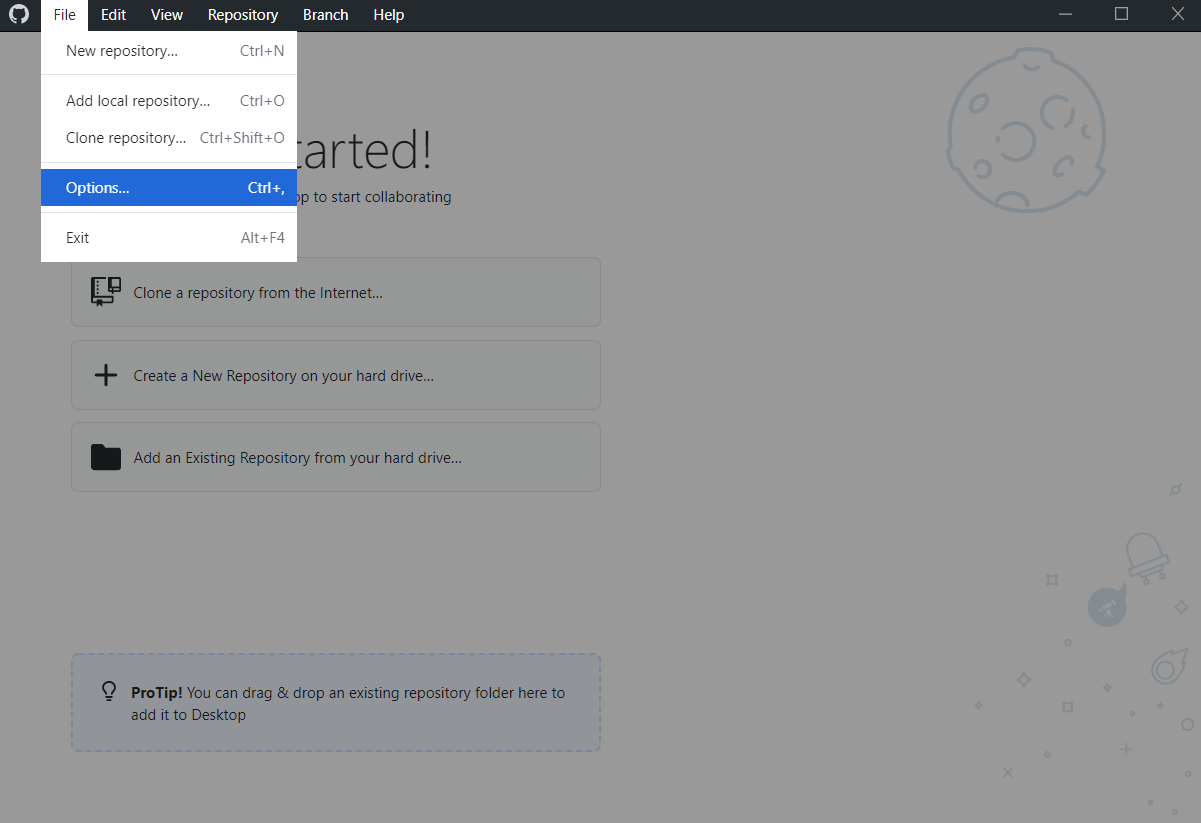
Step 1: Click on “File” on the upper left of the desktop app and select “Options” from the drop-down list.
Step 2: Click on “Sign In” beside the “Github.com” option. You’ll be prompted to sign in using the browser.
Step 3: Click “Continue with browser” to continue. This will take you to Github.com on your browser where you enter your email/username and password.
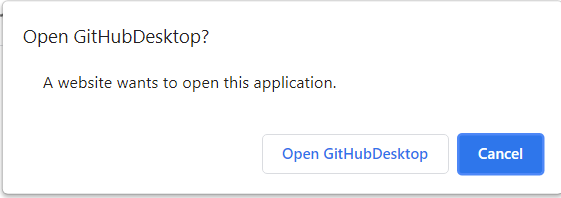
Once you enter your details, your browser will prompt you to open this link using your desktop app
Step 4: Click on “Open GitHubDeskTop” from the browser prompt.
This will bring you back to your desktop app, now displaying your username as shown below:
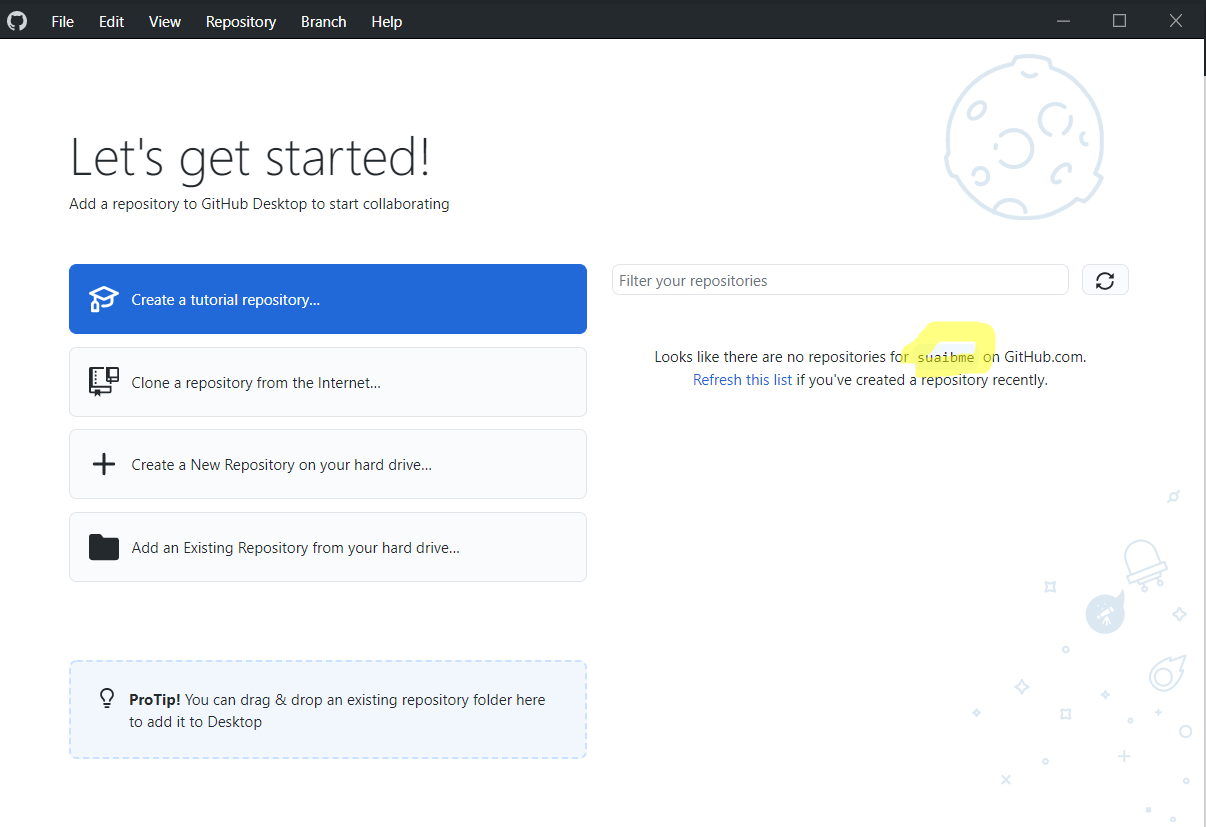
At this point, you’re ready to start using your Github account by creating a repository. Here’s how to get started.
Git for Designers: How to Make a Repository on Github
First, what’s a repository?
In the layman sense of the word, a repository is a receptacle or place where things are deposited, or stored. This is the same for a repository in Git.
A Git repository is a storage location for your code. It is where versions of your coded designs are found, which you can access anytime you need them. It tracks all the changes you make to your project and builds a history of these changes throughout the project’s lifecycle.
Once you start the project, you can create a repo/repositories inside the project. Here’s how:
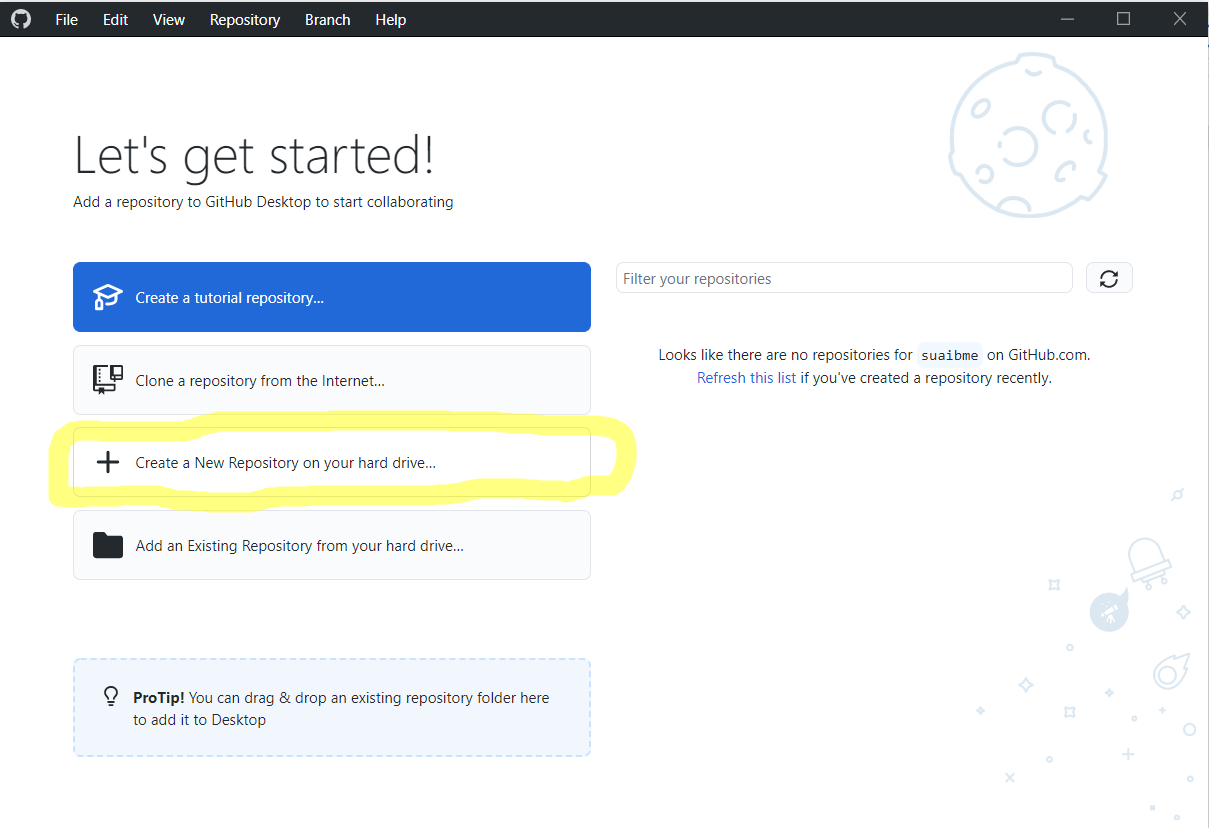
Since your desktop app is new, you will see a list of options on what to do on the homepage.
Step 1: Click on “Create a New Repository on your hard drive”
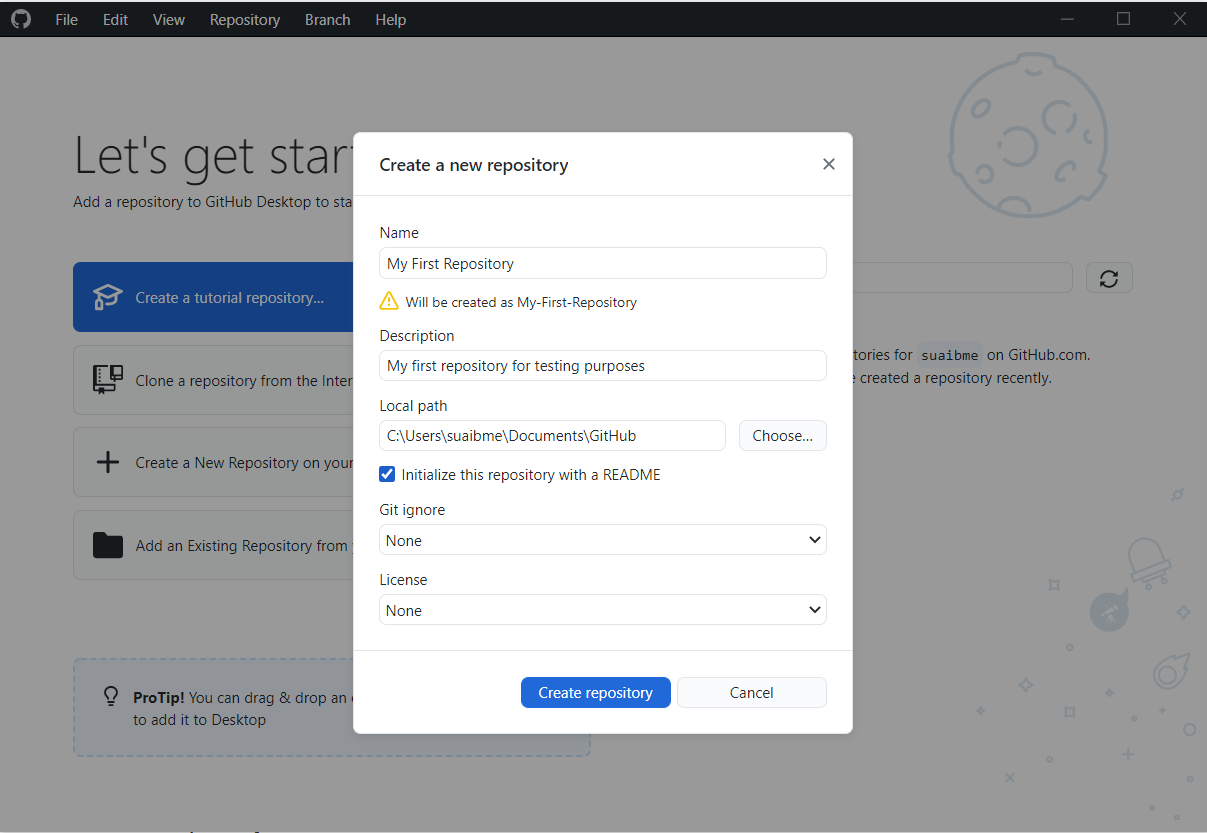
Step 2: In the next window that pops up, enter the repository name and description, and click on “Crete repository”
Step 3: In the next step, you’ll see that your repository is only available on your PC. You alone can see and edit it.
To collaborate with other teams or let someone else review your work, you need to publish this repository.
Click on “Publish repository” to get it live.
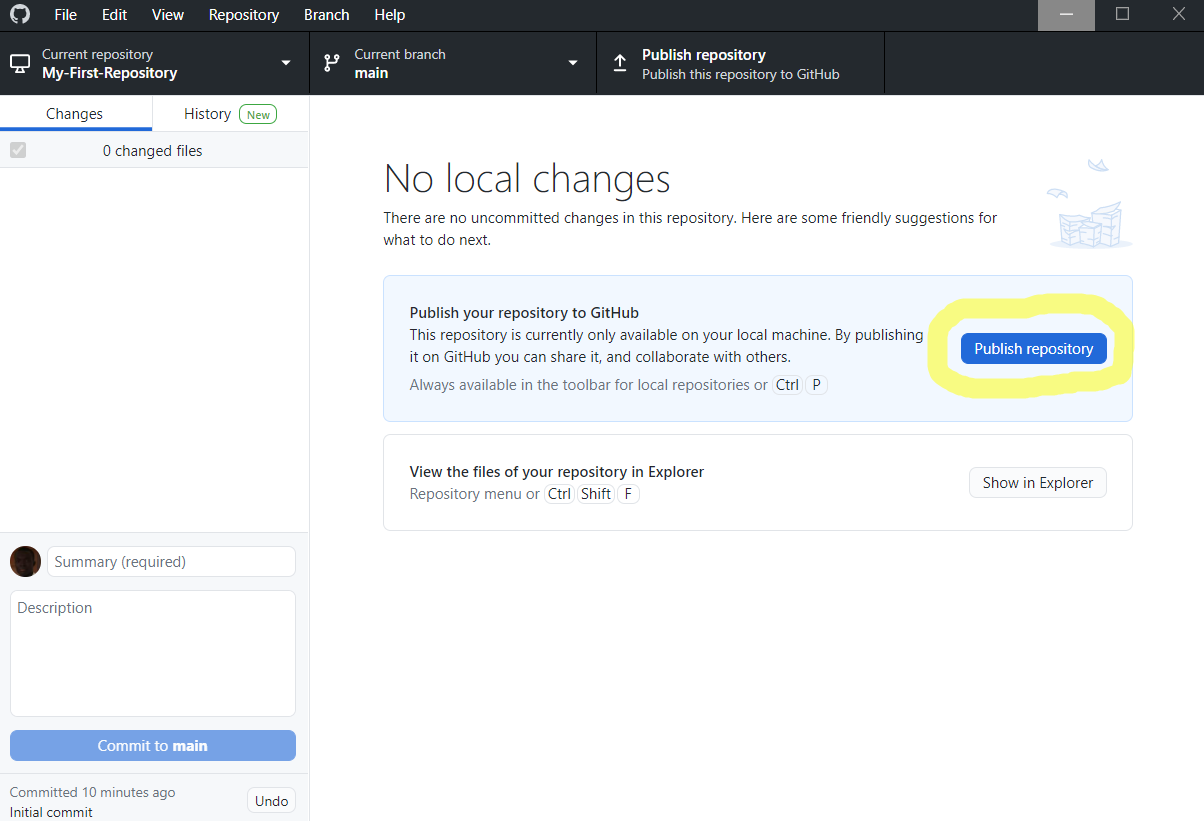
And your Git repository is now live.
How to Commit a Change in Github
Committing a change in Github means you’re saving the changes and edits you made to your local repository.
For instance, when you make changes to a Google Doc online, these changes are saved automatically. But this isn’t the case with Github. You have to save these changes, thus, commit a change.
Here’s how to commit changes.
Step 1: On your Github desktop app, click on “View on Github” next to the “open the repository page on Github in your browser” window.
This will take you to the repository page on your browser where you can make changes.
Step 2: In the browser window that opens, click on the Edit icon on the upper-right corner of the repository window.
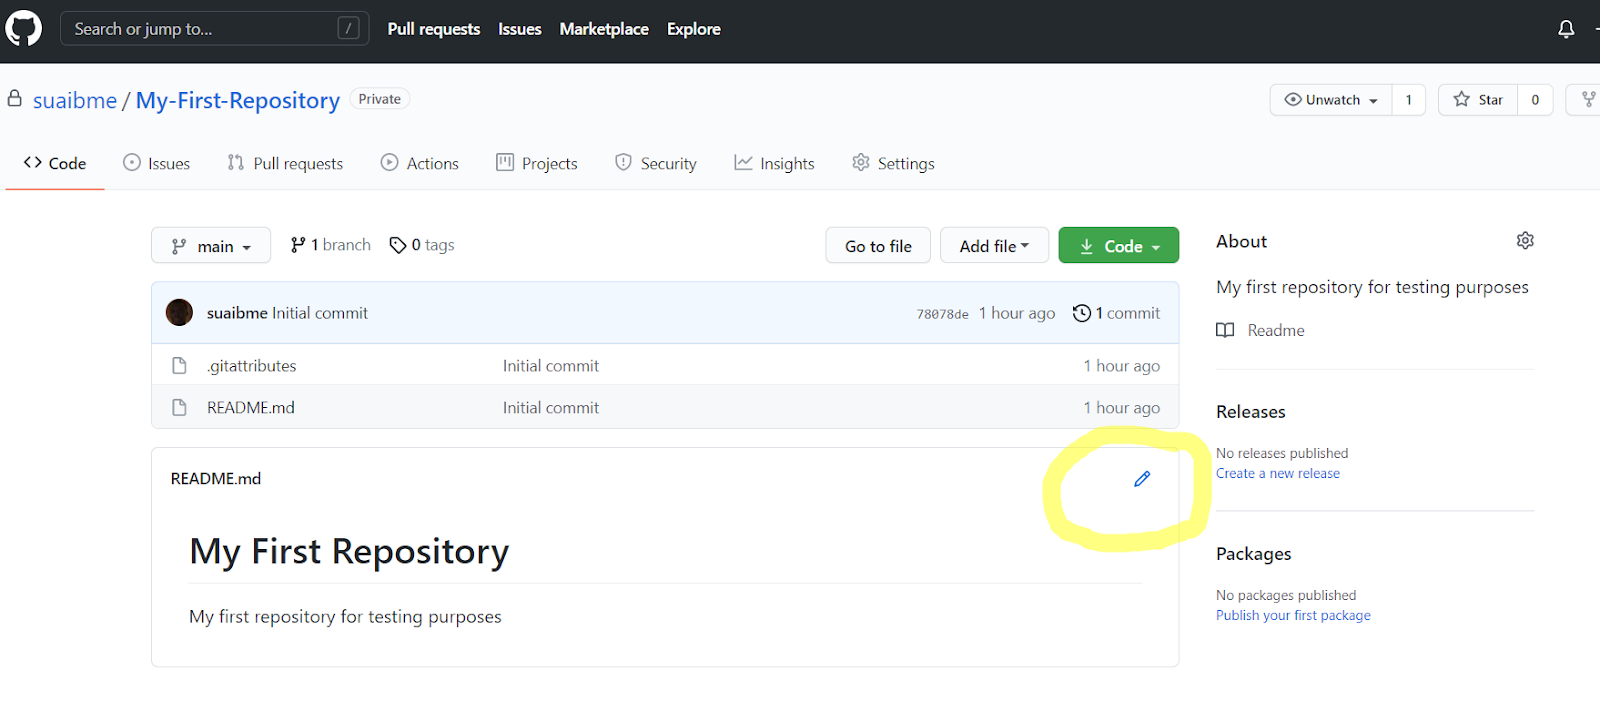
In the next window, your repository will open for you to make all the changes you want.
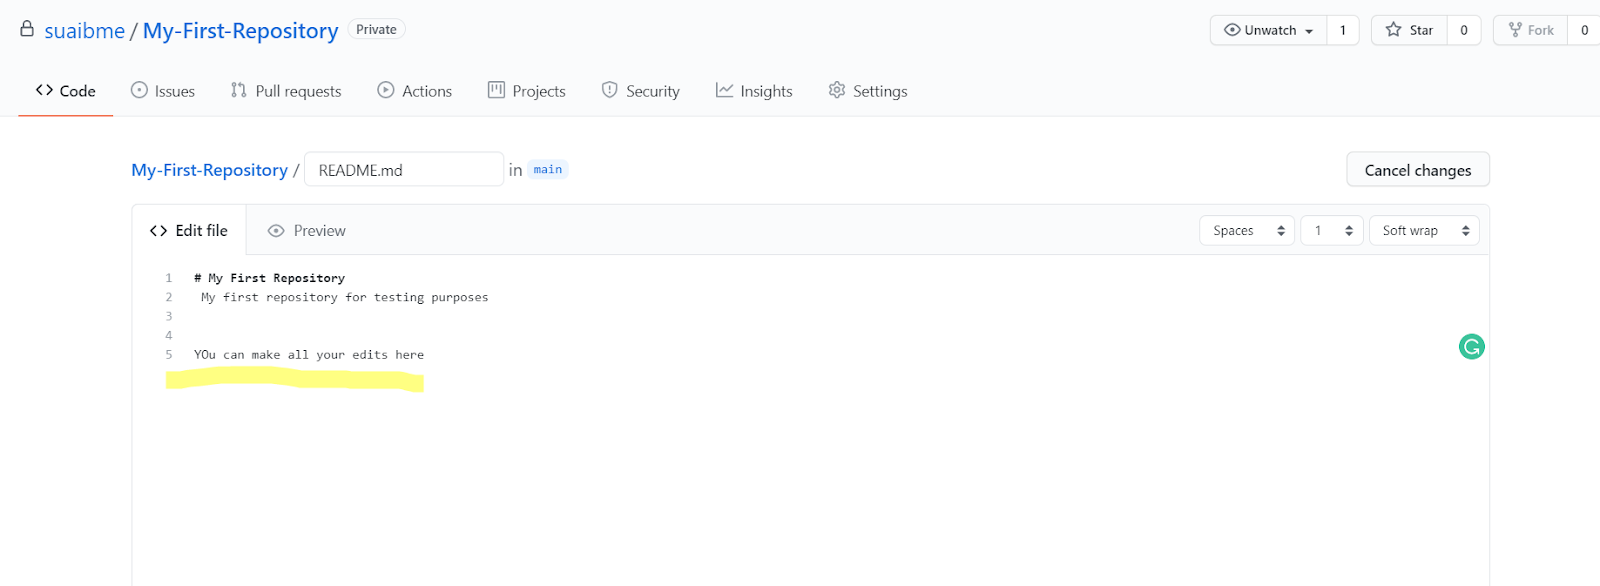
Step 3: Once you’re done making all the changes, scroll down and click on “Commit Changes”
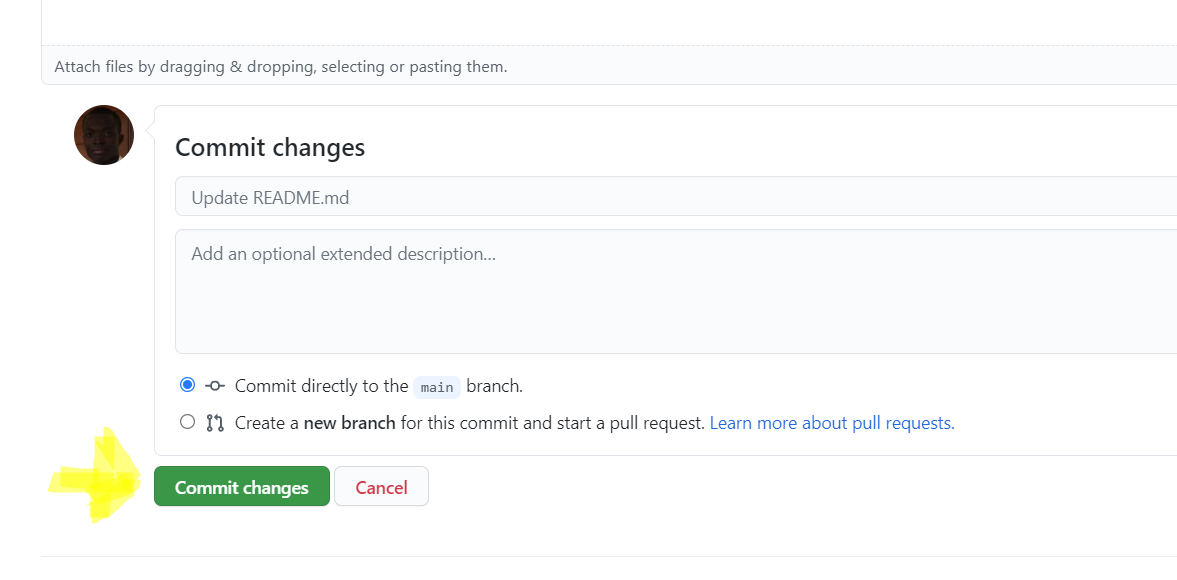
Now, all your changes are saved to the repository.
What are Branches and how do you merge them?
Just like how tree branches protrude away from the main tree, Github branches do the same. They’re a set of codes or changes that you make to your repository that have their own unique name.
Designers and developers use branches to experiment with new features and ideas or fix certain problems without touching the main repository.
When you create a branch, you do so to work on certain things that you don’t want to affect other changes made by your team.
How do I create a branch and merge it?
Once you’re done building a feature or fixing the bugs that you created the branch for, a way to add it to the original project is to merge it.
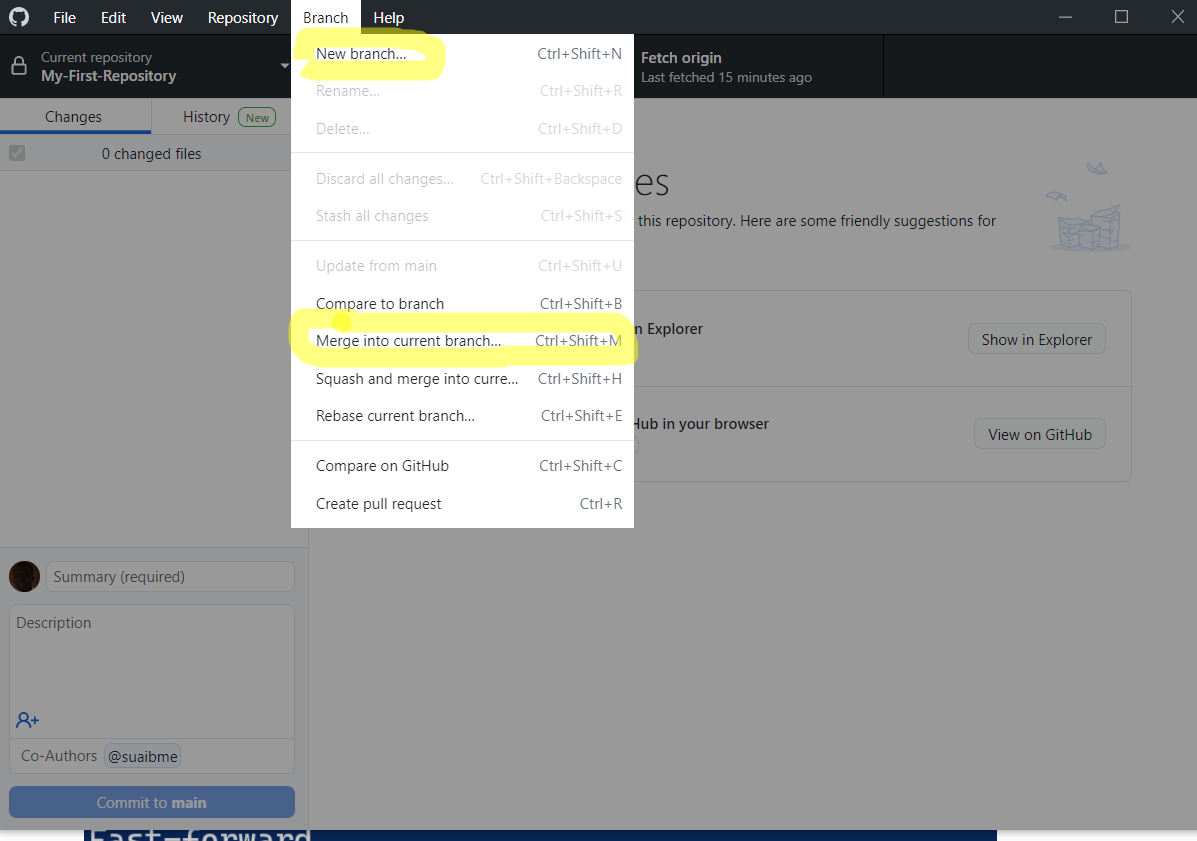
Go to the “Branch” button on the top menu of the Github desktop app. Clicking on it will bring up a list of drop-down options.
To create a branch, click on “New Branch” and follow the steps. Use the “merge into current branch” menu if you want to merge different branches.
Git for Designers: What other popular Git libraries are there for designers?
At this point, we all know that Github is a library or a database where we host our Git repositories. It’s also where we are able to collaborate with others.
But Github isn’t the only library or database platform out there for hosting Git resources. Here are other options available:
Gitlab
The closest to Github in terms of interface and use and an open-source tool, Gitlab is an excellent Git library used by many teams. It has many features, including issue tracking, code management, Wikis, and continuous integration with a lot of development tools among others.
Bitbucket
Another great Git repository hosting platform is Bitbucket. Available for Windows, Mac, Android, iOS, and Linux, Bitbucket has great features including commit history, code management, branch comparisons, and offers developers unlimited private repositories for free for up to 5 users.
Top 5 alternatives to Git repository
Aside from Git, there are at least 5 great hosting platforms with similar functionalities.
- SourceForge
- Launchpad
- Google Cloud Source Repositories
- AWS CodeCommit
- Apache Allura
Bring UI components from Git to UXPin
Git and Github are built for developer teams. But as designers, these tools have become powerful for us not just for creating and saving projects, but also for collaborating with developer teams. If you’re a designer out there working with developers or just wanting to keep a clean workflow, Git and Github are great tools to get you started. Remember that you can leverage Git repositories with UXPin Merge technology to bring the design and development process together and use a single source of truth.