Empathy Maps: The Practical Guide to Creating 10-Minute Personas (2026)
UX designers know better than anyone — it’s what’s inside that counts. The user’s thoughts, feelings, motivations, and frustrations drive every interaction with your product, and the better your team understands them, the better your design decisions will be.
An empathy map is the fastest way to build that understanding. In as little as 10 minutes, a team can create a visual summary of a user’s inner experience — what they think, feel, say, and do — and use it as a lean persona to guide design decisions throughout a project.
This guide covers the empathy map format, a step-by-step creation process, practical examples, and how to integrate empathy maps into modern UX workflows.
What Is an Empathy Map?
An empathy map is a collaborative UX tool that helps teams visualise and articulate the user’s perspective. It organises user research insights into a structured format that’s easy to create, easy to share, and easy to reference throughout the design process.
Originally popularised by Dave Gray at XPLANE and later refined by the Nielsen Norman Group, empathy maps have become a staple of user-centred design — particularly in Lean UX and agile environments where speed matters.
Empathy maps work as lean user personas because they:
- Quickly visualise user needs, especially for non-designers and stakeholders
- Fit into agile workflows as a lightweight starting point for user understanding
- Are fast to create and easy to iterate as assumptions get validated with real data
- Prime cross-functional teams to think beyond their own experiences
When to Use Empathy Maps
Empathy maps are most valuable in these situations:
- Project kickoffs: Align the team on who you’re designing for before any screens are created.
- Sprint planning: Ground feature decisions in user context — not just business requirements.
- After user research: Synthesise interview or survey findings into a shareable format.
- Stakeholder workshops: Help non-design team members understand and empathise with users.
- Before prototyping: Ensure your design direction addresses real user needs and pain points.
Empathy maps are not a replacement for comprehensive user research. Think of them as a synthesis tool — they capture and organise insights, but the insights still need to come from real user data (interviews, surveys, analytics, support tickets).
The Empathy Map Format
The standard empathy map is divided into four quadrants around a central user representation:
1. Says
Direct quotes and statements from user research. What does the user actually say during interviews, usability tests, or in support tickets?
Example: “I can never find the export button.” / “I wish this worked like [competitor].” / “I just need it to be faster.”
2. Thinks
What the user is likely thinking but may not say aloud. This quadrant captures internal dialogue, assumptions, and unspoken concerns.
Example: “Is my data safe here?” / “This seems more complicated than it needs to be.” / “I wonder if there’s a shortcut.”
3. Does
Observable actions and behaviours. What does the user physically do? How do they interact with the product, workaround limitations, or complete tasks?
Example: Opens multiple tabs to compare options. / Bookmarks the help page for frequent reference. / Exports to spreadsheet to do calculations the tool doesn’t support.
4. Feels
Emotional states and reactions. What frustrates, delights, worries, or motivates the user?
Example: Frustrated by the number of steps to complete a simple task. / Anxious about making irreversible changes. / Satisfied when a complex workflow completes without errors.
Extended Format: Pains and Gains
Many teams add two additional sections below the four quadrants:
- Pains: Obstacles, frustrations, and risks the user faces. What prevents them from achieving their goals?
- Gains: Desired outcomes and measures of success. What does “done well” look like for this user?
This extended format bridges the empathy map into actionable design direction — pains suggest problems to solve, and gains suggest outcomes to design toward.
How to Create an Empathy Map: Step by Step
Step 1: Gather Your Research
Before the workshop, compile available user data:
- User interview transcripts or notes
- Usability test recordings or highlights
- Survey responses
- Customer support tickets and common complaints
- Analytics data showing user behaviour patterns
- Product reviews or social media feedback
If you don’t have existing research, conduct even 3–5 quick user interviews. Assumption-based empathy maps have value as starting points, but they must be validated.
Step 2: Define Your User Segment
Each empathy map represents one user type. If your product serves multiple user segments, create a separate empathy map for each.
Give the user a name and brief description: “Sarah, a product manager at a mid-size SaaS company who uses our analytics dashboard weekly to prepare stakeholder reports.”
Step 3: Fill the Quadrants
Set a timer for 10–15 minutes. Working individually or in small groups, team members add sticky notes (physical or digital) to each quadrant based on the research:
- Says: Use direct quotes where possible. If paraphrasing, stay close to the user’s actual words.
- Thinks: Infer from research — what patterns suggest the user is thinking? What do their workarounds reveal about unstated beliefs?
- Does: Focus on observable behaviour. Session recordings and analytics are particularly useful here.
- Feels: Look for emotional signals — tone in interviews, frustration patterns in support tickets, satisfaction scores in surveys.
Step 4: Identify Patterns and Insights
Review the completed map as a team. Look for:
- Contradictions: Does the user say one thing but do another? These gaps are design opportunities.
- Recurring themes: What shows up across multiple quadrants? A frustration that’s said, thought, and felt is a high-priority problem.
- Surprising insights: What did the team not expect? These often lead to the most innovative design decisions.
Step 5: Add Pains and Gains
Synthesise the quadrants into actionable pains and gains:
- Pains: What are the user’s biggest frustrations, fears, and obstacles?
- Gains: What outcomes would make this user’s life measurably better?
This step transforms the empathy map from a research artefact into a design brief. Pains become problems to solve; gains become success criteria for your design.
What to Do With Finished Empathy Maps
An empathy map sitting in a Miro board that no one revisits is wasted effort. Here’s how to keep empathy maps active in your design process:
Inform Design Decisions
Reference the empathy map during design reviews. When debating a feature approach, ask: “Which option better addresses Sarah’s pain of [specific pain]?” This grounds decisions in user context rather than personal preference.
Guide Prototyping
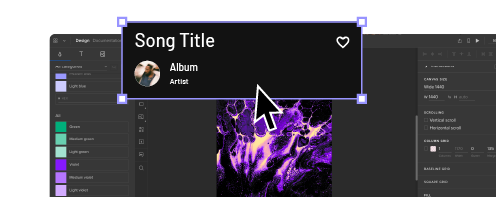
Use the pains and gains to prioritise what to prototype first. Build interactive prototypes that address the top user pains, then test them. UXPin makes this efficient by letting you build prototypes with real production components — so your test reflects the actual product experience, not an idealised mockup.
Align Stakeholders
Share empathy maps with product managers, executives, and engineering leads. They’re powerful alignment tools because they make abstract “user needs” concrete and visual.
Iterate and Validate
Treat empathy maps as living documents. After each round of user testing or research, revisit the map:
- Were your assumptions correct?
- What new insights emerged?
- Have the user’s pains or gains shifted?
Feed Into Personas
Empathy maps often evolve into full personas as you accumulate more research. The four quadrants and pains/gains provide the foundation; layer on demographics, scenarios, goals, and technical context as data becomes available.
Empathy Maps and Modern UX Workflows
In 2026, empathy maps remain relevant — perhaps more so than ever. As AI-powered design tools accelerate the creation of interfaces, the risk of building without sufficient user understanding increases. Empathy maps counterbalance this by ensuring that speed doesn’t come at the cost of empathy.
A practical workflow:
- Research: Gather user insights through interviews, analytics, and support data.
- Synthesise: Create empathy maps to organise and visualise findings.
- Plan: Develop a design plan informed by user pains and gains.
- Generate: Use AI tools like UXPin Forge to quickly generate layout options based on your design system — informed by the needs you identified in the empathy map.
- Refine: Manually adjust the AI-generated output for the nuances that empathy revealed — edge cases, emotional moments, accessibility needs.
- Test: Prototype and test with real users, then update the empathy map with new findings.
This cycle keeps user understanding at the centre of the design process, even as AI tools accelerate the production side.
Frequently Asked Questions About Empathy Maps
What is an empathy map?
An empathy map is a collaborative UX tool that visualises what a user thinks, feels, says, and does. It helps design teams quickly build shared understanding of user motivations, pain points, and behaviours without the time investment of a full persona.
What are the four quadrants of an empathy map?
The four quadrants are: (1) Says — direct quotes and statements from user research, (2) Thinks — what the user is likely thinking but may not say aloud, (3) Does — observable actions and behaviours, and (4) Feels — emotional states and reactions. Some formats add Pains and Gains sections beneath the quadrants.
When should you use an empathy map vs. a full persona?
Use empathy maps when you need fast, collaborative alignment on user needs — especially at the start of a project or sprint. Use full personas when you need detailed, research-backed user profiles for long-term reference. Empathy maps can serve as a stepping stone toward richer personas.
How long does it take to create an empathy map?
A basic empathy map can be created in 10–20 minutes during a team workshop if you have existing user research to draw from. Without existing research, you’ll need to add time for interviews or data gathering first.
What is the difference between an empathy map and a customer journey map?
An empathy map captures a user’s internal state (thoughts, feelings, motivations) at a point in time. A customer journey map plots the user’s experience across multiple touchpoints over time. Empathy maps focus on depth of understanding; journey maps focus on the sequence of interactions.
Can you create an empathy map without user research?
You can create an assumption-based empathy map using your team’s existing knowledge, but it should be clearly labelled as assumptions and validated with real user data as soon as possible. Assumption maps are useful starting points, not substitutes for research.
Ready to turn empathy into action? Try UXPin free to prototype user-centred designs with real production components — and bridge the gap between understanding your users and building for them.