Introduction
The creation of advanced designs and prototypes can be tricky these days. At some point, you’ll end up with dozens of artboards or pages that look nearly identical. As a designer, you know that these details are essential for the end product to be presented to your users.
But does every small detail need to be created like this? Is it the only way to design dynamic components with different content?
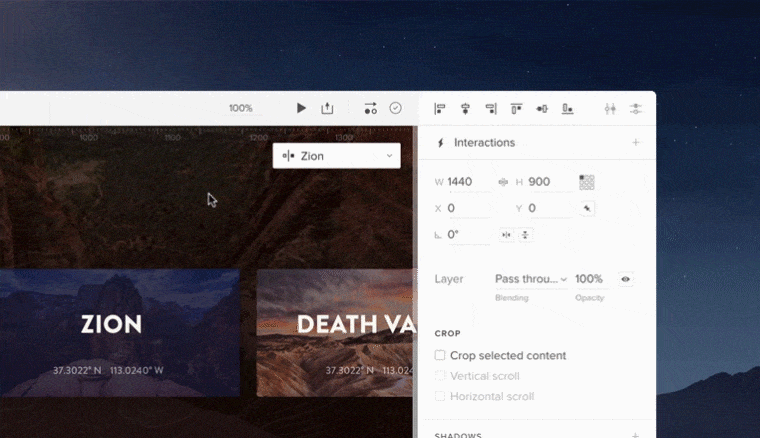
The problem with any image-based design tool is that they must design static version of key screens. So this is what designers try to prepare – flow, key screens and key components from use cases. It’s time-consuming, but does it have everything developers need to implement it?
Nope.
Developers need to know every state of every component used on the project. Components are dynamic and reactive. If a designer locks all this energy into a static set of artboards, it will blow up in her face. Imagine a simple design with a dropdown and a button. That’s it! The button needs to have a default, hover, active and, probably, disabled state. Dropdown has a hover and active state on the selector, and hover/active/disabled states on every option on the dropdown menu list. That gives you over 15 static artboards to represent all the states. And what if something changes? How do you keep it up to date?
This is a difference between Design and Development theses day – different levels of efficiency.
In UXPin, we introduced Multistates elements back in 2015 to address some of these problems. And we can say it loud and proud: this is a totally unique concept in the design tools landscape. In many cases, it’s why our users choose UXPin. Still, the design and prototype world is rapidly evolving and it requires increasingly sophisticated methods and tools to cover all fields.
More animation. More mobile. More code-based tools. So, we reevaluated all use cases and granted this concept a second life. And now we are happy to introduce our shiny new States feature! Here’s what you need to know to get started.
Focus on user feedback
First, we had to gather feedback about Multistates. Our users have given plenty of feedback since its introduction three years ago. After a tremendous effort from our research team, we finally found a simple way to understand the issues and categorized them as:
- Usability improvements
- Product requests
Our first thought was to simply improve the UI for Multistates. However, soon we found that this would only solve some of the usability issues.
What about the ability to propagate style and content between states of an element?
What about an animation created “out of the box” based on the changes?
Or the possibility to nest an element with states inside another element with states?
When these questions came up, we knew we had to go deeper.
Inspired by nature – states of matter
That brought us back to the core question – what ARE the states?
After a few brainstorming sessions, one direction especially attracted us – the idea of transformation of the elements. The main idea was that EVERY element should have the possibility to have a different set of properties (styles) stored as states and that these states can be switched to generate element transformation.
Sounds lovely, doesn’t it?
Then we started to look for more general rules (is the number of elements stable between states? Is the number of states in symbols the same?, etc.) Diving deeper into this app architecture question led us to a great analogy for what we are building, which is the states of matter. So any matter, for example water, can transform between states (solid, liquid, gas and plasma) but the number of particles in the environment remain constant.
The same goes for elements in UXPin. You can now build advanced components with different states and transform between the states of elements, but the number of elements will always stay the same. They just change their state – style, position, size, interactions, etc.
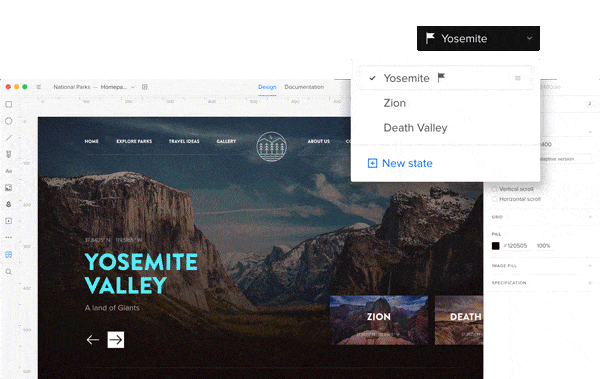
Different states of the same element
The biggest challenge, and the biggest opportunity, for us was the question – how should States be built from the perspective of the app architecture? The easiest way to understand the change is to compare it with the older concept, Multistates.
Creating another state of a Multistate was basically duplicating all the elements from a previous state. After the duplication, those were different – disconnected elements.
In the new concept of States, adding the another state of the element creates another alternative set of properties of the same element. It does not duplicate the same element again. It gives the element another alternative appearance, another level of existence.
You can edit the style and content of states, but it still will be the same element—with states. Also, if you remove the element on one state, it will be removed across all states. This approach gives us the possibility not only to transform elements with animation, but also greatly reduces impact on browser performance. This architectural pattern echoes how developers think about building applications and managing component behavior—the kind of nuanced state management that tools like Adalo bring to no-code app development, where database-driven components need to respond intelligently to different conditions.
States on states on states…
One of the most powerful things you can build in UXPin using States is… another state.
Imagine building simple elements with states (buttons, headers, etc.) and using them in more complicated elements with states (login forms, dashboards, use panels, etc.).
From the interviews with our customers, we know that a lot of designers try to build that and end up with a lot of symbols and artboards.
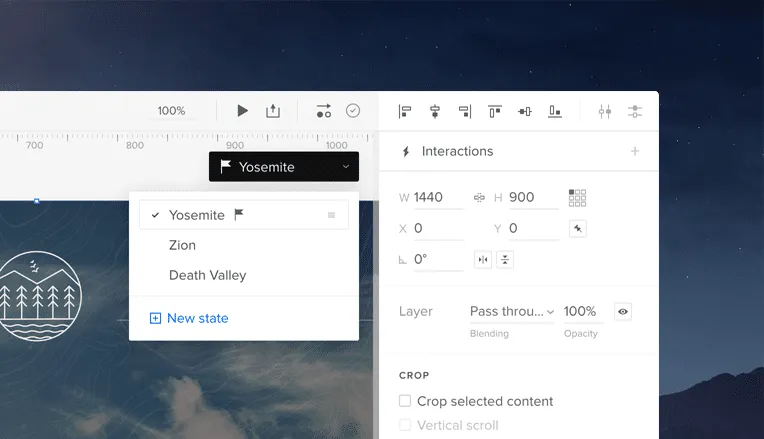
Thus, States were developed to nest states within states and to manipulate the active state beyond that. To support this process, we’ve added the ability to manage states from the layers panel. It helps not only to change the states but also to see, understand and redesign the hierarchy of elements in any component.
Push changes to other states
One of the biggest limitations with the old Multistates was the difficulty in updating already created elements with different states. As mentioned above, this happened because we were duplicating elements. With the new approach to the architecture, we finally solved this problem.
This was one of the biggest design and development challenges for the team. We had to cover two use cases that are quite tricky:
- Push changes in style/content to other states
- Have the ability to reset changes added to a state
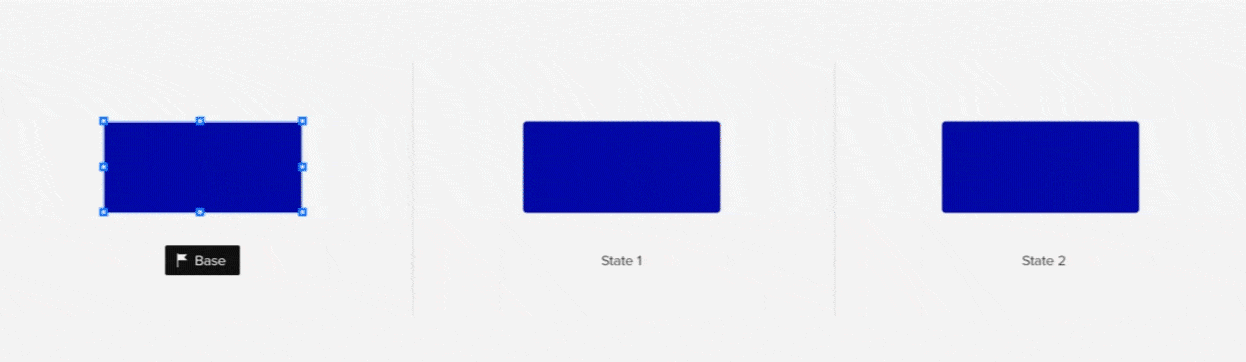
Keeping in mind these two use cases, we came up with the concept of the base state.
A base state is one with a bit different power than the other states. As its name suggests, it acts like a base/foundation on top of which other states are built. When you update the base, you update it for all states. That is to say that the change will appear in all other states too (unless the change of the same property of an element is overridden in another state). For those in software development: inheritance and overriding—sounds familiar? :)
Here’s an example. You designed a “Send message” button and built it in three states: default, hover and active. Then you have the shape of the button, dimensions, style and “Send message” text on it. After a few tests, you decide you want to remove the word message , so the button just reads “Send”. The base state lets you change that text just in one place and it applies automatically to other states!
Some of you might be wondering, “Ok, but what about when I want different text in some specific state?” For example “Sent!” in an active button state from the example above. You can set an override on any other state other than the base. Simply edit the button text in the chosen state to override the text of the base state. After that, changing this specific property of the base won’t affect the edited state, because the override is still there. But don’t worry, you can always reset the property override and it’ll restore the style or content from the base state.
What can you override in states, you ask? Almost everything – size, position, rotation, radius, color fill, border, content of the element and even interactions!
Out of the box animations
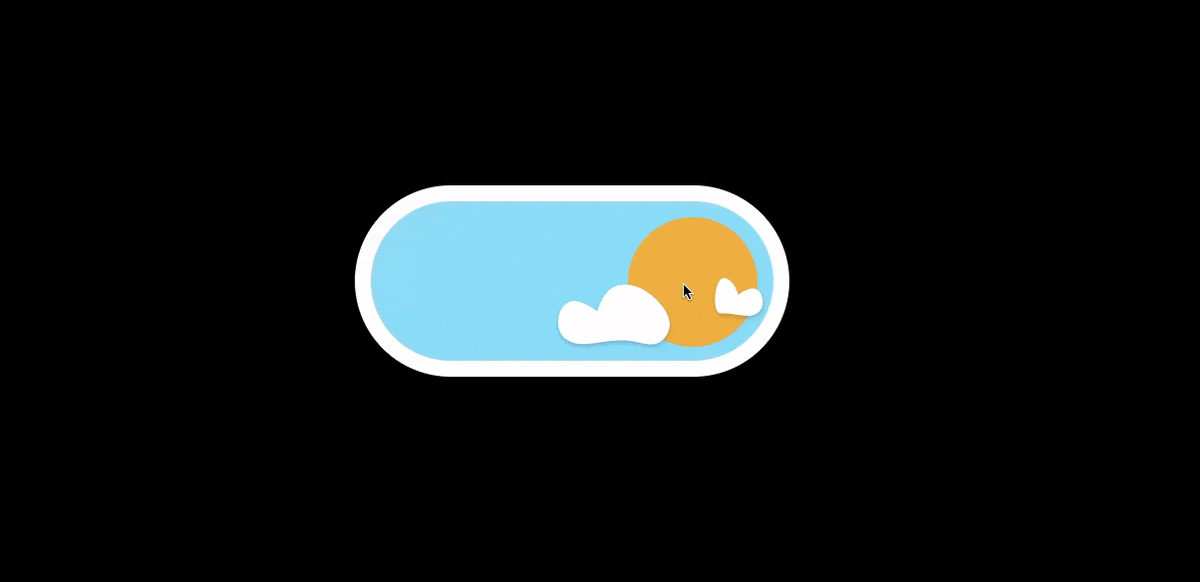
Last but not least, States provides big value for designers looking to easily create more robust animations in their prototypes. Again, this value comes from the fact that states are basically different appearances of the same element/s.
Here’s how it works. If you have two states of the same element with a different style (position, size, color), all you have to do to get animation is to create a simple interaction to change the state of the element. Once you create the interaction between them, the magic is already there! Of course you can change the timing or easing of the animation between states.
Remember states within states? You can even build the animation on the highest level of the nested states and it will animate every change of the nested states. Pretty cool, huh?
What can you use States for?
- Create a simple element like a button with the different states: active, hover, disabled, etc.
- Design complex patterns like a form that has an input field with different states: empty input, data provided, error state
- Components like carousels and accordion menus