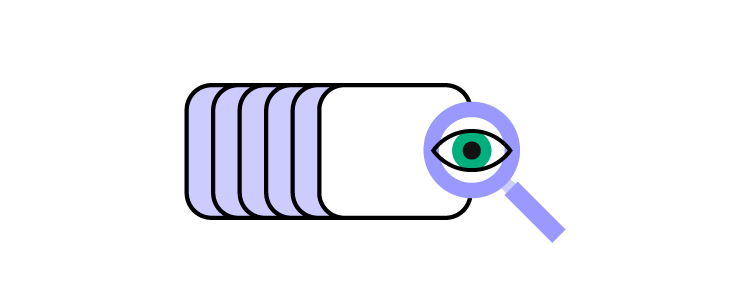
4 tips for User Testing Your Prototype

Even the best ideas can’t guarantee success. No matter how certain you are about a new concept, the only way to create a good product is by getting real feedback and building upon it.
That’s why building a prototype and going forward with testing it should be essential regardless of the scale of your project. It’s one of the foundation stones of the whole cycle.
It may seem intimidating at first, but as you dive into the process, you’ll soon discover how intuitive it is and that by being thorough you can save resources in the long run and make your launch as smooth as possible.
Here are our tips that will help you make the most out of your user testing.
1. Start testing early
If you’re waiting on your product to be complete, you’re missing out on valuable insights. Of course, you can’t exactly start user testing the day you land on a decent idea, but you shouldn’t hold back until you’re ready for launch.
Even though you can’t cover every detail, by gathering early insights you can start correcting issues and removing problems from the get-go. You should always have in mind that you’re not designing for yourself, so the users should help you discover issues before it gets too time-consuming to fix them.
As long as you’re aware of what your prototype can do in each phase, every failure will serve as a lesson to improve the next version. This also makes it cheaper, in the long run, saving you fixes that would come after the launch and take more time to solve. Usually, you can split your phases in a way that will help you set expectations:

- Wireframes and sketches – provide you with minimal insights, as they can be as simple as one-page setups. They won’t get you far with the overall picture, but they can form basic expectations from the users, how they understand the concept and what would be their next steps.
- Low to medium-fidelity prototype – with these you can already start gathering basic insights about UI interaction, the ways in which the users move forward if they understand the content, is there something distracting, etc. This step helps you form a strong foundation for later on.
- High fidelity prototype – while technically not a complete product, in this phase you can start grasping all of the users’ issues and the ways they interact with most of the elements. By now you should know if you’re ready to proceed to build the final product and if you managed to solve the issue you set out to respond to.
If you don’t have time to go through the whole process or building a high-fidelity prototype with all the interactions is just too time-consuming, you can build prototypes with fully interactive code components instead. Coming straight from your developers’ libraries, UI code components can help you speed the design process 10 times.
2. Map out your tasks
Every testing session should have a clear goal. Of course, you’re after all the insights you can get, but you should have an actionable plan in place to help you be efficient and solve as many issues as possible.

One of the most common mistakes when providing tasks for your test users is going too broad with a lot of vague questions, which can leave you with a lot of “It’s fine, I guess” answers.
Aim for getting an answer about specific experiences through actionable steps that are simple to track and gather insights from. Instead of pointless subjects such as „does everything work“ (spoiler alert: it doesn’t, it’s a prototype), go for something that will provide you with clear next steps.
First, limit each session based on the aspects of the product you want to get more information about and sort them by priority. Then you should explain to your testers what is expected of them, for example, “go through the interface and find the option to edit a video” or “navigate to the checkout page”.
All of these should also have goals to be achieved, either as a desired step-by-step process or the time needed, but users don’t need to have the information for the test to be successful.
It’s important to remember that usability is key when testing prototypes, so don’t overdo it with design and any additional data that may take away from the point and overwhelm the users in this phase. To make a test clear, simple, and reliable, try to go for maximum interactivity in a prototype, without too much hand-holding and explaining.
3. Pick the right users
When you’re starting the testing process, you don’t have to make the audience take a technical skills assessment before you show them the prototype, but you do need to make sure that you have a relevant pool of testers.
Representative users are those who you actually see as user personas that will (hopefully) use the product when you launch it. If you’re, for example, building a cooking app, it would be a good idea to have users that cook at home at least three or four times a week. Of course, not every person should be exactly the same – you should have a mix that will allow you to notice different issues.
It may be tough finding the right group to test your prototype and that’s one of the reasons some teams skip testing altogether, but it’s always worth it in the end. You should always go for quality over quantity, as it’s most important to have relevant users with a fresh perspective. You may actually learn a lot with just under ten people.
The need to have fresh eyes on the product is also why you should avoid your family and friends. Even though they want to help, it’s hard for them to have the same approach as real people who have no previous knowledge of the product. It would also be a good idea to use an NDA in this case, especially if you haven’t announced your product yet.
Another thing you should keep in mind is the nature of the product and where the users will interact with it. This means that if you’re working on an international product or service, you need testers from various markets, as they each have their own specifics. This also goes for devices – place the users in an environment that they would actually be in.
In the later phases of testing, you should also gather insights from internal stakeholders in order to have a clear overview of what’s possible and what needs to be changed before launch. This includes people such as distributors that should already have experience with similar processes.
4. Do multiple iterations
You should always be ready to adjust. The testing process isn’t always linear, so flexibility is key to achieve the best results.
For example, if you notice a feature is drawing focus away from the main functionalities of the product, you should be ready to change your direction as a response.
This feedback loop also applies to the tasks you give your test audience – if you see something isn’t working, you can improvise and switch up the questions to get the best insights.
Users will also have their suggestions on how you could improve even if the task itself doesn’t involve that. That’s why your whole team should be involved in the process, ready to implement a new solution you didn’t have in mind before.
It’s also important to avoid trying to solve every issue at once – your prototype should and will undergo multiple changes along the way so you should be patient and try fixing the biggest problems first. After that, do another test and see how the feedback changes. While you’re going through the phases, keeping a database backup will save you from having to roll back too far if something needs to be reverted to the starting position.

Each new feature added should be followed by a new test. It may look excessive and you’ll want to just bulk everything together, but going small will help you get more detailed insights, also saving the trouble of massive changes, which is especially important when it comes to design.
Putting everything together
You should aim to have eyes on your prototype as soon as possible. By introducing real people to the process, you will get a new perspective that will help you change and improve in unexpected directions.
Don’t be afraid to roll up your sleeves and redesign. Involve your whole team and remember that the testing won’t always go over smoothly, but through each step, you get to know your product better, which brings you that much closer to a seamless launch. Go through the prioritization process and invest additional effort through the testing, keep perfecting your prototype with a feedback loop, and, before you know it, you’ll have a product you can be proud of! But first things first – sign up for a free trial at UXPin to start building your prototypes.