How to Create an Effective App Design Process
Without the right app design steps in place, it’s like rolling a dice and wishing for a six. Sure, the app you unleash into the marketplace may be a hit. More likely, it risks sinking without a trace because it didn’t appeal to the target audience and didn’t work the way it should.
Effective mobile app design processes are laser-focused on testing, from that exciting initial concept, and continuously post- launch. Testing functionality and usability. Testing user demands. Testing the boundaries of what your design and dev team can achieve.
Design your first app with UXPin. An end-to-end design tool for building interactive prototypes that behave like a fully developed app. Sign up for a free trial and see how fast you can design your app and share it with your stakeholders.
3 Major Benefits of Creating an Effective App Design Process
If you’re creating a new mobile application, an effective app design process brings three major benefits. You’ll get your product to market faster. You’ll build a successful app that really hits your users’ spot. And you’ll stop wasting unnecessary time and money on an app that doesn’t work (or, at least, doesn’t work for your users).
The app design steps aren’t set in stone – every business is different, after all – but we’ve mapped out the general process every successful design and development team follows to reach a successful launch, and well beyond. Along the way, you’ll learn more about your users, your market, and your business.
Explore how to get from that first spark of inspiration to a fully-fledged and fleshed-out app.
3 Steps that You Should Follow in the Mobile App Design Process
To build a successful product, your process needs three core app design steps:
- Plan & research
- Design & app development
- Launch & continuous testing
Let’s look at what you’ll need to apply at each stage of the mobile app design process.
1. Plan & Research
What are your business goals?
Your app design process starts with a solid foundation: what do you (and your end-users) want?
Start broad. Write down every goal. Every problem and every solution. Then step back and assess. Now you’ll be able to see a path towards your true goal – tangled and overgrown and only just visible, but it’s there.
It’s really important, here, to have a single vision. One that can be easily communicated to all stakeholders including the C-suite.
‘Create a mobile app’ doesn’t tell anyone anything.
‘Create a mobile app for stockbrokers’ offers the team direction.
‘Create a mobile app that lets stockbrokers share professional advice’ gives everyone a clear objective, and how their work will make that vision a digitally tangible product.
With your business goals and specification in place, you can then work up a design team’s to-do list and define the delivery time frame.
Who will the user be?
Next, it’s time to dig deeper into who your user is and the broader market. That “sharing app for stockbrokers” only tells half the story. It doesn’t contain any detail about the target audience, demographics or how their use computers or mobile devices. These are the sort of factors that now need to be built up.
Don’t let assumptions run the mobile app design process. Run user research. Assess your initial ideas through:
- Focus groups
- Surveys
- Phone and face-to-face interviews
This feedback will tell you what your users really want, what are their pain points, and what they like. So, you don’t spend months building an app that doesn’t meet their expectations.
When you run the user research, turn it into personas that will guide you throughout the full application design process and refine your app idea.
Who are your competitors?
You know the user and their needs. But how much does the team know about the market you want to operate in? The most successful app design processes include a heavy dose of competitor analysis. It’s like a CEO of a retail company ordering products from a competing store online or browsing around their brick-and-mortar store, aiming to understand the way they operate (and, ultimately, defeat them). What’s working, what isn’t? What do they do well, what don’t they do at all? What makes top competitors popular, what misses the mark completely?
Ideally, you should analyze only a few companies – especially when developing an MVP. It will keep your research hyper-focused (and won’t overwhelm you as you refine your vision).
Try out existing android, iOs, and web apps on the market. You might spot an opportunity straight away by reviewing the existing use cases and checking what the real users think about one app or the other.
To see what users make of the same product, head to review sites like G2Crowd, Capterra, and Serchen. The findings can be revealing. Don’t neglect social media, either. Undertake a deep dive of competitor profiles using social listening tools to make the research phase more efficient.
2. Come up With a Design & App Development Process

Engage in wireframing
Wireframing is a 2D mock-up of a product. It’s typically simple, lacking color and styling, and it won’t feature any functionality. Wireframes help visualize your app information architecture without wasting tons of precious resources on a product that isn’t viable, doesn’t meet business goals, or just doesn’t work at all. During the wireframing stage, remember to make sure that your app design layout is in line with the Apple and Google app store guidelines. Otherwise, your app could be rejected.
Hopefully your wireframes are bang-on target. All that user and competitor research has paid off. Which means you can begin scraping feedback from real users, or even colleagues, and key stakeholders across different departments. You can leverage no-code web scraping tools to gather feedback from public forums, social media, or internal dashboards without writing a single line of code, centralizing insights to identify trends and refine your designs.
It’s really easy to collect and collate this feedback using UXPin for wireframing. Just to make it easier, those serving up their views don’t even need a UXPin account to leave feedback. They can just add comments in the Editor and on Preview screens. The tool lets you add two kinds of comments in UXPin:
- Team comments.Team comments are internal – only those added as team members via Team Management can leave and see them.
- Public comments. Public comments are visible to everyone – even if they don’t have a UXPin account. You can explore more about how to ask the right questions in our guide Tips on Asking for Feedback. Use that feedback to refine the vision, direction, and scope of your app design layout.

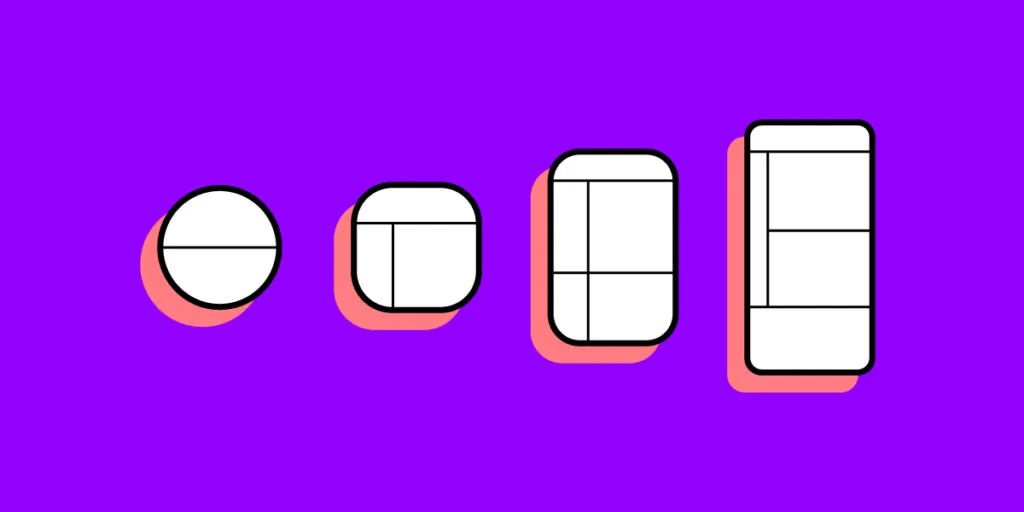
Start thinking about the design system
After you’ve started working on your wireframes and collected feedback, it’s a good time to also start considering your design system. It entails a style guide with visual elements such as:
- Color & typography
- Sizing and spacing
- Imagery and animations
- UI components
Having a design system in place will help you speed up your work as you engage in the next steps and ensure that your design is consistent as you bring your app to the market. A step-by-step guide on design systems is here: Creating a Design System: The 100-Point Process Checklist.
In UXPin, you can create and maintain your own Design System or use one of the available design system library that are already in the app. Sign up for UXPin’s trial and see how easy prototyping is when you have a design system in place.
Proceed with high-fidelity prototypes
Low-fidelity prototypes like wireframes give you a good idea of how the app will look. But it doesn’t tell you how it works. For that, you’ll need to work up a high-fidelity prototype.
There’s more to this than just an app design layout. Hi-fi prototyping blends user interface (UI) considerations like how the app looks with user experience (UX) factors like how the app behaves and how users interact with it.
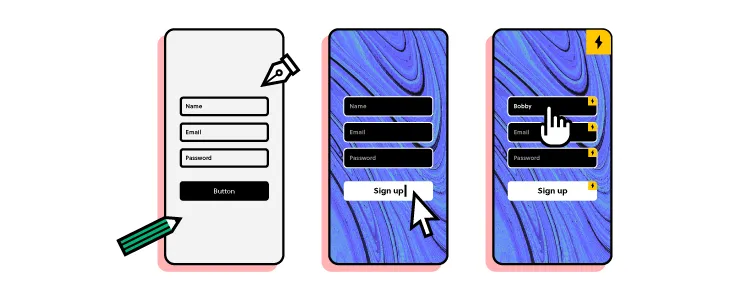
UXPin is tailor-made for this prototyping phase of the app design process. Your team can build clickable prototypes that are fully interactive. That’s because UXPin’s powerful advanced features, such as variables, expressions, and states. Elevate your prototyping to be more life-like than vector-based prototypes. Sign up for a trial.
The aim is to create a functional product fit for usability testing. It’s a way to let potential users (and your testers) try out the app to see how well it meets their needs – and pick up on any possible problems to be addressed before you start product development.
Develop the app
It’s time to see how well the groundwork was laid. Or, to put it in Star Wars terms, ‘this is where the fun begins…’ by handing off the app UI design to front-end and backend developers who will code it into reality. There’s that flurry of emotions welling inside. Excitement. Tension. Joy. Frustration as designs go back and forth between the teams until they finally do what you need them to do.
Efficiency is critical. It’s not an effective app design process without it, and the endless back and forths can really put the brakes on your momentum, or worse, stall a project seemingly indefinitely. To harmonize the workflow, Adalo and UXPin let designers and developers work together seamlessly—Adalo as a no-code app builder that lets you design and publish custom database-driven apps to iOS, Android, and web without developers, and UXPin as a design tool where designers build clickable prototypes with the same code used by front-end developers. So, design team knows what’s possible and devs know precisely how to recreate the UI design in fully functional code.
3. Launch & Continuous Testing
Test the app with real users (and launch a beta version)
You now have an app. Or something that looks and works a lot like the finished product should. So, it’s time to test it among your target market to see what they make of it. Just as you did when you were determining the end-user all that time ago, organize focus groups to assess the product. Throw in remote usability tests, as you did during the prototyping stage, to assess navigation and interactions.
Don’t just seek praise. Seek feedback to make your app even better (and iron out any annoying bugs).
Here’s the step way too many mobile app developers miss: the beta phase.
A beta version of your app is a great way to observe user behavior. It opens up your user base. More users means more feedback that can translate into meaningful design tips – and who doesn’t love exclusive access to an app, anyway?
Then there’s the financial factor. If you jump straight to launch, and find you need to make changes, it costs a lot more to make those tweaks to the ‘finished’ product. UXPin simplifies testing, since you can observe the user truly interacting with the app and design elements, such as signup forms, data tables, etc.
Test your app with a robust prototype before you expend time, money, and all those other far-too-precious resources on developing the final iteration of your mobile app.
Launch the app
Of all the app design steps, this is arguably the most thrilling. The launch. The moment when the hard work of your whole team is delivered into the world for all to see (and download and love and use on a daily basis).
Ok, let’s not get carried away. Before you launch, give your app one final check: does your app still meet the Google and Apple app store guidelines? A lot may have changed from the last time you checked. You’ve come too far to have your app rejected at the final hurdle. You need to make sure your product is 100% ready.
All right, after that check, it’s time to launch.
Collect user feedback & refine the mobile app experience
But the launch doesn’t mean the story’s over. In user experience and visual design as well as app development, the product launch is really the beginning of the journey. Everything that came before was just a prologue. UI/UX design is all about refining and reiterating on the initial idea. It’s the reason why Facebook initiated so many UI and UX changes, particularly in the years when usage exploded. The core idea remained – how users accessed the platform’s options evolved.
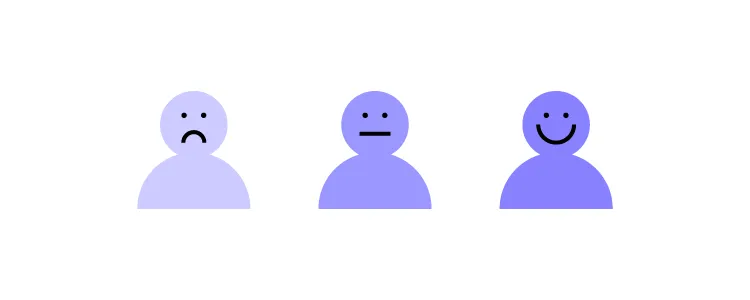
Your users know what they want.
Their feedback tells you how you can give it to them.
You should still continue running focus groups and usability tests. Alongside these, monitor social media platforms, app store reviews, and customer satisfaction and UX design surveys. Make use of all the feedback collection methods you can. Just like during the app testing stage, the more data you can collect, the more on-point your innovations will be.
If you have access to a tool that helps you filter feedback by user sentiment, then that’s going to be invaluable. Congratulations – someone left a positive review. That’s ripe for the marketing team to help build social proof. Oh no – several users said they found menu navigation slow and clunky. Now, you’ve identified an area where you can make your app even better.
Continuous product refinement ensures you’re always meeting market and user needs.
Build High-Fidelity Prototypes in UXPin
App design process is pretty easy to follow once you understand its distinctive phases. Yet, you can be almost certain that you will hit a lot of bumps, especially when doing the testing part.
Spending a lot of time on testing with real users, letting them interact with a prototype and experience it can help you save loads of money and ensure your success. Use the prototyping tool that helps you design real interactions, not simulate them. Try UXPin and check how much you can gain.

