Want to speed up UI design and development while ensuring consistency? Combine Claude Haiku 4.5, an AI tool for fast, accurate UI generation, with UXPin Merge, a platform for designing with production-ready components.
Here’s what this approach offers:
- Claude Haiku 4.5 generates UI layouts 4–5x faster than comparable models, with 65% accuracy in following design systems.
- UXPin Merge lets you design using real code-based components, eliminating design-to-development gaps.
- Together, these tools allow teams to prototype quickly and ship production-ready code, saving time and reducing rework.
Key steps to get started:
- Set up Claude Haiku 4.5 via Anthropic‘s API (available on platforms like Google Cloud or AWS).
- Sync your design system to UXPin Merge using Git, npm, or Storybook.
- Use UXPin Forge to generate components with AI, ensuring alignment with your design standards.
- Assemble layouts in UXPin Canvas and test interactive prototypes with real components.
This workflow is ideal for teams aiming to streamline UI creation while maintaining code consistency.
Prerequisites and Setup
Get everything you need to start building efficient UIs with Claude Haiku 4.5 and UXPin Merge. Setting up your tools in advance will save you from potential headaches down the road.
What You Need to Get Started
To begin, make sure you have access to Claude Haiku 4.5. Anthropic notes: "Claude Haiku 4.5 is available everywhere today. If you’re a developer, simply use claude-haiku-4-5 via the Claude API". You can access it through an Anthropic developer account or via major cloud platforms like Amazon Bedrock or Google Cloud’s Vertex AI.
You’ll also need a UXPin account with Merge technology enabled. UXPin supports integrations with popular libraries such as MUI, Ant Design, Bootstrap, and ShadCN, allowing you to jump into designing right away. If you’re working with a custom design system, ensure your components are set up as a code-based library. These are typically React components or Web Components hosted on platforms like GitHub, Bitbucket, or GitLab, or integrated through tools like Storybook or npm packages.
Additionally, install Node.js (v8 or higher) and npm. If you’re on Windows, you’ll need to set up Windows Subsystem for Linux (WSL) to run the Merge CLI.
Configuring UXPin Merge
To connect your design system to UXPin, choose the integration method that works best for your setup. Here are the options:
- Git Integration: Directly links to your repository, ensuring a single source of truth.
- Storybook Integration: Works with public and private Storybook instances and supports frameworks like Vue and Angular.
- npm Integration: Allows you to import packages without needing extra developer input.
At the root of your design system repository, create a uxpin.config.js file. This file organizes your components into categories, specifies inclusions, and defines wrappers so UXPin can properly render them. If your codebase aligns with Merge standards, use Clean Integration for a seamless Git connection. If you need more flexibility, opt for Wrapped Integration with Higher-Order Components.
For smoother updates, automate syncing with a CI/CD tool like CircleCI, Travis CI, or GitHub Actions. Set your UXPin authentication token as an environment variable to update the Design Editor automatically whenever code changes are committed. Before sharing your setup with your design team, test it locally by running npm start in the Merge CLI to launch the Experimental Mode/Dev Environment.
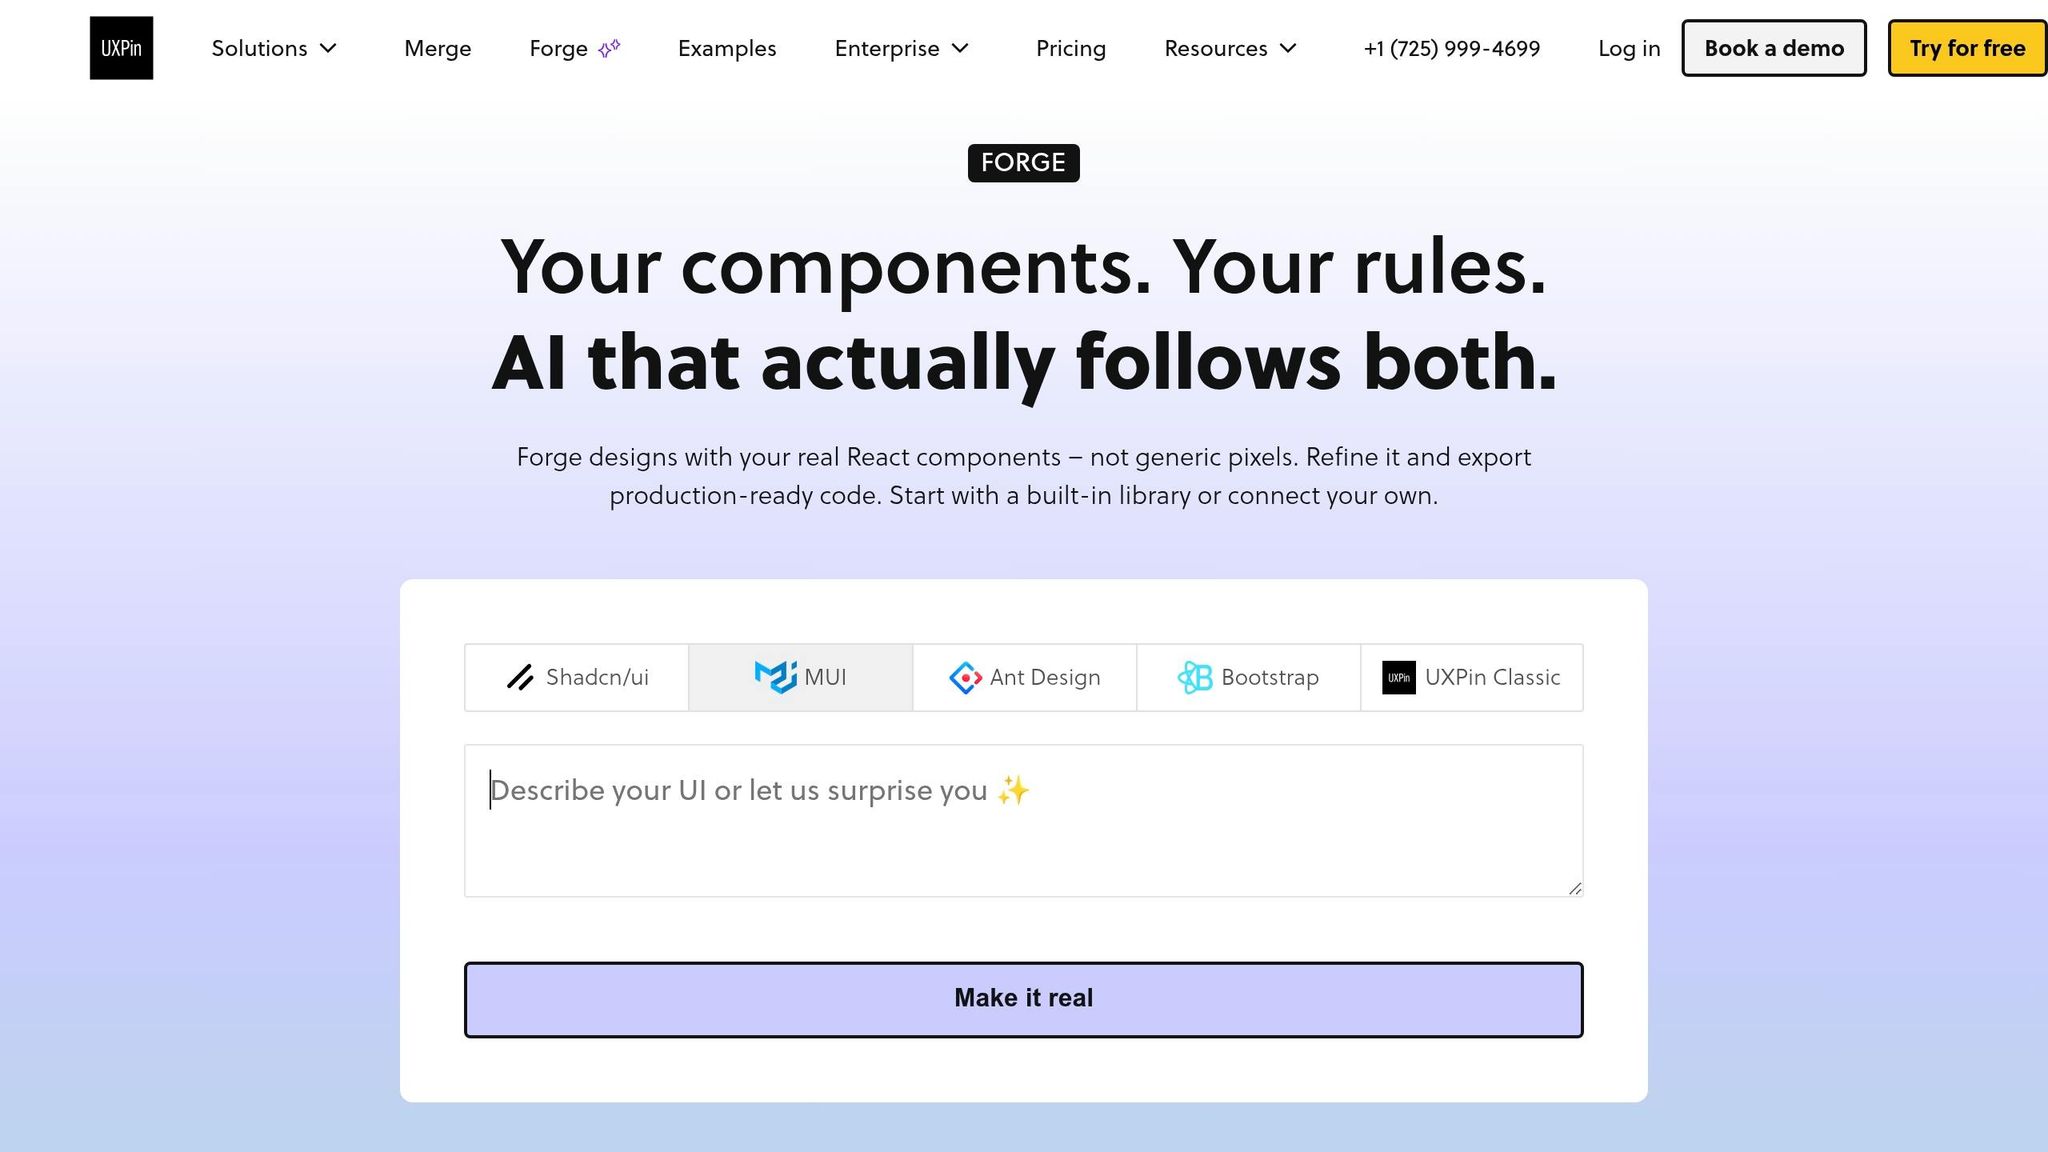
Once your design system is synced, Claude Haiku 4.5 integrates seamlessly within UXPin Forge. This AI-powered tool combines generative AI with your code-backed design system. With Merge syncing your components, Forge can use them to create production-ready layouts while staying within the boundaries of your approved design patterns.
Now that your environment is ready, you can dive into building UI components with Claude Haiku 4.5 and UXPin Merge.
sbb-itb-f6354c6
How to Build UI with Claude Haiku 4.5 and UXPin Merge
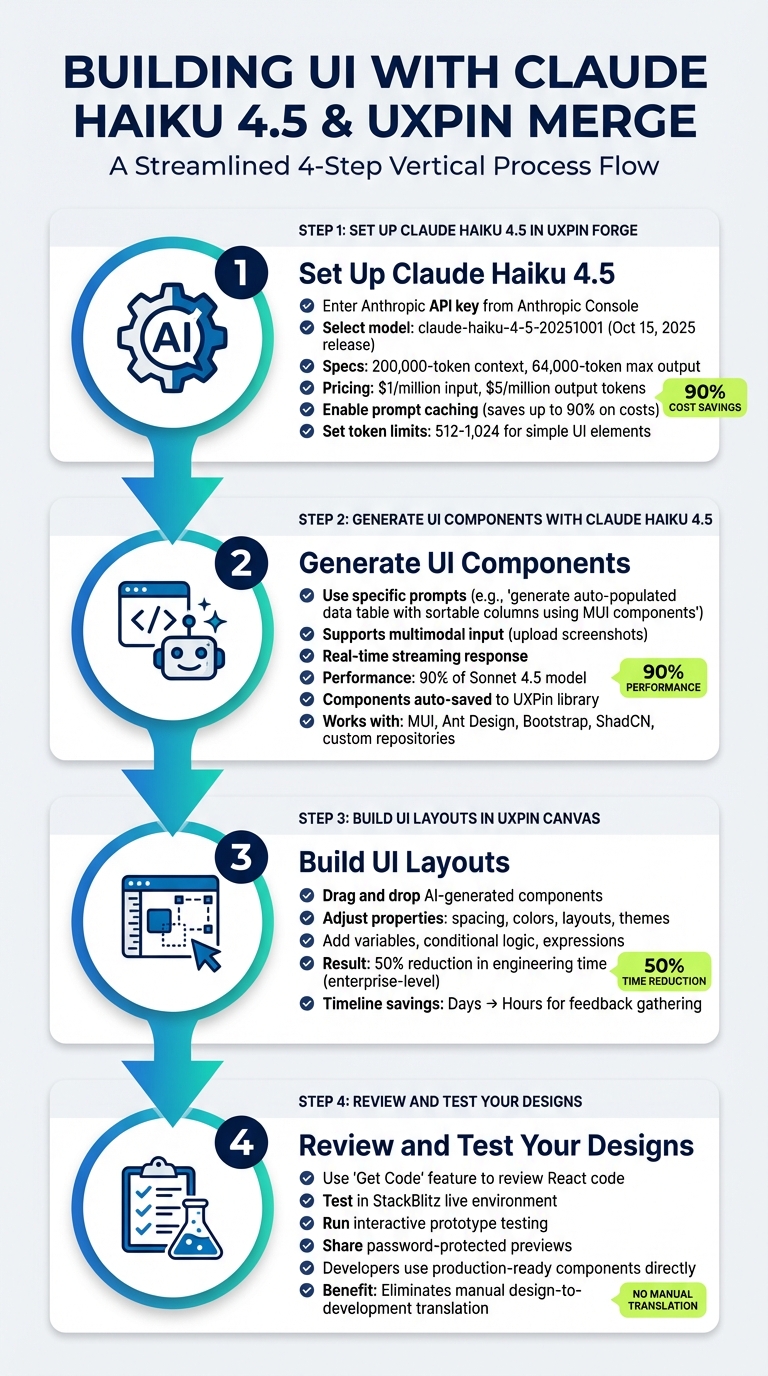
4-Step Workflow for Building UI with Claude Haiku 4.5 and UXPin Merge
With your environment set up, you’re ready to create production-ready UI components and piece them together into full layouts. By combining Claude Haiku 4.5’s AI capabilities with UXPin Merge’s code-backed design system, you can craft interfaces that meet your exact development needs.
Step 1: Set Up Claude Haiku 4.5 in UXPin Forge
Start by opening UXPin Forge (the AI Component Creator) within your UXPin workspace. In the settings panel, enter your Anthropic API key, which you can generate from the Anthropic Console. Next, select claude-haiku-4-5-20251001 from the model dropdown to access the latest version, released on October 15, 2025.
This model supports a 200,000-token context window and a 64,000-token max output, making it capable of handling complex UI generation. Pricing is straightforward: $1 per million input tokens and $5 per million output tokens.
To control costs, enable prompt caching in your settings. This feature can cut expenses by up to 90% for repetitive tasks, such as reusing the same design system documentation or CSS frameworks. For simple UI elements like buttons or cards, set token limits between 512 and 1,024 to avoid unnecessary charges.
Once configured, you’re ready to start generating components using specific prompts.
Step 2: Generate UI Components with Claude Haiku 4.5
In UXPin Forge, use clear and detailed prompts to create UI components. The AI generates code-backed layouts using elements from your synced design system, whether it’s MUI, Ant Design, Bootstrap, ShadCN, or a custom repository. Every component aligns with your approved design standards.
For more complex elements, specificity is key. Instead of saying, "create a table", try something like, "generate an auto-populated data table with sortable columns using MUI components". Claude Haiku 4.5 also supports multimodal input, allowing you to upload interface screenshots. The AI analyzes layouts and produces code that matches your design system’s patterns.
The streaming response feature lets you see code generation in real time, so you can tweak component properties or themes on the spot. In evaluations, Haiku 4.5 achieves 90% of the performance of the Sonnet 4.5 model.
Anthropic notes, "Haiku 4.5 proves you can have both intelligence and rapid output. It handles complex workflows reliably, self-corrects in real time, and maintains momentum without latency overhead".
Generated components are automatically saved to your UXPin library, making them reusable across projects. Once you’ve created your components, move to the UXPin Canvas to build complete layouts.
Step 3: Build UI Layouts in UXPin Canvas
After generating components, switch to the UXPin Canvas to assemble them into layouts. Drag and drop AI-generated elements – like forms, tables, or navigation bars – directly onto the canvas. Since these components are built with production-ready code from your design system, what you see on the canvas is exactly what developers will ship.
Use the properties panel to refine each component visually. You can adjust spacing, colors, layouts, or even switch themes while staying compliant with your design system. Add variables, conditional logic, and expressions to simulate real application behavior and test user flows before handing off the design.
Larry Sawyer, Lead UX Designer, shared: "When I used UXPin Merge, our engineering time was reduced by around 50%. Imagine how much money that saves across an enterprise-level organization with dozens of designers and hundreds of engineers".
Mark Figueiredo, Sr. UX Team Lead at T.RowePrice, added: "What used to take days to gather feedback now takes hours. Add in the time we’ve saved from not emailing back-and-forth and manually redlining, and we’ve probably shaved months off timelines".
Once your layout is complete, it’s time to review and test.
Step 4: Review and Test Your Designs
Use the "Get Code" feature to review the React code and dependencies for each component, ensuring they align with your codebase standards. You can also open your prototype in StackBlitz to test functionality in a live development environment.
Run through your interactive prototype to ensure all states, transitions, and logic function as expected. Share password-protected previews with stakeholders to gather feedback while keeping the design easy to modify.
Brian Demchak, Sr. UX Designer at AAA Digital & Creative Services, explained: "We have fully integrated our custom-built React Design System and can design with our coded components. It has increased our productivity, quality, and consistency, streamlining our testing of layouts and the developer handoff process".
Since the components are production-ready, developers can directly use them from your shared repository, eliminating the need for manual translation between design and development.
Best Practices for Claude Haiku 4.5 and UXPin Merge
Keep AI Within Design System Boundaries
To get the most out of Claude Haiku 4.5 and UXPin Merge, it’s crucial to keep AI outputs aligned with your design system. This means configuring prompts to reference your design tokens – like colors, typography, and spacing – and importing component libraries along with validation rules into UXPin Merge. By doing so, you can ensure the AI stays within the boundaries of your established guidelines, eliminating the need for constant manual checks.
For example, a fintech design team successfully integrated Claude Haiku 4.5 with UXPin Merge by loading their Figma-based design system. They used AI prompts to generate button variants that adhered strictly to system tokens. The outcome? 100% compliance across 200+ components and a 50% reduction in redesign time. Using design tokens as a framework not only ensures consistency but also helps scale design efforts while minimizing rework.
Involving the team early in this process enhances these technical safeguards even further.
Involve Designers and Developers Early
Getting designers and developers involved from the start is key to keeping AI outputs practical and aligned with real-world constraints. Kick things off with joint sessions where both teams can review the design system and refine AI prompts together. UXPin’s collaborative canvas makes this process even smoother, allowing teams to provide real-time feedback. Designers can validate visuals while developers test code exports.
Clearly defining RACI roles (Responsible, Accountable, Consulted, Informed) can help avoid bottlenecks. For instance, designers might refine prompts, developers ensure code compatibility, and stakeholders give final approvals. This kind of early collaboration can cut iteration cycles by 30-50% and catch potential issues – like responsiveness problems – before the prototyping phase even begins.
This groundwork lays the foundation for faster and more efficient prototyping.
Prototype Fast, Ship Faster
When design system boundaries and early collaboration are in place, teams can accelerate their workflows significantly. With UXPin Merge, you can sync code to design instantly and create prototypes with just one click. Features like version control and live previews allow for quick iterations, enabling a seamless workflow: ideate, generate, test, and deploy. This approach ensures production-ready code without sacrificing quality.
Enterprise teams have reported impressive results with this method, achieving 3x faster prototyping (reducing timelines from weeks to days) and a 40% decrease in time-to-ship. AI contributes by handling 70% of initial layouts, freeing up teams to focus on refinement. To maintain quality, A/B test prototypes early and gather feedback from both users and developers. Focus on MVP prototypes that export clean React or Vue code, and keep them updated with design system tokens for continuous improvements.
This streamlined process ensures teams can move quickly while delivering polished, production-ready designs.
Conclusion
What Enterprise Teams Should Remember
Pairing Claude Haiku 4.5’s fast prototyping capabilities with UXPin Merge’s code-backed design system can revolutionize enterprise UI design. This combination offers three key benefits:
- Speed: AI-generated components significantly cut down prototyping time.
- Alignment: Code-backed prototypes ensure designers and developers stay on the same page.
- Efficiency: Feedback cycles are shortened, often dropping from days to just hours.
By centralizing your design system within UXPin Merge, you ensure that Claude Haiku 4.5 produces components that adhere to your standards, helping teams avoid design debt. Enterprises that maintain these practices achieve better compliance while scaling their enterprise design system operations seamlessly.
How to Get Started
Ready to take advantage of this streamlined workflow? Here’s how you can begin:
- Sign up for a free UXPin trial at uxpin.com/pricing. The trial includes built-in libraries like MUI, Ant Design, and Bootstrap.
- Sync your custom design system with a Git repository to ensure it mirrors your production environment.
- Configure Claude Haiku 4.5 in UXPin Forge.
- Use a simple prompt to generate your first component.
- Collaborate with your team to review and export production-ready React code.
For enterprise teams needing custom AI credit limits, advanced security, or dedicated support, reach out to sales@uxpin.com to discuss tailored Enterprise pricing options.
FAQs
How do I connect my custom design system to UXPin Merge?
To link your custom design system with UXPin Merge, you’ll need to integrate its codebase using either Git or Storybook. This setup keeps your components synchronized and readily available within UXPin. Once the connection is established, you can work directly with production-ready components from your design system in your prototypes and designs, creating a smooth and efficient workflow.
How can I keep AI-generated UI compliant with our design tokens?
To make sure AI-generated UI stays consistent with your design tokens, leverage AI tools that can analyze your design files. These tools help generate and manage tokens for elements like colors, fonts, and spacing. They can also recommend semantic token names, sync updates directly with your code repositories, and ensure everything remains aligned. Additionally, using structured naming conventions and organizing tokens systematically can help maintain uniformity across all platforms.
What’s the cheapest way to use Claude Haiku 4.5 for UI generation?
Claude Haiku 4.5 offers a budget-friendly option for UI generation when accessed via OpenRouter. The pricing is straightforward: $1.00 per million input tokens and $5.00 per million output tokens. This setup provides an efficient and economical way to generate UIs without breaking the bank.
Related Blog Posts
- How to prototype using Claude Sonnet 4.5 + Custom Design Systems – Use UXPin Merge!
- How to prototype using Claude Haiku 4.5 + Custom Design Systems – Use UXPin Merge!
- How to build UI using Claude Opus 4.5 + shadcn/ui – Use UXPin Merge!
- How to build UI using Claude Sonnet 4.5 + shadcn/ui – Use UXPin Merge!

