Want to streamline your UI design and development? Combine Claude Opus 4.5, shadcn/ui, and UXPin Merge. This workflow lets you design with production-ready components, use AI for layouts, and skip handoffs entirely. Here’s how it works:
- Claude Opus 4.5: AI-powered layout assistance saves time and ensures accuracy by working directly with your pre-defined design system.
- shadcn/ui: A library of pre-coded, customizable React and Tailwind CSS components.
- UXPin Merge: Connects design to code, enabling designers to work with real components developers will ship.
This setup is ideal for teams needing fast, consistent, and aligned UI designs. Start by setting up UXPin Merge, accessing Claude Opus 4.5, and integrating shadcn/ui. From there, design, customize, and export code-ready prototypes efficiently.
Why it matters: Skip tedious handoffs, reduce rework, and deliver faster with tools that guarantee consistency between design and development. Ready to learn the steps? Let’s dive in.
Use Claude Code DESIGNER Skill to 10x UI Designs
sbb-itb-f6354c6
Setting Up Your Workspace
Getting started with UXPin Merge, Claude Opus 4.5, and shadcn/ui is straightforward. Everything operates within the UXPin canvas, giving you access to AI-driven layout generation and ready-to-use components as soon as you sign up. Here’s a breakdown of the three key steps: signing up, using AI assistance, and integrating shadcn/ui components.
Signing Up for UXPin Merge
UXPin offers three subscription tiers, all of which include Merge technology.
- Core Plan: Priced at $29/month, this plan includes basic AI models, 200 AI credits per month, and access to built-in coded libraries like shadcn/ui. It’s a solid choice for individuals or small teams testing out the workflow.
- Growth Plan: At $40/month, this plan adds advanced AI models (like Claude Opus 4.5), 500 AI credits per month, design system management, and Storybook integration. It’s the most popular option for growing teams.
- Enterprise Plan: Tailored for larger organizations, this plan offers custom pricing and includes unlimited AI credits, custom component library integration, and dedicated support.
For more details, visit uxpin.com/pricing or email sales@uxpin.com for Enterprise inquiries. Once you’ve chosen a plan, open the component library panel and start placing elements onto your canvas.
Accessing Claude Opus 4.5 in UXPin Canvas
After selecting your plan, head to the AI assistant panel to start generating layouts with Claude Opus 4.5. Available to Growth and Enterprise users, this AI model is fully integrated into UXPin – no need for an external account.
Claude Opus 4.5 is efficient, generating optimal results in just 4 iterations, compared to 10+ iterations required by other models. It also boasts 80.7% accuracy on visual interpretation tests, making it Anthropic’s most advanced vision model to date.
The model works exclusively with your pre-defined design system components, ensuring that all layouts are built using the shadcn/ui components available in your workspace.
Understanding shadcn/ui Integration
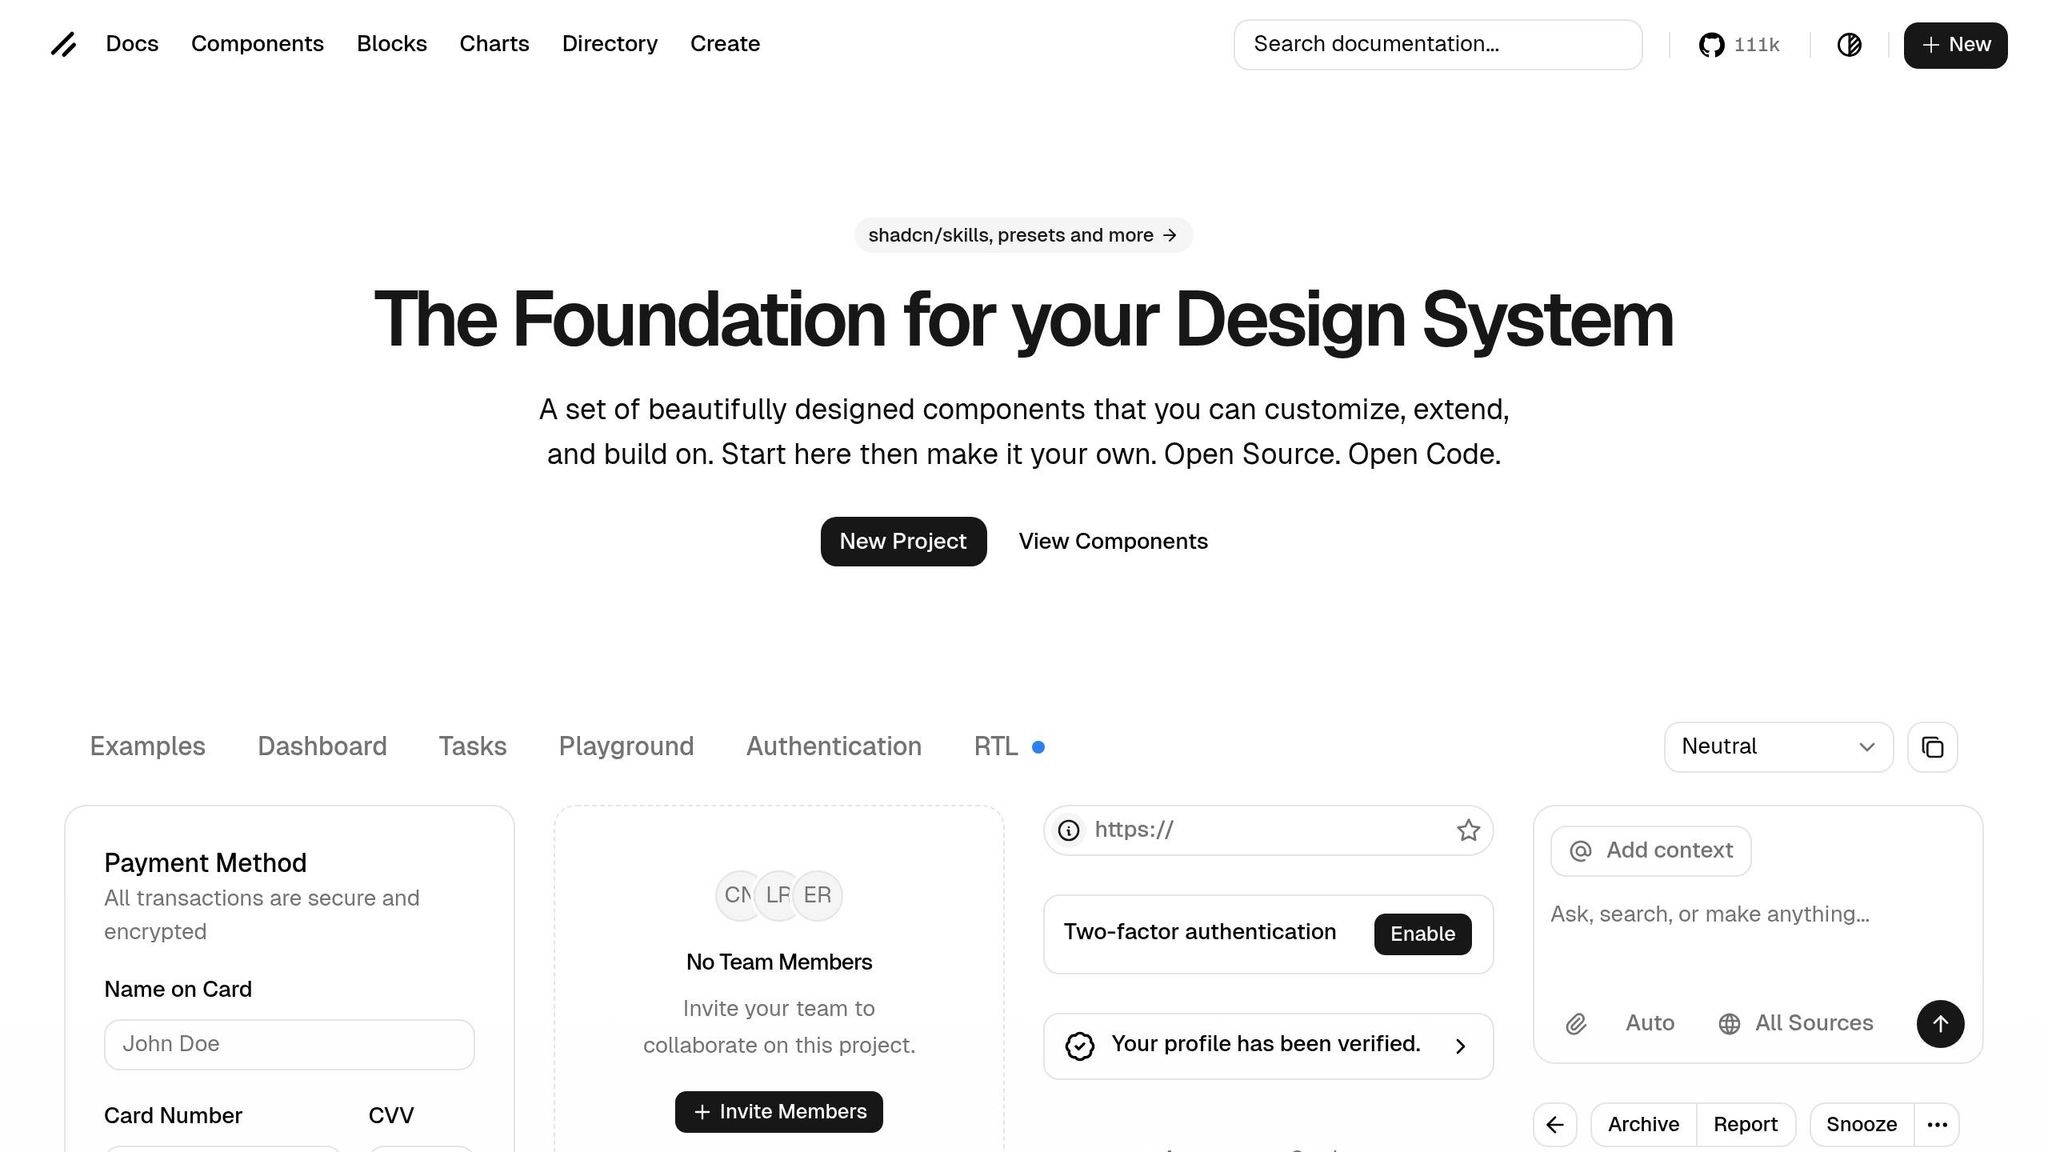
shadcn/ui offers ready-made, customizable UI components built with React and Tailwind CSS. UXPin’s native integration means these components are pre-coded, accessible, and instantly available – no manual setup required.
When you drag a shadcn/ui button or form into your canvas, you’re working with the exact component developers will use in production. You can tweak properties like size, variants, and states directly in the UXPin interface, and those adjustments are immediately reflected in the underlying code. This bringing design and code together eliminates the need for translation layers, allowing you to create UIs that match production code perfectly.
How to Build a UI: Step-by-Step
Now that your workspace is set up, it’s time to bring your UI to life. This process blends three powerful tools: shadcn/ui components for building blocks, Claude Opus 4.5 for AI-assisted layout creation, and UXPin Merge as your design platform. Here’s how to go from idea to functional prototype.
Using shadcn/ui Components in UXPin Merge
With everything configured, start by diving into the component library panel on the left side of your UXPin canvas. Here, you’ll find shadcn/ui components ready to use – no need for imports, extra setup, or external accounts. Simply drag and drop elements like buttons, forms, cards, or navigation bars directly onto your canvas.
As you adjust properties such as size, color, or state within UXPin, you’re tweaking the same components developers will use in production. This seamless connection ensures your design translates perfectly into code, eliminating any discrepancies between design and development.
Generating Layouts with Claude Opus 4.5
Why arrange every component manually when Claude Opus 4.5 can handle it for you? Open the AI assistant panel and provide a detailed prompt describing your desired layout. For instance:
"Design a dashboard UI with a sidebar navigation, a header featuring a user profile dropdown, a main content area displaying data cards in a 3-column grid, and a footer with links."
Claude Opus 4.5 delivers results in as few as 4 iterations, far outpacing other models that might need 10 or more. Its effort parameter optimizes token usage, delivering faster and more efficient results. Best of all, the AI works exclusively with your shadcn/ui components, ensuring all elements are pre-approved and ready for development.
Customizing and Refining Your Design
After Claude Opus 4.5 generates your layout, you can refine it directly on the canvas. Click on any component to tweak its properties, switch variants, or adjust spacing. Need more changes? Just prompt the AI with specific instructions, like:
"Set card spacing to 24px and change the button variant to outline."
The system immediately flags unsupported properties, keeping your design consistent. Once you’re satisfied with the refinements, you’ll be ready to create interactive prototypes and move forward with deployment.
Prototyping and Deploying Your UI
Turn your static design into a fully functional user interface. With UXPin Merge, you can connect your design to actual code, enabling interactive features and seamless integration into your development workflow.
Adding Interactivity with Logic and Variables
To make your design interactive, select any component and open the Interactions panel. This is where you can add conditional logic, variables, and expressions. For example:
- Want a modal to pop up when a button is clicked? Use the "Show/Hide" interaction.
- Need a checkbox to toggle content visibility? State variables can control what appears on the screen.
The best part? These interactions automatically convert into functional React code. When you export your design, UXPin includes features like visible and checked states directly in the exported functions block. This eliminates the need for manually coding these interactions, speeding up your workflow and reducing errors. Once your interaction logic is in place, you’re ready to export and integrate your design.
Exporting and Syncing with Repositories
Exporting your code is straightforward. Switch to Spec mode to access your design’s code. When you select the parent container, you’ll see three main sections:
- Dependencies: Lists all necessary imports (e.g., from shadcn/ui).
- Functions: Contains your interaction logic.
- JSX Code: Shows the actual markup.
From here, you have multiple export options: copy to clipboard, open in StackBlitz, or download as a React project (complete with a .zip file and package.json). For Enterprise users, Git integration takes it a step further. Any changes made in your repository automatically sync with UXPin Editor, keeping your components up to date.
"Being able to jump straight from design to having code ready is going to be a huge time-saver for our team." – Allison Barkley, Director of Operations, Baremetrics
Benefits for Enterprise Teams
Traditional UI Workflow vs UXPin Merge with Claude Opus 4.5 Comparison
Bringing together Claude Opus 4.5, shadcn/ui, and UXPin Merge creates a streamlined workflow that boosts delivery speed and improves product quality. This approach bridges the usual gap between design and development by ensuring both teams rely on the same source of truth. Here’s how this integration transforms enterprise workflows.
Faster Time-to-Market
Traditional handoffs between design and development can be painfully slow. Developers often spend hours deciphering static mockups, building components from scratch, and addressing inconsistencies during implementation. UXPin Merge eliminates these inefficiencies by allowing designers to work directly with real React components from shadcn/ui. This removes the need for manual rework.
Add Claude Opus 4.5 to the mix, and the process gets even faster. Teams can quickly generate multiple layout options using their existing component library. This ability to rapidly explore design variations saves time while reducing the risk of rework, helping teams deliver faster without compromising quality.
Better Design-Dev Alignment
Static UI kits often fall behind as codebases evolve, creating gaps between design and development. With UXPin Merge, your code becomes the single source of truth. Designers always work with the latest production-ready components, and developers receive JSX code directly from the designs. This eliminates the guesswork of interpreting static mockups.
When Claude Opus 4.5 generates layouts, it sticks to components already in your library. This ensures every design is technically feasible from the start, keeping both teams aligned and reducing unnecessary back-and-forth.
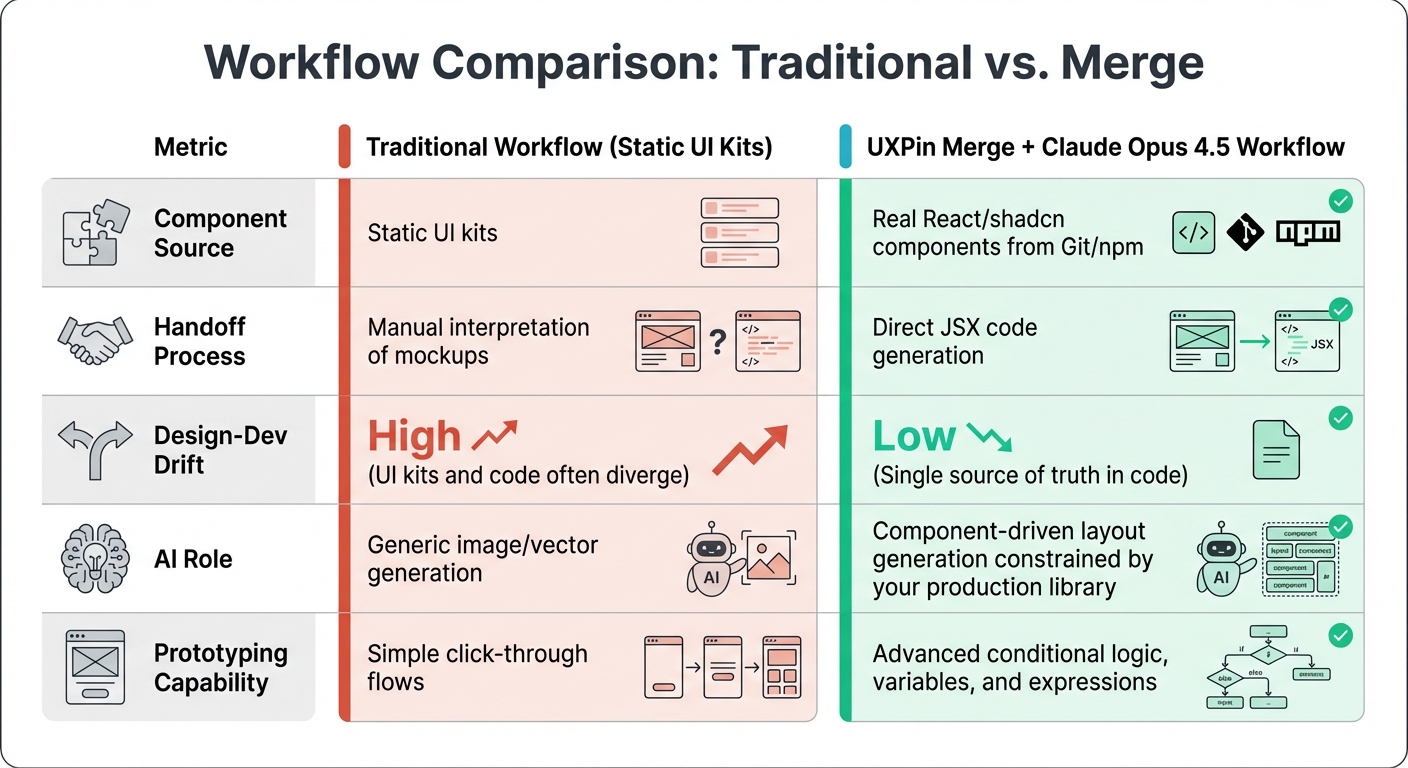
Workflow Comparison: Traditional vs. Merge
| Metric | Traditional Workflow (Static UI Kits) | UXPin Merge + Claude Opus 4.5 Workflow |
|---|---|---|
| Component Source | Static UI kits | Real React/shadcn components from Git/npm |
| Handoff Process | Manual interpretation of mockups | Direct JSX code generation |
| Design-Dev Drift | High (UI kits and code often diverge) | Low (Single source of truth in code) |
| AI Role | Generic image/vector generation | Component-driven layout generation constrained by your production library |
| Prototyping Capability | Simple click-through flows | Advanced conditional logic, variables, and expressions |
Conclusion and Next Steps
Creating high-quality UIs doesn’t have to be a time-consuming process. By combining Claude Opus 4.5, shadcn/ui, and UXPin Merge, you can take designs straight from concept to production with ease.
Key Takeaways
This workflow changes the way enterprise teams handle UI development. Using real React components ensures that the designs you create are exactly what gets implemented. Claude Opus 4.5 helps generate layouts with your pre-approved components, guaranteeing production-ready outputs. Meanwhile, UXPin Merge connects directly to your codebase, eliminating the risk of losing essential details during handoffs.
The result? Faster turnaround times, better alignment between design and development, and fewer revisions. Instead of deciphering mockups, your team can focus on building features that make a real impact.
Start transforming your design process today.
Getting Started with UXPin Merge
Want to simplify your UI workflow? UXPin Merge offers plans for teams of all sizes, with Merge technology included in every tier. This means you can start designing with production-ready components right away.
Check out uxpin.com/pricing to find a plan that suits your team, or reach out to sales@uxpin.com to explore Enterprise options, including integrating your own component library and dedicated support.
FAQs
Do I need developers to set this up?
Setting up this workflow can be a bit technical, especially when it comes to integrating tools like Claude Opus 4.5, shadcn/ui, and UXPin Merge. Developers might need to step in to handle tasks like linking these tools, managing integrations such as Git or npm, and configuring the environment correctly. While these tools aim to simplify the process, getting the technical setup right is crucial to ensure everything runs smoothly.
How do I write better prompts for layouts?
When working with Claude Opus 4.5 to generate layouts, clarity and detail in your prompts are key. Start by clearly describing your design needs. Be specific about the type of layout you’re aiming for – whether it’s a dashboard, a login page, or something else entirely.
Next, outline the key components your layout should include. Think about elements like buttons, forms, navigation menus, or any other features that are essential for your design. Including these details ensures the AI knows exactly what to incorporate.
Finally, don’t forget to mention your stylistic preferences. Highlight aspects like color schemes, spacing, and alignment to guide the AI toward a look and feel that matches your vision.
By focusing on these three areas – structure, components, and style – you’ll give Claude Opus 4.5 the information it needs to generate layouts that align with your goals.
Can I use my own component library?
Absolutely. UXPin Merge allows you to integrate your own component library seamlessly. By connecting custom code components, teams can work directly within their design systems. This approach ensures that prototypes match production code exactly, cutting down on manual tweaks and making collaboration smoother. It’s a smart way to incorporate custom component libraries into your design process.