What Is a Prototype? A Complete Guide to Types, Fidelity, and Tools (2026)
A prototype is an interactive model of a product — or part of a product — that teams build to test ideas, validate design decisions, and gather user feedback before investing in full-scale development. Prototypes range from hand-drawn paper sketches to fully interactive digital simulations that behave exactly like the finished product.
Prototyping is arguably the most important skill in a product designer’s toolkit. It connects the abstract world of research insights and wireframes to the concrete world of user behavior and engineering implementation. Done well, prototyping catches usability problems when they cost almost nothing to fix. Done poorly — or skipped entirely — it leads to expensive rework after engineering has already built the wrong thing.
This guide covers everything you need to know about prototyping: what prototypes are, the five types, fidelity levels and when to use each, the step-by-step prototyping process, what makes a prototype effective, and how modern tools — including AI-assisted and code-based prototyping — are changing the practice in 2026.
Key takeaways:
- A prototype is a testable model of a product used to validate ideas before committing development resources.
- Prototypes vary in fidelity: low (paper sketches), medium (interactive wireframes), and high (realistic, code-backed simulations).
- Higher-fidelity prototypes produce more reliable test results because participants interact with realistic interfaces.
- Teams should prototype early and iterate often — at least 3–5 rounds per major feature.
- Code-based prototyping tools like UXPin Merge create prototypes that function identically to the final product, producing better test data and enabling seamless development handoff.
- AI-assisted tools like UXPin Forge generate interactive prototypes from text prompts, screenshots, or URLs — using your team’s real component library.
Build prototypes with real, interactive components from your design system. Discover UXPin Merge — or start a free trial to see it in action.

What Is a Prototype?
A prototype is a simulation of a product that design teams use for testing and validation before committing engineering resources. The fundamental goal is to answer specific design questions — “Can users complete this checkout flow?”, “Do they understand the navigation?”, “Does this dashboard layout surface the right information?” — without building the actual product.
Prototypes serve three critical functions:
- Identifying usability problems early. Testing with real users reveals pain points and friction that design reviews and stakeholder walkthroughs cannot reliably detect.
- Aligning stakeholders around a tangible artifact. Prototypes give product managers, engineers, executives, and users something concrete to react to — far more productive than debating abstract requirements.
- Reducing development cost. Catching a navigation problem during prototyping costs a fraction of what it costs to rework the same problem after development. Teams that skip prototyping typically spend 3–5x more on post-development redesign.
A common mistake is treating prototyping as a one-time activity. The most effective teams prototype early (starting with rough sketches) and iterate often — 3–5 prototyping and testing rounds per major feature, depending on complexity.
Prototype Fidelity: Low, Medium, and High
Fidelity describes how closely a prototype resembles the final product. Choosing the right fidelity for each design stage is a critical skill — using high fidelity too early wastes time, while using low fidelity too late produces unreliable test results.
Low-Fidelity Prototypes
Paper sketches, sticky note flows, and basic digital wireframes with boxes and placeholder text. Low-fidelity prototypes focus on layout, flow, and information architecture — not visual design or interaction detail.
When to use: Early ideation, concept validation, information architecture testing, stakeholder alignment on overall direction.
Advantages: Fast to create (minutes), easy to modify, encourages broad exploration because there’s no emotional investment in polish.
Limitations: Test participants may struggle to interact naturally with abstract representations. Results are directional, not precise.
Medium-Fidelity Prototypes
Digital wireframes with basic interactions — clickable navigation, simple page transitions, functional form fields. Content is real or realistic, but visual design is minimal (grayscale, basic typography).
When to use: Testing information architecture, navigation patterns, content hierarchy, and basic user flows.
Advantages: Interactive enough to produce meaningful behavioral data. Fast enough to iterate between test sessions.
Limitations: Participants may be distracted by the unfinished visual appearance. Some interaction patterns can’t be tested without higher fidelity.
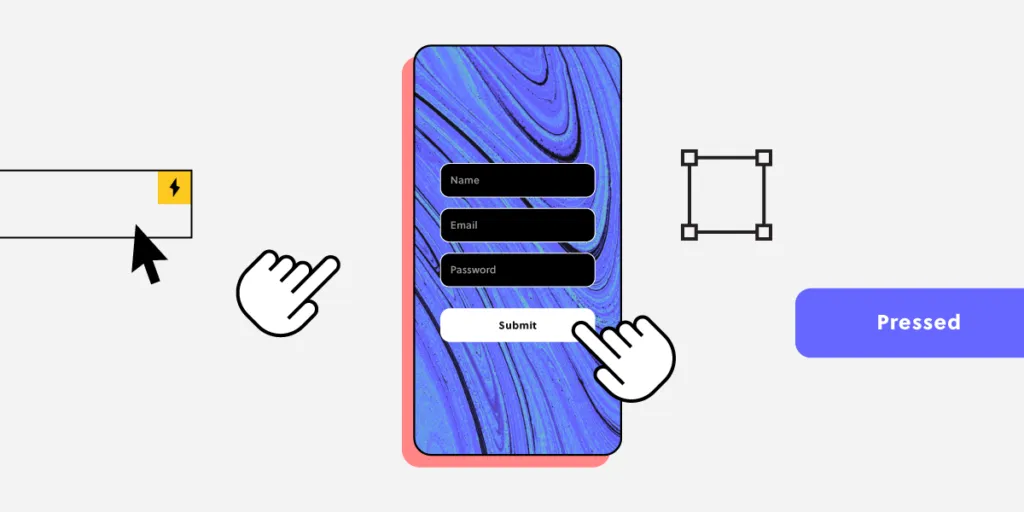
High-Fidelity Prototypes
Fully realized designs with real content, production visual styling, realistic interactions, and — in the case of code-based prototyping — actual functioning components. These prototypes are nearly indistinguishable from the finished product.
When to use: Final validation before development, executive sign-off, user acceptance testing, and design handoff to engineering.
Advantages: Most reliable test results because participants interact with realistic interfaces. Best for testing micro-interactions, complex flows, and edge cases.
Limitations: More time-consuming to build (unless using code-based tools). Can create attachment to specific solutions.
The guiding principle: Use the lowest fidelity that can reliably answer your current design question. Increase fidelity as the design matures and questions become more specific.
5 Types of Prototypes Used in UX Design
1. Paper Prototypes
Hand-drawn screens on paper or cards, used during early brainstorming and design thinking workshops. A facilitator simulates the system by swapping papers as the user “interacts” with drawn elements.
Best for: Rapid ideation, exploring multiple concepts quickly, inclusive workshops where not everyone uses digital tools.
2. Digital Wireframe Prototypes
Created in design tools using basic shapes, placeholder content, and linked screens. They represent the structural “skeleton” of an interface without visual design.
Best for: Testing layout, flow, and content hierarchy. Validating information architecture with users and stakeholders.
3. Interactive Mockup Prototypes
Visually polished prototypes with clickable hotspots, page transitions, and basic state changes. Built in design tools with prototype linking features.
Best for: Presenting to stakeholders, testing visual design decisions, and validating multi-step flows where visual context matters.
4. Code-Based Prototypes
Prototypes built from real production framework components (React, Vue, Angular) rather than static images or vector drawings. These prototypes function exactly like the final product — dropdowns open, forms validate, state changes persist.
Best for: Final validation, complex interaction testing, data-driven interfaces (dashboards, analytics, forms with conditional logic), and seamless development handoff.
UXPin Merge pioneered this category. Designers drag and drop production React components onto a canvas, configure props and states through a visual interface, and produce prototypes that are indistinguishable from the shipped product. Engineers receive designs built from components they already maintain — eliminating the translation gap that causes most design-to-development friction. Enterprise Merge customers report a 50% reduction in engineering time as a result.
5. AI-Generated Prototypes
A category that has matured significantly in 2026: AI tools that generate interactive prototypes from text prompts, sketches, or reference URLs.
UXPin Forge represents the most production-ready approach to AI prototyping. Unlike generic AI generators that produce pixel-based mockups, Forge builds layouts from your team’s actual component library. You can describe what you need (“Create a user settings page with profile info, notification preferences, and a connected accounts section”), upload a screenshot, or paste a reference URL — and Forge generates an interactive prototype built from your real production components. The output is exportable as production-ready JSX.
This approach is particularly powerful for early-stage prototyping: Forge handles the first 80% of layout generation, and designers use UXPin’s professional tools to refine the remaining 20% — responsive breakpoints, micro-interactions, edge-case states, and pixel-level polish. Teams report up to 8.6x faster design-to-prototype cycles with this workflow.
The Prototyping Process: Step by Step
Effective prototyping follows a structured process that connects research insights to design decisions to validated outcomes.
Step 1: Define What You Are Testing
Before building anything, articulate the specific questions the prototype needs to answer. Vague goals (“test the new design”) produce vague results. Specific goals (“Can users find and edit their notification preferences within 30 seconds?”) produce actionable insights.
Step 2: Choose the Right Fidelity
Match fidelity to the question. Testing whether users understand a new navigation structure? Low-to-medium fidelity is sufficient. Testing whether a complex multi-step form flow is intuitive? High fidelity is necessary.
Step 3: Build the Prototype
Focus on the flows and screens that address your testing goals. Don’t build every screen — only the ones participants will encounter. Use realistic content rather than “Lorem ipsum” so users can make meaningful decisions.
Step 4: Test with Real Users
Recruit 5–8 participants who represent your target audience. Use task-based scenarios: give users a goal and observe how they attempt to achieve it. Record sessions (with consent) for later analysis. Use think-aloud protocol to understand users’ reasoning.
Step 5: Analyze and Prioritize Findings
Categorize findings by severity: critical issues (users cannot complete the task), major issues (users complete with significant difficulty), and minor issues (users complete but express confusion). Prioritize fixes by severity × frequency.
Step 6: Iterate and Retest
Apply fixes, rebuild the relevant prototype sections, and test again with a new set of participants. Repeat until critical issues are resolved and the design meets its success criteria.
What Makes an Effective Prototype?
Not all prototypes are equally useful. The most effective ones share these qualities:
- Focused: Tests specific hypotheses rather than attempting to demonstrate the entire product.
- Realistic enough: Contains sufficient fidelity to produce reliable behavioral data from test participants.
- Disposable: The team is willing to throw it away and rebuild based on findings.
- Collaborative: Built and reviewed with input from designers, engineers, product managers, and users.
- Connected to production: The closer a prototype is to production code and components, the smaller the gap between validated design and shipped product.
Prototyping Tools in 2026: What to Look For
The prototyping tool landscape has evolved significantly. Here are the key capabilities to evaluate:
- Code-backed components: Can you design with real production components, or only with static vector shapes? Code-backed prototypes produce better test data and eliminate the design-to-development translation gap.
- AI-assisted generation: Can the tool generate starting layouts from prompts, screenshots, or URLs? This accelerates early exploration dramatically.
- Interaction fidelity: Can you prototype complex interactions — conditional logic, state management, variable-driven content — or only simple click-through flows?
- Design system integration: Does the tool sync with your team’s component library, ensuring every prototype uses up-to-date components?
- Collaboration and sharing: Can stakeholders interact with prototypes via a shared link?
- Export to code: Can the tool export clean, production-ready code (JSX, HTML/CSS) that engineers can use directly?
UXPin is the only platform where AI generation (Forge), professional design tools, and production code output (Merge) all work from the same source of truth — your actual component library. Whether you start with an AI-generated layout or build from scratch, the output is built from real components with real props, real states, and real interactions.
Popular component libraries available through UXPin Merge include MUI (Material UI), shadcn/ui, Bootstrap, and Ant Design. Teams can also sync their own proprietary component library via Git integration or the Merge CLI tool.
Getting Started with Prototyping
If you are new to prototyping — or looking to level up your practice — here is a practical starting path:
- Start with paper. Sketch 3 different approaches on paper before opening any tool. Test the concepts with a colleague by walking through the flow.
- Move to interactive wireframes. Take the strongest concept and build a clickable wireframe. Test it with 5 users using task-based scenarios.
- Increase fidelity with real components. Use UXPin Merge to rebuild the validated flow using production components. Test again — the realistic fidelity will surface interaction-level issues that wireframes missed.
- Let AI accelerate the process. Try starting with UXPin Forge. Describe the interface you need, let Forge generate the first draft from your component library, then refine and test.
- Handoff with confidence. Because the prototype is built from real code components, engineers receive a design that uses the same elements they deploy — no ambiguity, no interpretation gap.
Start a free UXPin trial and build your first code-backed prototype in minutes.
Frequently Asked Questions About Prototypes
What is a prototype in UX design?
A prototype in UX design is an early, interactive representation of a product used to test and validate design decisions before full-scale development. Prototypes range from hand-drawn paper sketches to fully interactive digital simulations built with real production code components. They help teams gather user feedback, identify usability issues, and reduce the cost of design changes.
What are the different types of prototypes?
The main types are: paper prototypes (hand-drawn sketches for early ideation), digital wireframe prototypes (basic interactive wireframes for testing layout and flow), interactive mockup prototypes (visually polished designs with clickable elements), code-based prototypes (built with real production framework components for maximum fidelity), and AI-generated prototypes (created from text prompts or reference images using tools like UXPin Forge).
What is the difference between low-fidelity and high-fidelity prototypes?
Low-fidelity prototypes use simple shapes, placeholder content, and basic layouts to test broad concepts and information architecture. They are fast to create and ideal for early exploration. High-fidelity prototypes include polished visual design, realistic content, and interactive elements that closely mimic the final product. They produce more reliable test results but take longer to build — unless you use code-based tools like UXPin Merge that accelerate high-fidelity prototyping.
Why is prototyping important in the design process?
Prototyping lets teams validate ideas with real users before committing expensive engineering resources. It catches usability issues early (when they are cheap to fix), facilitates stakeholder alignment, and reduces the risk of building products that don’t meet user needs. Teams that skip prototyping typically spend 3–5x more on post-development redesign.
What is code-based prototyping?
Code-based prototyping creates prototypes using real production code components (React, Vue, Angular) rather than static images or vector shapes. Tools like UXPin Merge let designers drag and drop production components onto a canvas, producing prototypes that function identically to the shipped product. This eliminates the design-to-development gap and produces the most reliable usability test results.
How many times should you prototype before starting development?
Most UX practitioners recommend 3–5 prototyping and testing rounds per major feature, depending on complexity. Start with low-fidelity for concept validation, increase fidelity as the design matures, and continue until critical usability issues are resolved. The goal is validated confidence before committing engineering time — not perfection.


