7 Advanced Prototyping Features That Help You Build Better Prototypes
The quality and fidelity of your prototypes can significantly impact the design process and the final product. With advanced prototypes (that look and function like the final product), UX designers can get better results from usability testing and fix any issues before they get to the design handoff.
The problem? Most leading vector-based design tools don’t have the fidelity or functionality for designing prototypes that can accurately mimic the final product.
With the advent of code-based design tools, designers now have the ability to build advanced prototypes that look and function like the final product.
This article explores seven advanced prototyping features offered by code-based design tools and how they help designers build better prototypes for testing and sharing with stakeholders.
UXPin is leading the code-based design revolution. Sign up for a 14-day free trial and discover how advanced prototyping with UXPin can help you build better user experiences for your customers.

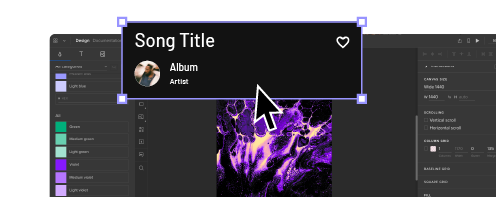
Auto Layout
Auto Layout is a helpful feature for designers to distribute, size, and align elements fast. Designers can make significant changes to a user interface layout simply by changing a few auto-layout properties.
Most design tools offer auto-layout, but with UXPin’s code-based tool, it’s a little more advanced.
UXPin’s Auto Layout works on Flexbox properties and principles – which means designers and developers speak the same language. This cohesion is most beneficial for design handoffs because engineers can simply copy/paste the CSS from UXPin as a starting point for development.
UXPin’s Auto Layout has five properties:
- Direction: Set whether you want to order the auto-layout frame: vertically or horizontally.
- Distribute: Choose different distributions of elements to set how you want them laid out along the cross axis.
- Gap: You can set a fixed spacing between elements in the group with Auto Layout.
- Wrap: Wrap the elements depending on the groups’ width or height.
- Align: Align the elements along the main axis (defined by direction: vertical or horizontal) in the container.
Additionally, you can change other properties to the auto-layout group, including fill, border, padding, radius, and size. Designers can use Auto Layout for a single component or groups of components and elements.
UXPin Merge
UXPin’s proprietary Merge technology is revolutionizing UX design workflows while solving many DesignOps challenges. Merge allows designers to build products and interfaces using fully functioning code components hosted in a repository.
This exciting technology means that designers can build prototypes with the same components used in the final product. They can also change the component’s properties to match the new design.
You have two options for connecting Merge:
- Git integration for React components.
- Storybook integration for several other technologies, including Vue, Angular, Web Components, Ember, and more.
Any changes engineers make to code components in the repo will automatically sync to UXPin’s design editor. Designers also get a notification informing them of the new update–perfect for syncing the entire organization’s design system for a single source of truth!
Learn more about UXPin Merge and how you can request access.
Component-Driven Prototyping
Designers can create reusable components to save time and maintain consistency. You can also save components in your design system so that the entire organization can access the same parts.
UXPin Components comprise of two aspects:
- Master Component: Defines the component’s properties.
- Instance Component: Copies that mirror the Master.
Any changes you make to the Master will automatically sync to all of its Instances. Designers can override Instances if necessary. For example, you might want to change the background color for several Instances in a grid. You can also reset your overrides to revert to the Master.
If you make any changes to a Master Component, UXPin will display a notification in the Properties panel saying This Component is out of sync. The same message will appear if someone else in your organization has adjusted a design system component. UXPin gives you the option to push or pull component changes accordingly.
If you don’t want team members making changes to your design system, you can set Permissions in the Design System’s Dashboard.
UI States
States allow you to set different properties for an element or component based on user or system triggers. For example, a single button can have default, hover, active, and disables states, much like they would in the final product.
Your Base State is the element or component’s default. If you make changes to a Base State, UXPin will only adjust the properties common to all states–allowing you to make changes without updating each state individually. You can also Reset all changes to revert to the Base.
States are also useful for designing complex components like drop-down menus, accordions, carousels, and navigation, thus increasing the fidelity and functionality of your prototypes.
Variables
With vector-based prototypes, data input and validation are simply not possible. Participants and stakeholders have to “imagine” that they’ve entered their details in a signup form, or designers have to build a personalized prototype.
UXPin’s Variables allows you to capture user inputs and take actions using that information. For example, you can simulate an onboarding flow by capturing the user’s name and then using it for a personalized welcome on the next screen or display the details on their profile page.
With UXPin’s Variables, designers can create a dynamic, customized, immersive experience that changes depending on the user. Something vector-based design tools cannot do!
Expressions
Take your prototyping one step closer to a coded product using UXPin’s Expressions. This powerful feature lets you create Javascript-like programming, including form/password validation, updating a shopping cart, or modifying the text from a user input.
A great example is validating an email address. If the input doesn’t include the @ symbol, the prototype can display an error message telling the user to type a valid email address.
Designers can also use Expressions to create an authentic eCommerce checkout experience where the user can update their cart and calculate the actual value at checkout. If they delete something, the product will disappear, and the total will update accordingly. You can even capture their payment information and display it on the confirmation page before confirming the order!
Using Real Data
Another time-saving UXPin feature is the ability to use real data inside your prototypes. You can use your own data from JSON, CSV, or Google Sheets or use UXPin’s Fill with Data feature to populate fields with relevant dummy content and Unsplash images.
Google Sheets is probably the quickest and easiest way to get your own data into UXPin. Make sure your column heading matches the layer name, and UXPin will automatically populate the relevant fields. If you make changes to your data (JSON, CSV, or Google Sheets), you can Refresh Data, so the layers repopulate–extremely helpful for making quick changes during usability testing or presenting to stakeholders.
BONUS – Design Systems
As a bonus, we thought we’d give you a quick intro to UXPin’s Design Systems. You can create a design system from scratch or use one of several built-in design libraries to start building prototypes straight away.
Design systems (including those from Merge) appear in UXPin’s left navigation so designers can drag and drop the components they need to build prototypes. With a good design system, you can go from concept to high-fidelity prototype in no time at all!
The Importance of Advanced Prototyping
Building advanced prototypes is vital for designers to conduct quality tests to solve usability issues. Image-based design tools don’t offer the fidelity or functionality UX teams need to provide usability participants with prototypes that mirror the final product experience.
The problem with these prototypes is that many usability issues end up in the final product resulting in costly errors and delays–often causing tension between designers and developers who don’t fully understand each other’s constraints.
Image-based design accentuates UX, product, and engineering silos because each team is working to overcome different challenges.
UXPin’s code-based editor renders HTML, CSS, and Javascript, which means designers work with advanced prototypes in a language engineers understand! Design handoffs run smoother because developers can visualize what the prototype is supposed to do, and they can copy/paste starter code to begin building the final product.
Summary
UX designers design code-based products, but they use vector-based tools for prototyping and testing. Without the same fidelity and functionality, how can you expect to achieve accurate testing?
Advanced prototyping starts with using the right tool for the job. Most leading design tools are excellent at designing vector graphics, but they’re poor at prototyping and meaningful usability testing.
With UXPin, designers can build fully functioning prototypes that accurately test the user experience and solve issues vector-based tools can’t.
Ready to experience advanced prototyping with UXPin? Sign up for a free trial and install one of our free App Examples that introduce designers to UXPin’s advanced prototyping features.