Julia is a UX Writer at UXPin. She loves the intersection of language and design. Her background spans UX copywriting, technical documentation, and content strategy. Empathy is key to her work, not just for the user but for all involved.
After months of hard work, we’re back with a fresh batch of new updates to UXPin. With this release, we’ve been focusing on performance improvements across the app – faster loading time for both images and the text element. In a nutshell, here’s what has changed over the last months.
Images now load 50% faster
Images now load faster than ever! When you open an image-rich prototype in UXPin on preview, you’ll see a significant change in its loading time. The graph below says it all – the loading time of image-rich designs is now 50% faster than before.
Faster loading time for text elements
From the ground up, we have completely rewritten the way text elements render in UXPin. That in turn results in a huge performance boost. You’ll see the difference in the loading time of text elements, boxes, and buttons on preview as well as in the editor. The loading time is 50% faster than before!
We’re happy to let you know that we’re hosting a free webinar “Scale design efficiently with DesignOps2.0” with a guest speaker: Erica Rider from PayPal’s internal developer tools team on Oct 29th, 2020 at 10:00 PDT.
During the webinar, Erica will share some DesignOps best practices and explain how to smoothly transform your design processes, remove UX bottlenecks, and empower product teams with an end-to-end product development lifecycle.
Apart you’ll learn how to:
Transform your organization from a development-driven organization to a design-driven one.
Optimize your design processes and facilitate design quality through smooth processes.
Connect design and operations by sharing and expanding design intelligence.
Do you want to find out how to simulate millions of virtual users that interact with a site from different locations on a single screen? You can get behind the scenes and discover all the insights about it in our recently published success story from Nitzan Ron of BlazeMeter.
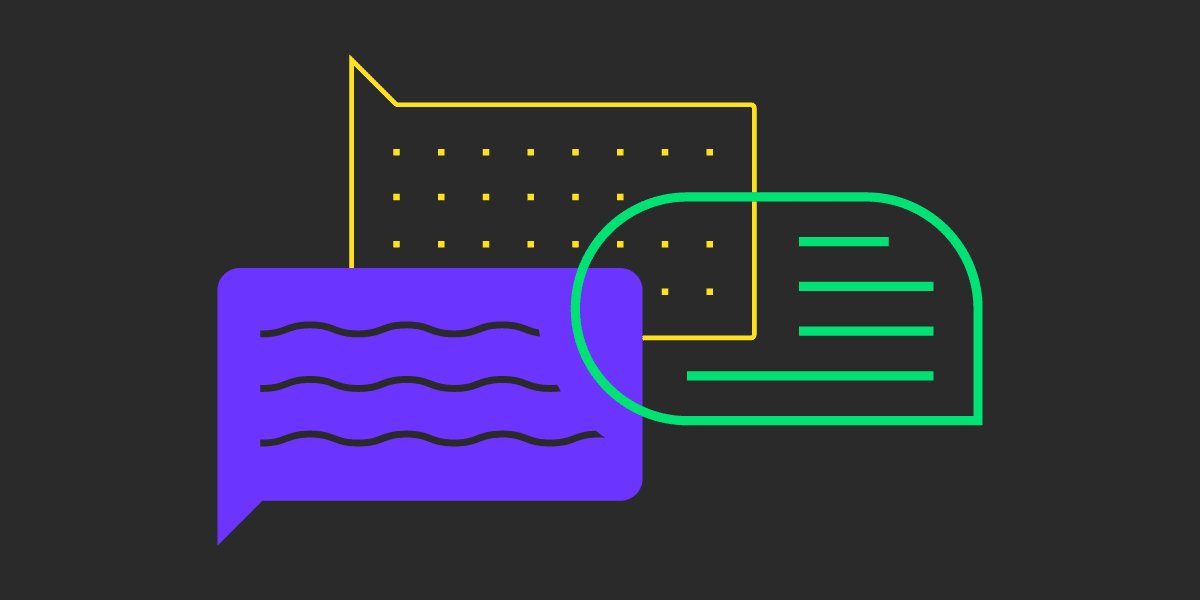
Ron recalls having tested numerous solutions, from dynamic pie charts to vertical charts – none of them were good enough for what he intended to design in the first place. He wanted to present the concept of statuses with waves – moving, dynamic, and changing all the time in a non-linear way. Guess what? UXPin turned out to be the perfect solution to prototype such a concept! He achieved the desired effect with only two features, states, and interactions, on a single page without the need to duplicate each wave numerous times. The final outcome created a really unprecedented “wow” effect – read all about it now!
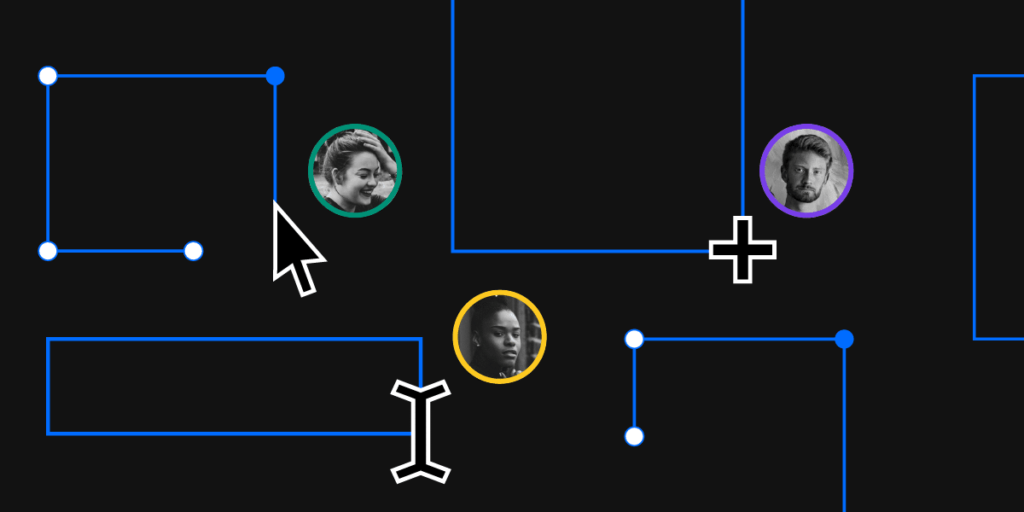
We have lived to see design teams transform from a few designers working in the corner of the open space to large cross-functional teams that collaborate with business, stakeholders, and development. Today, designers work with people from many departments, on all sorts of levels, in different timezones – sometimes even people from outside the company. How does one manage such a diverse team that needs to work towards a common goal?
In a recent interview Bree Walter, Senior UX Designer at H&R Block talks about her experience with cross-functional teams and how she manages their work using UXPin. So if you’re a Product Owner or a Product Manager, we know how much you value seamless collaboration – not only for designers but everyone involved.
One of the key differences between UXPin and other design tools is that UXPin offers a few features that allow you to connect the worlds of design, business, and development, and make it easier for everyone to stay on the same page.
Gather feedback from anyone, no sign-in required
Unlike other design tools on the market, such as InVision (see UXPin vs InVision comparison), comments in UXPin let you gather feedback right at the spot from anyone even if they don’t have an account.
This is perfect if you need to invite additional members of the team to contribute to the project or have someone suddenly jump on it and share their opinion. It’s a win-win for both.
Reviewers don’t have to create an account just to leave a comment, and you don’t have to request an additional seat so that they can contribute. You only need to share the preview link with them and you start having an open discussion about the design.
Share your life-like prototype with the stakeholders or potential users of your product so that they can click through the prototype. This way you gather feedback on early stages and can iterate before the coding even begins.
How about this awesome Guess Game by Alexander Olssen from the video above? Wanna play too? Here’s his UXPin design preview. Simply click through and you’ll get the idea and the feel of what the game would work like if it was an actual product. (PS. The comments were turned off for this specific prototype because you don’t have to grant everyone access to comment on your design previews.)
Keep feedback in one place
This way, all feedback is kept in one place. It doesn’t get lost in Slack conversations, emails or multiple versions of the same design files passed around by designers, where nobody knows what is final because there are endless non-final final versions of a single file.
Share documentation and specs with developers
UXPin goes way beyond the possibility of just leaving comments with no sign-in. It also makes the designer-developer collaboration feel like a breeze. The same preview link that you’ll use to get others to comment also includes all information about the designs that your dev team needs to translate layers into code.
UXPin’s Spec mode is like an open book to everyone. Thanks to it, designers can keep creating and developers can have access to any information they need to implement the project. Any changes update right away so you don’t have to worry about updating it.
Ready to change how you work?
Creating products with great user experience requires coordination and perfect alignment across the entire team. UXPin really supercharges complex teams to move faster, make better decisions by quickly exchanging feedback, and master the art of dynamic teaming. Sign up for UXPin 14-day free trial to check all the collaboration features with your cross-functional team now.
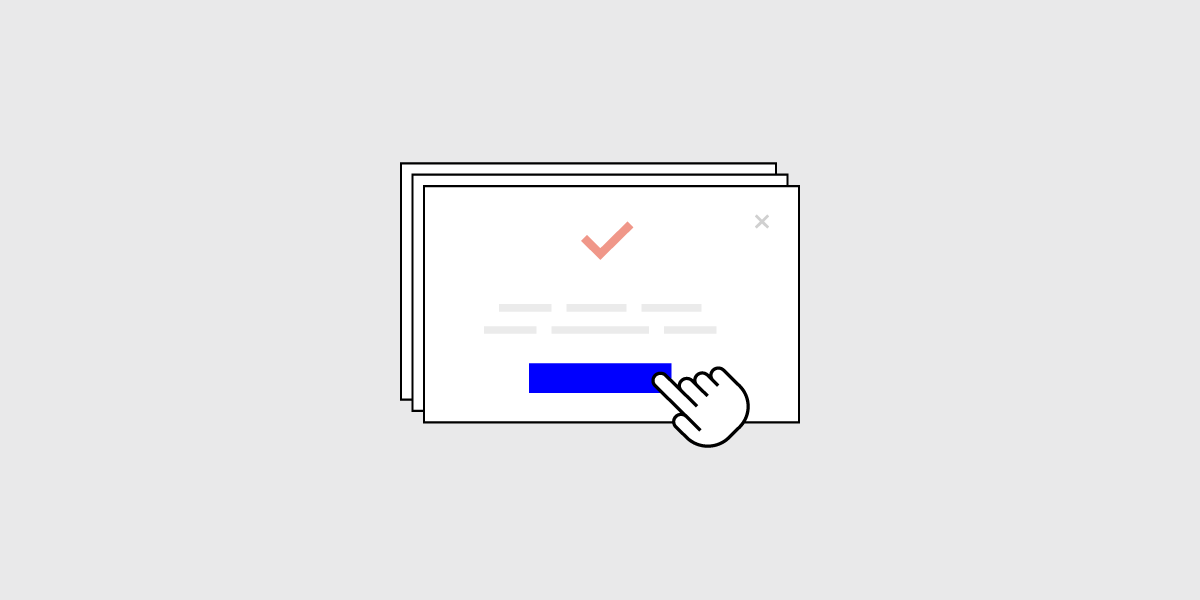
Pop-ups are one of the most popular design patterns. That’s why we’ve put together some examples of pop-ups done right and backed them up with tutorials on how to create them in UXPin.
The whole idea behind cookie consents
When sites remember your login details, preferences, or store your shopping cart items for later, that’s all thanks to web cookies. Cookie consents are probably one of the most popular and obvious pop-ups. Still, when designing them, you need to provide a great user experience and ensure users’ privacy at the same time.
What’s really required in the cookie policy messaging
Copy approaches to writing a cookie consent can be very different and may vary widely. However, at minimum, the consent should address:
What you use cookies for,
What do they give,
How your users can manage them.
Selected examples of cookie consent banners done right
The vast majority of websites display the cookie consent at the bottom of the viewport. It can be displayed as the footer or simply in the bottom-right or bottom-left corner. Let’s take a look at some websites that have done it right.
Squarespace’s cookie consent is not intrusive, yet remains visible at the bottom of the screen as the user scrolls the page. It informs you of the privacy and cookie policy and what you consent to by continuing to use the site.
Another way is to display the cookie consent in the corner of the screen. The example from FullStory is a more prominent one. It is a fixed dialog in the bottom left corner of the viewport that stays in that place until you interact with it.
How to create a cookie banner in UXPin
You can create this kind of a pop-up in UXPin in minutes by using just a few elements, such as a Box, a Text element, and Buttons. If you want to know how to recreate it step by step, read our tutorial on How to Create a Cookie Consent Pop-Up.
On-scroll pop-up window
Instead of welcoming your site visitors with a newsletter sign-in pop-up right away, you may want to take a slightly subtle approach. You can display it only when it is relevant to the content and on a scroll, just like Curate Labs did.
How to build an on-scroll pop up in UXPin
To prototype an on-scroll pop up in UXPin, you’ll need to build an interaction that displays the pop up when the page is scrolled to a specified position. Watch the video below to see how to recreate it step-by-step or follow our tutorial.
At its heart, UXPin is a design andprototyping tool that takes your designs to the next level by giving them that “real product” feel thanks to many, many features – from real inputs and data to interactions and variables.
Bridging the worlds of design and development, UXPin also brings out to the best of both with collaboration for everyone. Over the last months, we have showered you with a host of product updates. Behind the scenes, we’ve been working hard to improve performance. In case you missed any of our updates, here’s everything that we shipped between UXPin 2.1 on December 10, 2019, and UXPin 2.5 on May 19, 2020, in a nutshell.
We always listen to what you say
We always listen super carefully to what you say, taking every opportunity to make UXPin better. Over the last months, we have added many frequently requested features and more – and that makes us super proud!
Set different canvas sizes
Along with UXPin 2.5 came what we call Different Page Sizes. It’s the ability to set different canvas sizes for each Page separately within one Prototype. Before that, all Pages would always share the same size. Since we still receive some questions from you about it, we thought this tutorial would be of extra help.
Comments in editor
Comments in the Editor were among other frequently requested features. Ever since we enabled it, giving and replying to feedback to the design while working on it is such a no brainer.
Undo deleted pages
Without a doubt, undoing deleted pages (just like you do it with emails in your Gmail inbox), was something you often asked for. So we made it possible to recover deleted pages seconds after you remove them.
File import
Sharing designs between accounts has never been faster. The file import allows you to save your prototype as a .uxp file, share it with anyone who can import it back and open it inside UXPin – even if you don’t share the same account.
Color labels for pages
Color labels for Layers that came with UXPin 2.0 turned out to be so helpful that we went the extra mile and enabled the same for Pages. Right-click on any page in the Pages panel and choose a color label for it.
Elastic boxes and buttons
Boxes and Buttons expand as you type into them, making last-minute copy updates a breeze. Just uncheck the Fixed Width and Height option in the Properties Panel.
Selecting elements made easy
We’ve made it easier to select locked elements, elements that overlap or are hidden under one another.
Get griddy with grids
With the introduction of New Grids, you have three different types of grids to choose from: column, baseline, and square. New Grids we also something we have tested inside and out internally before we gave it to more hands.
Jump between recent prototypes
To jump between recently opened prototypes, just click the down arrow in the top left corner of the Editor and choose the one you want to go to. It’s just much less clicking!
Color picker
Making the Color Picker faster and more intuitive took us a lot of work at the beginning of 2020, but the feedback we got from you proved that every hour of our work was really worth it!
The Color Picker gives you instant access to up to twenty recently used colors. Each time you use a color, it gets saved at the bottom of the Color Picker. That’s also where you can switch between colors from any of your Design System Libraries.
Contrast checker
Along with the rebuilt Color Picker, came the built-in Contrast Checker to ensure your text reads easily. When you’re working with text, there will be two lines across the color picker. These are the dividing lines between colors that make the text on your design readable and those that don’t.
Spell check
Both in the browser and in the desktop app, UXPin’s spell-checking ensure your copy is free of any typos. It constantly checks your prototypes for any typos and allows you to fix them with a few clicks.
OS fonts in the browser
Speaking of fonts and text, we’ve brought all OS fonts to the Editor. Depending on your operating system, you’ll now see all of them in the Font picker under Local fonts.
One home for all your pages
We call it the Overview – a single place with a bird’s-eye view of all your pages that makes it so much easier to keep things nice and neat.
Editable SVGs
With the UXPin 2.5 release, we introduced editable SVG files. Quickly upload and edit the SVG files on your design. With this, you can upload and refine illustrations or icons without leaving the prototype to use a different tool.
Big and small nudge
With the Big and Small Nudge, it’s possible to configure how many pixels the element will move or resize when using the keyboard. Especially handy with the 8px grid.
Duplicate improvements
Such a small thing yet so powerful! When duplicating elements, UXPin will remember the last offset, saving you so much time down the road.
Input placeholders
Inputs act like the “real-deal” – no need for additional interactions or states to make the placeholder.
Thank you for being part of our Community on Spectrum for over a year. There wouldn’t be us if it wasn’t for you! We appreciate all the valuable insights and lots of energy that you have given us – it has allowed us to make UXPin better. The Spectrum Community has been a place where everyone learned from each other. We learned from you, and you learned from us. We are incredibly grateful for every message, piece of feedback, feature request, or even the smallest reported bug – these are the building blocks for improving UXPin. We were able to create lasting changes that benefit all of us.
Unfortunately, due to the changes in Spectrum, we are closing the UXPin Community on May 18th, 2020.
Why are we leaving Spectrum?
When we launched the Community over a year ago, anyone could sign up for Spectrum. However, along the way, Spectrum has changed its policy. Today, the only way to join the Community is with a Github account. We want our Community to be open to everyone, and Spectrum fails to meet these needs.
We are already on the lookout for a better place for our Community. In the meantime, you can still talk to us in our in-app chat or email us at ideas@uxpin.com to make feature requests, ask questions, and report issues. Also, we highly encourage you to join the UXPin Research Group to be in the loop. All members of this Group are updated about our upcoming features, can test them, and have an impact on how things work.
Thank you once again for being valuable members of our Community!
Just like the rest of the world, we also work remotely now, but that’s not stopping us from building new features and adding improvements. Before we release UXPin 2.5 to you, we want to shed light on some of the features that are about to roll out:
Comments in the Editor: New level of collaboration
We’re super excited to announce that Comments are coming to the editor! Over the last months, we’ve received plenty of requests to make this happen. You will soon be able to add comments and reply to feedback when working on your design.
Today, we’re coming back with another tour of some extra tips and tricks. So you might like to open up a fresh UXPin prototype and try them out or continue working on the current design you created yesterday.
Ignore snapping
When moving or resizing elements, you can ignore snapping by holding down the Cmd key on Mac and Ctrl on Windows.
To lock all layers in a group, just hold down Alt and click on the lock icon. To hide all layers, also hold down Alt and click on the eye icon – the layers will stay hidden even if you pull them outside the group.
To quickly rename a selected layer, use the Cmd R shortcut (Mac) and Ctrl R (Windows) and start typing. Press Tab to go one layer down and Shift and Tab to go one layer up.
There’s a faster way to change input values than typing – you can just drag the label to increase or decrease the value. Holding down Shift when dragging will change the input value by 10.
To collapse all groups in the Layers panel at once, use the Cmd Alt L shortcut (Mac) and Ctrl Alt L (Windows). This will close all groups in the layers panel.
To expand or collapse multiple groups at once, hold down Alt and hit the arrow next to the group’s name. This will open up or close absolutely everything within the chosen group.
Work from home, they said. It’s going to be great, they said. Love it or hate it, but remote work is more feasible now than ever. Since there is still a lot of stigma around working from home, we decided to show how UXPin helps master remote team collaboration. So fret not, designers who are new to it. This article explains how UXPin solves the most common problems when you’re thousands of miles away from each other.
I’d love to have a single tool for the entire design process
Well then, we have good news. UXPin is built for your entire product design workflow and goes even beyond that. You can use it for initial mockups, design, prototyping, approvals and developer hand-off. There’s no need to jump around various tools for each stage of the process – everything happens in one place.
I need to use my personal computer
We’ve been there, we’ve done that. When working from home, chances are you may need to use your personal computer. With UXPin, everything just works seamlessly in the browser and there’s no need to install, reinstall or update anything. You can run it on Chrome, Safari, and Mozilla Firefox. On top of that, UXPin is backed up by powerful engines to handle very large prototypes, we take performance seriously.
Someone needs to design, others need to review…
Of course, when there’s a team, there are different roles. Someone will need to make changes to the design while others need to review it. And you don’t want the permissions to overlap. In other words, a developer doesn’t need to have the same permissions as a designer. With UXPin’s User Management, you can give permissions and assign roles to those who need to stay in the loop-based exactly on their role.
How do I maintain design consistency with remote designers?
UXPin allows you to communicate your design across your team by sharing Libraries with Components, Colors, Assets or Text styles. Thanks to that, your team works faster and stays on the same page. You can create a button, turn it into a Component, and save it in your library so that your colleagues can start using it on other pages right away. Or, you can jump right into prototyping while your teammate adds new buttons on the canvas.
Any changes made to Components from a Shared Library can be pulled to or from the library and updated on the Pages where you’ve used your components. As you work together on one prototype, you’ll see your team avatars in the top bar and around the elements that are being edited by others.
I need to have my work saved but my internet connection is poor
We’ve been there, we’ve done that. There’s nothing more frustrating than a poor internet connection when you’re working remotely. Luckily, UXPin saves all your work in the cloud, even if your wi-fi isn’t as good as the office connection.
How can we iterate fast if we’re all in different places?
Any team, especially the one that works on releases, needs a proper versioning system to help make sense of it all. If you need the ability to say: “This is the final version that ships as 2.1”, UXPin’s iterations are your way to go.
You can share a link to any point in your prototype’s version history and evaluate design ideas while you’re still working on the final creation. Just save your design as an iteration, share a preview link with someone and go on with your work. When creating Iterations, you can also leave out any comments that are off the mark. To pick up at the point where you saved your design, just retrieve an iteration and take it from there.
We’re not in the same room for a meeting….
Obviously, remote work makes it impossible to just get up, walk across the office and have a chat with someone at their desk. That’s where Preview and Comments come handy. To show someone your design, just send them a link that stays up to date as you make changes.
With Comments, you can have a little team brainstorming session by allowing everyone to share their thoughts on the design in context. The thing with Comments is that once you start using them, you just don’t want to go back. They’re a great way to quickly collect feedback from anyone involved in the process, whether it’s a stakeholder who wants to leave an important note or a writer who wants to jump into the design and fix copy.
You can assign comments to different people or mention them in comments to keep everyone in the loop. Once you tweak your designs based on the collected feedback, you just resolve them with a single click.
How can I get approvals from remote stakeholders?
Poor approval processes can result in lost time and unnecessary frustration. We have good news, UXPin allows you to craft a perfectly streamlined approval flow. Just invite stakeholders to view, leave notes, and approve your designs – all in one place and even if they don’t have their own UXPin account.
I can’t sit down at one desk with my dev team…
Just because you’re working remotely doesn’t mean your hand-off process has to suffer. UXPin perfectly smoothens your design-development process so that developers can take care of the behind-the-scenes stuff that makes a product work. It’s got all it takes to turn beautifully designed interfaces to a real product with no additional hand-off tools because all your design specs are literally just a click away.
Another way to create a better line of communication between developers and designers is by creating documentation. You can leave notes so that developers know exactly what is what. Results? Less back and forth on Slack or via email.
Ok, I’m ready. Where do I start?
Getting UXPin and into UXPin is seamless and hassle-free. Remote work won’t stop you from achieving team-based goals. Our tool is available to everyone by simply signing up. Just click the banner below. If you want to explore what you can achieve – check out our tutorials on YouTube or our Docs section. Both of which will give you plenty to start with.
UXPin 2.4 comes with the .uxp file import! You can now save your prototypes as .uxp files and import them to UXPin. To open a file, simply drag and drop it onto your UXPin project dashboard where your other prototypes are.
The possibility to import and save .uxp files is especially useful when you want to share a design with others who don’t have access to the same UXPin account. See exactly how it works in UXPin Docs.
Discover our beautifully designed, ready-to-use examples that inspire, save your time, and accelerate your workflow. Just import them to UXPin and pick up from there!
UXPin 2.3 is here and it brings the new color picker, pages overview, and the possibility to spell check your text. We’ve also squashed over 100 improvements and fixes to make UXPin even better for you. Here’s what you can expect today, as well as what’s coming next.
Today we introduce our new color picker. It’s now a lot faster and more intuitive. It took a lot of work, but we’ve completely rebuilt it to make your workflow more efficient. To make it even better, we’ve already started working on a new eye-dropper tool!
The color picker gives you instant access to up to twenty recently used colors. Each time you use a color, it saves it at the very bottom of the picker. That’s also where you can switch between colors from your Design System Libraries if you have them. So for those that miss adding colors to your “favorites” with that little heart icon in the old picker, we recommend using Design System Libraries. They allow you to save your favorite colors and even share them with your team! You can read more in our Color Picker tutorial.
Built-in contrast checker
We equipped our color picker with a built-in contrast checker which makes it the only color picker on the market to have one. It evaluates the contrast between the text and the background on the fly to ensure your text reads easily. Each time you edit text on your design, you’ll notice two lines across the color picker. These are the dividing lines between text colors that are at least “AA” rated, and those that don’t meet these standards. Learn more in the Contrast Checker tutorial.
You know the drill… you’ve worked really hard to create that perfect UI only to have this one accidental typo spoil your work. To avoid such situations, with the 2.3 release, we enabled your browser’s spell-checking powers to mark any spelling errors on your design as you type. From now on, you can have your prototype constantly checked for any typos and fix them with a few clicks. See how it works on UXPin Docs.
The name pretty much explains itself. We’ve created a single place where you can have a bird’s-eye view of all your pages. This makes it so much easier to keep things nice and neat.
Check out all the improvements we shipped and the fixes we squashed with this release.
Editor
From now on, the recently used Design System Library will show faster and without the loading spinner.
We added new Rotate, Delete, Duplicate options to the element context menu and Zoom options to the canvas context menu.
Layers
You can now duplicate elements with Alt drag in the Layers panel.
To duplicate an element outside a Component, in the Layers panel hold down Alt and drag the element out.
Canvas
It is now possible to scroll the canvas in both directions at once.
The window now follows the cursor while scrolling, drawing Shapes or making a selection.
Components & States
New options for Components in the context menu: Edit Master, Push to Library, and Pull from Library. Plus, we renamed Deatch to Unlink.
Previously, setting a fixed position for an element in one Component Instance would influence it in other instances of that component. You can now change set the fixed position in one instance without influencing the rest.
We simplified the default state name to “Base”.
Interface
Toggling the UI with the Cmd \ shortcut works faster than before.
Fonts
FontAwesome is not available in the fonts picker.
You can now use Alt T to open the font picker for a selected text element.
Fixes
Elements
When duplicating selected elements with Alt drag, they were placed below the last selected element in the Layers panel. Now, they’re placed on top of the first selected element.
Fixed some bugs related to copy-pasting elements.
Components & States
We fixed a bug causing the possibility to create States for elements inside and outside a Component at the same time.
Pen tool
Fixed console error after pressing Delete while dragging a point in a path.
The bounding box of a shape was not rounded to full pixel when creating paths and combined shapes.
Preview
Multi-select padding wasn’t applied on Preview.
When switching between pages, the sitemap would sometimes become inactive.
Merge
Issues with pasting Code Components values, such as strings or arrays.
On the desktop app, a popup with an error showed when you tried to edit text elements that are Components.
Other
Gradients did not always apply properly.
Multiple mask fixes.
Custom fonts would not render properly when copying elements between prototypes.
Fixed issues with adding Design System Library permissions to selected users.
What’s next
See what’s coming up in the next release:
Importing .uxp files
Saving your prototypes as .uxp files will give you the possibility to import and open someone else’s design files and share your own work with others.
Editing SVG files
Uploading and editing SVG files will soon be possible in UXPin.
Comments in editor
You will soon be able to access comments in the editor.
We’re back with a roundup of new features, and we’re very excited about all that is yet to come this year. This release brings all-new grids, color labels for pages and access to your recent prototypes right from the editor. All topped off with over 100 fixes and improvements.
You now have three types of grids to choose from and apply in your projects: column, baseline, and square. Define the right structure, hierarchy, and rhythm in your design and take the guesswork out of many aspects of your design process. Get griddy with it! See how it works in Docs.
We know that until now switching between projects took far too many steps — open the Dashboard, go back to projects, open the project, choose the prototype, and so on. That’s why we’ve decided to make switching between prototypes easier and faster, by adding the possibility to access up to five recently opened prototypes. Just click on the down arrow in the top left corner of the Editor.
After introducing color labels for layers, we’ve pretty much been snowed under questions and requests to enable this feature for pages. And we did it! Right click on a page to get an option to add a color label. See more in Docs.
A number of improvements that make working with the font select smoother and easier.
We renamed the Fonts Management to Font Library.
You can now adjust the font size, line height, and letter spacing with shortcuts.
The text no longer blinks when switching fonts.
Shapes
Shapes, lines, and arrows that have Bézier curves or 2 points don’t have the radius option available.
Rectangles and rounded rectangles will have radius available for all edges.
On various zoom levels, Pen tool paths are always 1px.
Pages and Layers
You can now use emojis in page, prototype, and project names.
We’ve increased the time for undoing deleted pages from 10 to 20 seconds.
Duplicated pages appear below the last duplicated element.
Editor and more
The swipe gesture no longer exists the editor.
We’ve updated the names of a few interaction triggers and actions.
Fixed
Check out all the fixes we smashed this time:
Breakpoints
The “Open in New Tab” option for pages would always open the default breakpoint, instead of the active one.
Custom breakpoints were not visible in canvas properties.
Adding more than 8 breakpoints would make the Properties panel disappear from the viewport.
Elements
Enabling auto-size for Boxes displayed the wrong values in the padding inputs.
When zooming in, the zoom jumped from high level to very low too fast.
Sometimes applying gradients from the Design System Library would make Rectangles transparent.
Elements changed their position when pressing and releasing Alt during resize.
Elements did not align to the pixel grid after being copied or duplicated.
Drawing paths inside combined shapes was not possible.
Positions
Snapping to guides did not work for elements that were outside the canvas.
Elements did not align to the pixel grid when aligned to center.
Smart guides moved 1px when duplicating elements on zoom.
Editor
Disappearing bottom bar when switching to documentation mode.
You couldn’t drag elements on the canvas after drawing a path and adding an image without closing the editing mode.
Pinning the Sitemap to the right deselected pages.
Blinking Sitemap on resize.
We fixed issues that caused the app to crash.
What’s Next
See what’s coming up in the next release:
New Color Picker
We are still working on rewriting our Color Picker to make it faster and more intuitive.
Pages Overview
We’ve been working hard on a major update to our interface – the Pages Overview – thanks to which you will be able to access and view all your pages in one place.
Spell check
Soon enough we will give UXPin a spell-checking superpower for everything you type on your design.
OS default fonts in the browser
You will soon have access to all your default OS fonts in the browser.
UXPin 2.1 brings a whole list of awesome improvements (we’re not stopping after UXPin 2.0), from elastic boxes and buttons that expand as you type, to an easier way of selecting elements and undoing deleted pages. Discover everything that’s new and dive into the details of all other enhancements and fixes.
Boxes and buttons now expand as you type into them. Just uncheck the Fixed size option in the properties panel and you’re good to go! Apart from that, we’ve also enabled all text properties inside boxes and buttons. See how it works in Docs.
This has been one of the most frequently requested features. So we’re happy to finally say that you can now recover deleted pages seconds after you remove them.
If you have pages in your design that you don’t want to show on preview, just click the eye icon next to the page name. This makes them invisible on preview, excludes them from exports and the navigation. Learn more on Docs.
Selecting elements on the canvas is now easier. If you want to select a locked element on the canvas or elements that overlap or are hidden under one another, we’ve got you covered. Just right-click and choose Select Layer from the context menu to get down to every single layer that’s right under your cursor. Read more in the tutorial.
Improvements
You can now move elements to a position that’s not visible in your current viewport.
We’ve improved grid rendering on large zooms levels.
You can now set the weight of system fonts for Windows.
The top bar now displays up to 5 avatars in the Top bar when you’re working with the team on the same prototype.
We’ve improved the context menu for elements by grouping actions that are relevant and adding new ones.
We have removed unnecessary options from the canvas context menu.
Editing large projects would cause a performance drop.
Sometimes the Esc button would not deselect a currently selected Page.
From now on, the possibility to open the sitemap if you have only one page is blocked.
Groups in the Pages panel are now expanded when dragging a page into the group.
Fixed
The icon for removing the guide was stuck when clicking very close below the vertical guide and dragged it.
Disappearing canvas when switching between pages while editing the Master Component.
Pinning or unpinning the Pages and Layers panel did not remember the expanded or collapsed sitemap size.
Adding a new page from the context menu duplicated the content of the selected page.
The project switch button worked only when you clicked on the project’s name.
We’ve fixed the order of layers after duplicating at least 2 elements with Alt-drag.
Copy-pasting elements with Cmd/Ctrl C and Cmd/Ctrl V would place the copied element beneath the original element.
The properties panel disappeared when you edited some expressions.
Zen mode did not hide all panels.
Flip Vertically and Horizontally is now blocked in Component Instances.
Fonts added by users would not load on Chrome [Windows].
When moving guides with Cmd pressed, ignore snapping didn’t work.
The context menu in the layers panel did not close after the first click.
Adding a new page in a collapsed pages panel no longer enters the edit name mode.
Elements didn’t snap to guides after you zoomed in.
States for hidden elements in the Layers panel were not grayed out.
Depending on the browser, the collaborator’s initials inside team avatars were not centered properly.
What’s Next?
Here’s what you should be looking forward to in our upcoming releases:
Color Picker
We’re rebuilding our color picker by making it faster to use. You’ll know right away which colors are at least “AA” rated and which don’t meet accessibility standards. You’ll also have the option to switch between the list and grid view for colors from all accessible Design System Libraries.
Grids: Column, Baseline, and Square
We will soon be adding more grids to UXPin. Column Grids that are perfect for organizing elements into columns., Baseline Grids to give a flowing rhythm to the text in your design, and Square Grids where you can define the size of cells.
Recent prototypes
You’ll be able to view the list of your recent prototypes and switch between them from the top left corner of the editor.
Pages overview
An overview of all your pages will soon be available in UXPin. You’ll see a new icon at the top of the Pages Panel that will take you to a separate view with all pages from your current prototype.
We use cookies to improve performance and enhance your experience. By using our website you agree to our use of cookies in accordance with our cookie policy.