Want to streamline your UX process and align design with development? Combining Claude Opus 4.5 and UXPin Merge can help enterprise teams build scalable, consistent, and localized user experiences. This guide explains how these tools work together to simplify design workflows, reduce rework, and improve efficiency.
Key Takeaways:
- Claude Opus 4.5: AI-powered tool for generating user flows, UX copy, and localized content.
- UXPin Merge: Turns concepts into interactive prototypes using component-driven prototyping using production-ready components.
- Seamless Integration: Claude ideates, UXPin Merge executes – reducing design-to-development friction by up to 50%.
- US Localization: Tools ensure compliance with US-specific formats (e.g.,
$1,250.00,MM/DD/YYYY).
By leveraging this workflow, teams can deliver consistent, testable, and deployment-ready designs faster while maintaining alignment across design and engineering.
Let’s explore how to prepare your design system, integrate these tools, and create localized, interactive prototypes.
UXPin Merge AI: Smarter UI Generation That Follows Your Design System
sbb-itb-f6354c6
Preparing Your Design System and UXPin Merge Workspace
UXPin Merge Integration Methods: Git vs npm vs Storybook
Before you can fully integrate Claude Opus 4.5 into your workflow, it’s crucial to have a well-prepared design system and UXPin Merge workspace. A solid setup ensures smoother processes and fewer hurdles down the line.
Setting Up a Custom Design System for Enterprise Use
Building an enterprise-level design system starts with the basics. Begin by defining your foundation tokens – these include color palettes, typography, spacing, border radius, elevation, and breakpoints. These tokens act as the building blocks for everything else in your system. Next, create a component library with essentials like buttons, inputs, dropdowns, data tables, modals, date pickers, and forms. Each component should include documentation for states and usage guidelines.
Don’t forget to include patterns, templates, and accessibility standards early on. Follow WCAG 2.1 AA and Section 508 requirements from the start. For teams working on federal or government projects, Section 508 compliance isn’t optional – and retrofitting accessibility later can be costly. Ensure contrast ratios meet 4.5:1 for body text, add visible focus states to all interactive elements, and include proper ARIA attributes to support assistive technologies.
To keep your system organized, set up clear naming conventions, versioning rules, and a process for deprecating outdated assets. This ensures UXPin Merge always pulls from stable, production-ready components instead of unfinished branches that could disrupt prototypes.
Once your design system is well-structured and governed, you can integrate it with UXPin Merge for a seamless workflow.
Connecting Component Libraries to UXPin Merge
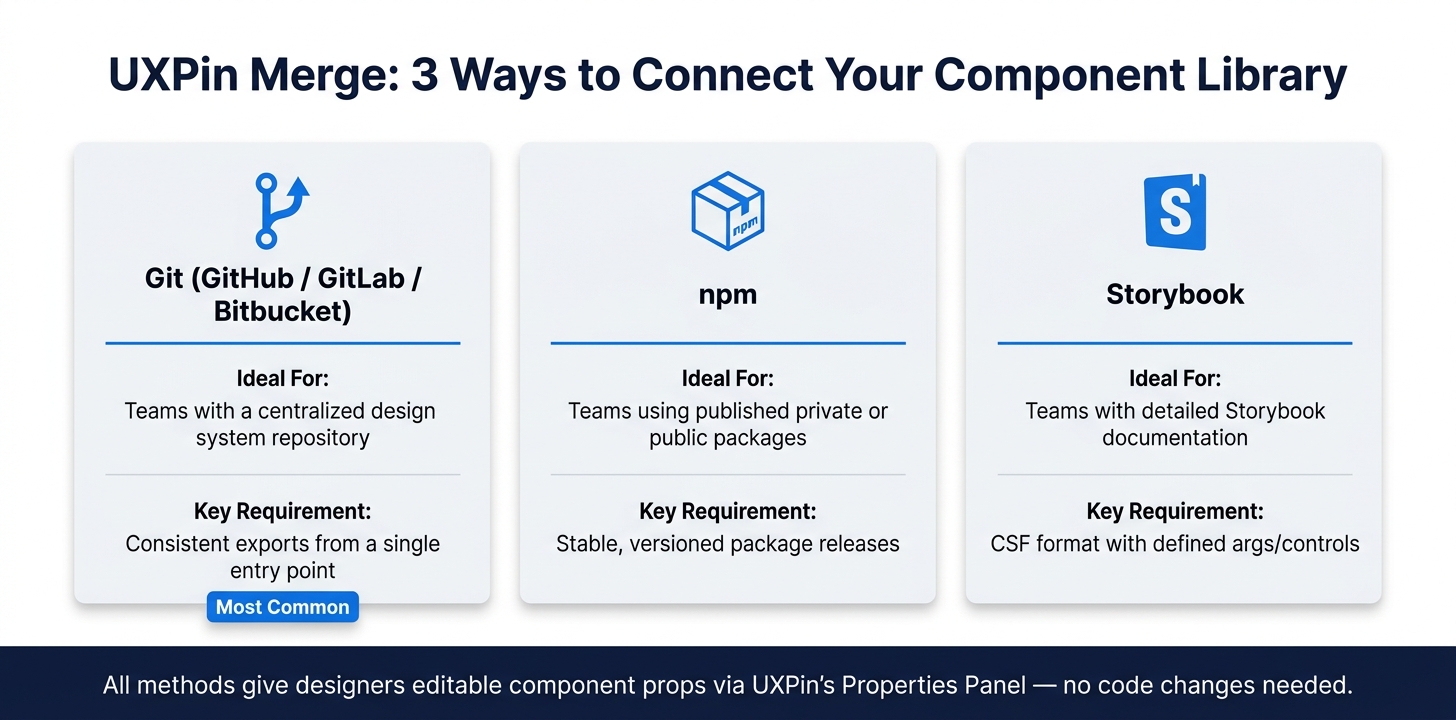
UXPin Merge offers three connection methods for your component library: Git integration (GitHub, GitLab, or Bitbucket), npm packages, or Storybook. The best option depends on your team’s existing setup.
| Integration Method | Ideal For | Key Requirement |
|---|---|---|
| Git (GitHub/GitLab/Bitbucket) | Teams with a centralized design system repository | Consistent exports from a single entry point |
| npm | Teams using published private or public packages | Stable, versioned package releases |
| Storybook | Teams with detailed Storybook documentation | CSF format with defined args/controls |
Once connected, UXPin automatically detects your component props and makes them editable through the Properties Panel. Designers can tweak variants using dropdowns, text inputs, and checkboxes without needing to modify code. To streamline this process, use clear and descriptive prop names, set defaults to reflect common use cases, and rely on a dedicated Merge branch with stable versions of your components to prevent issues when development branches are updated.
If your library uses context providers, such as a theme wrapper or internationalization provider, make sure to include wrapper components. These ensure that everything renders correctly within UXPin’s editor, maintaining consistency throughout your prototypes.
Configuring UXPin Design Tokens for US Localization
To localize your design system for the US, define tokens for currency, date, time, and measurement formats in UXPin’s Design System Libraries panel:
format.currency→$#,###.##(e.g., $1,250.00)format.dateShort→MM/DD/YYYY(e.g., 05/26/2026)format.dateTime→MM/DD/YYYY h:mm A(e.g., 05/26/2026 3:30 PM)unit.length.primary→in/ft/miunit.temperature.primary→°F
For typography, include tokens for tabular numbers and price displays to ensure financial figures like $1,299.00 align properly in data tables. Use identical token names in both UXPin and your codebase so that design specs and implementation remain consistent. According to the Sparkbox Design Systems Survey 2023, 69% of respondents already use design tokens to manage styles and themes.
To simplify your workflow, create a cheat sheet listing token names, components, and key properties (e.g., PrimaryButton, DataTable, DatePicker, FormField). This will help you map Claude’s outputs directly to the components in your Merge workspace.
Once your design system is localized and integrated, your workspace will be ready for Claude Opus 4.5 to elevate your UX architecture and streamline content creation.
Using Claude Opus 4.5 to Generate UX Architecture and Content
Claude Opus 4.5 acts as a reliable assistant for creating UX architecture and US-localized content.
Generating User Flows and Information Architecture
With your design system and design tokens in place, Claude Opus 4.5 can help structure your UX architecture efficiently.
This tool is particularly skilled at turning a basic product brief into a well-defined user journey. For instance, if you’re designing an enterprise procurement dashboard for purchase order approvals, Claude can produce a clear flow that includes screen states, decision points, and edge cases. Thanks to its 200,000-token context, it can incorporate extensive design documentation, ensuring it references your actual component names accurately.
For more intricate workflows, setting the effort level to xhigh can yield the best results. Typically, you can expect polished outputs within approximately four iterations. The generated flows integrate seamlessly with UXPin Merge, aligning perfectly with the components defined in your design tokens.
Writing UX Copy and Localized Content with Claude Opus 4.5
When it comes to UX copy, Claude Opus 4.5 can handle everything from button labels to error messages, tooltips, and onboarding text. It adheres to US formatting standards when explicitly instructed. For example, it won’t default to using MM/DD/YYYY dates or $1,250.00 currency formats unless you specify these details.
"Claude responds well to clear, explicit instructions. Being specific about your desired output can help enhance results." – Anthropic Claude API Docs
To ensure consistency, frame localization requirements as direct, positive commands. For example:
- Use "MM/DD/YYYY exclusively" rather than saying "don’t use European date formats."
- Specify "$0,000.00" for currency.
- Indicate "(000) 000-0000" for phone numbers.
This approach removes ambiguity and ensures uniformity across all screens and outputs.
How to Write Effective Prompts for Claude Opus 4.5
Crafting well-structured prompts is key to getting the most out of Claude Opus 4.5. The model follows instructions literally, as noted by Brian Andrus of DreamHost:
"Claude 4.5 takes you literally. If you ask for a dashboard, it might give you a blank frame with a title because you didn’t ask for the rest."
To refine your prompts, use XML tags like <context>, <instructions>, and <localization_standards>. Begin your prompt with comprehensive design documentation – research shows that placing context first can improve response quality by up to 30%. Follow this with your specific request, and include 3–5 examples of US-localized UX copy to establish the tone and format clearly. For enterprise dashboards, explicitly request "professional US English" and "system sans-serif typography" to ensure the output aligns with a clean, data-focused design.
These outputs can be directly integrated into UXPin Merge prototypes, bridging the gap between design and development seamlessly.
Turning Claude Opus 4.5 Output into UXPin Merge Prototypes
After creating a structured design system, the next task is transforming Claude Opus 4.5’s detailed output into interactive prototypes. Once Claude generates UX specs – like screen lists, component hierarchies, content, and interaction rules – UXPin Merge and its AI assistant, Forge, step in to bring these to life.
Using Forge to Build Layouts from Claude’s Specifications
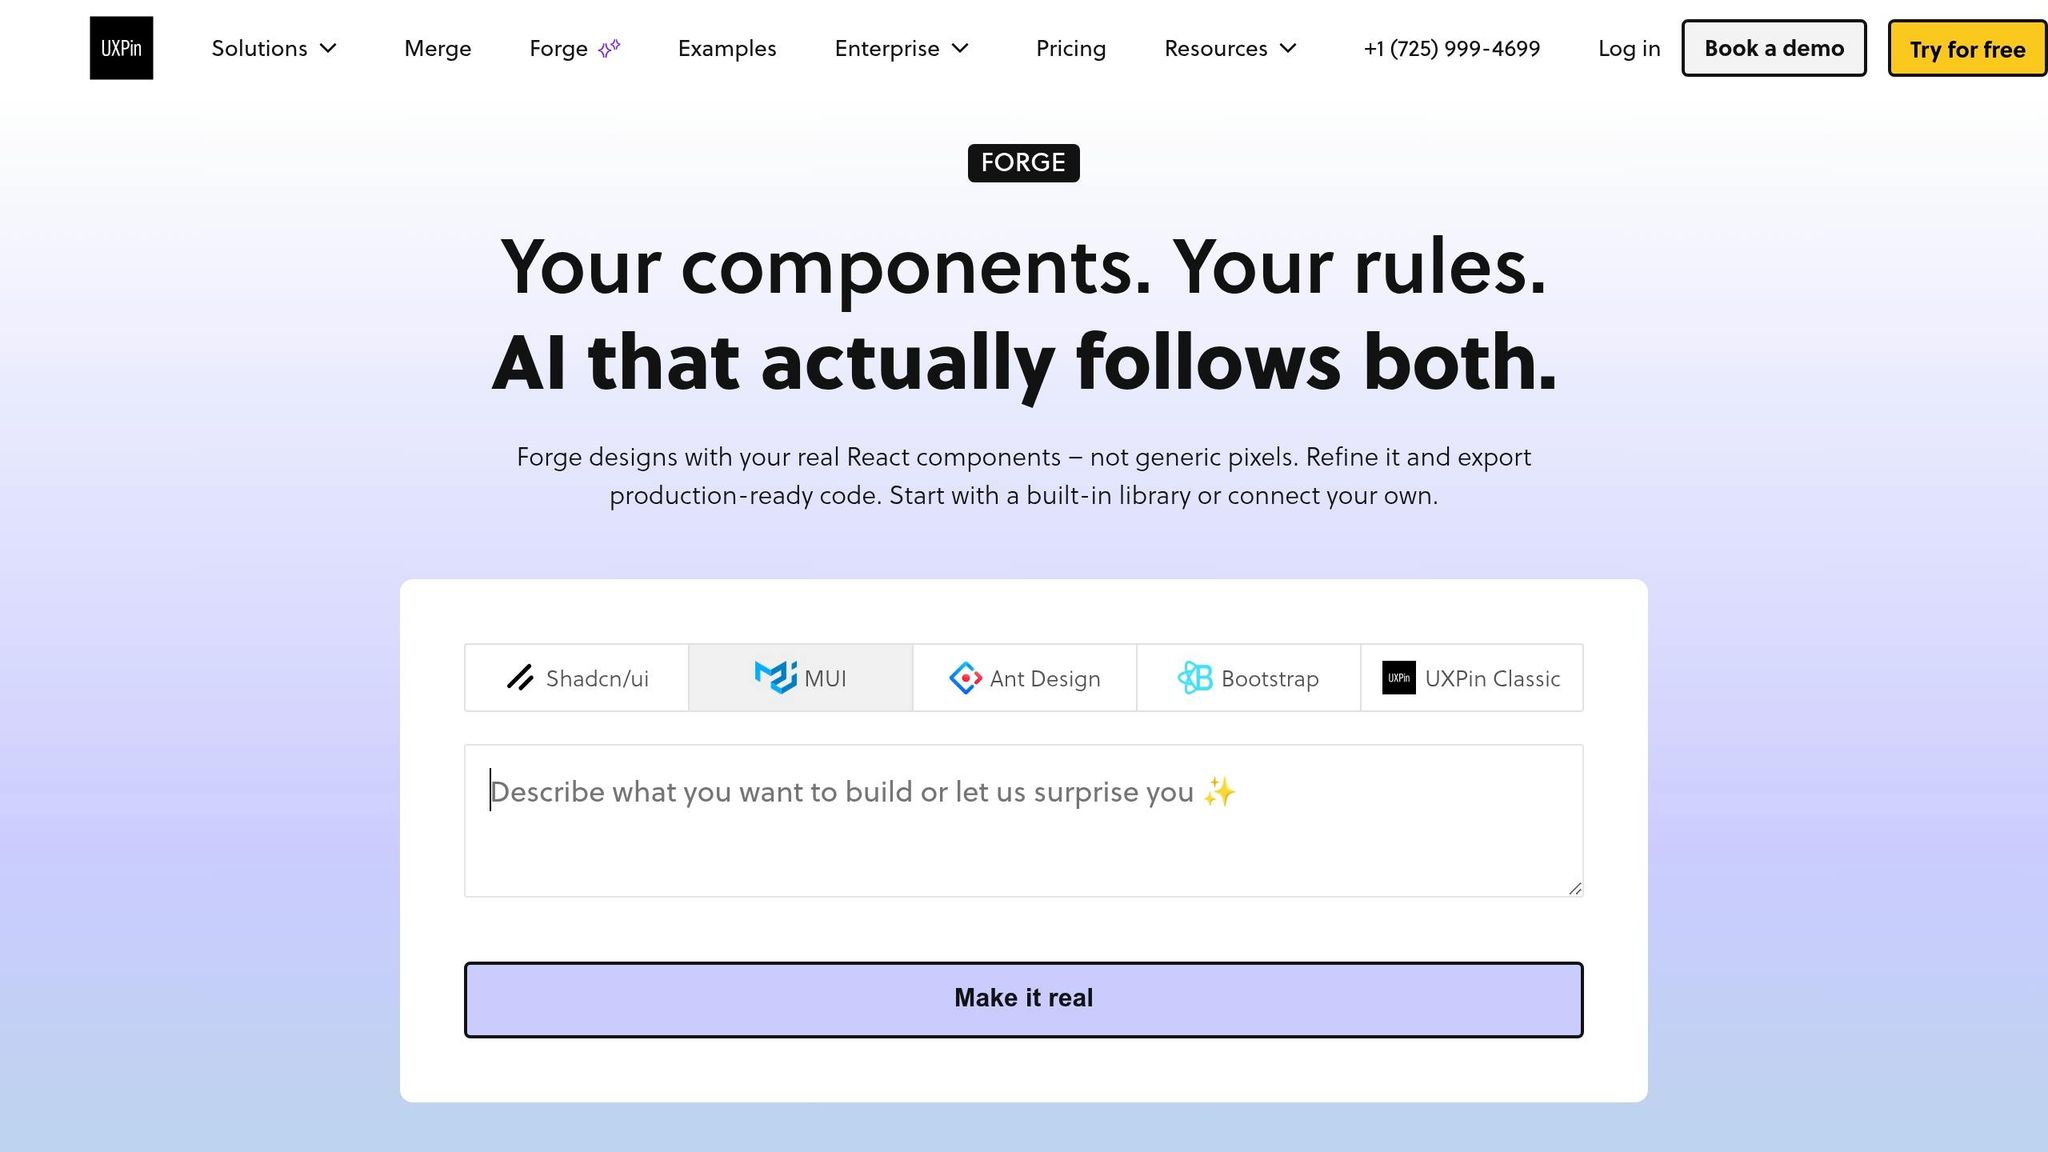
Forge thrives on structured input, so it’s essential to guide Claude in organizing specs by page, section, and component. Make sure to include details like component name, variant, and key properties (e.g., label text, placeholder, default state). For instance, a procurement dashboard spec might look like this: "Page: PO Approval – Section: Header – Component: PrimaryButton, variant: default, label: ‘Approve Order.’"
Once you have this structured output, paste the screen description into Forge’s prompt box and select your connected Merge component library. Forge will then generate a layout using production-ready components. Afterward, review each element’s properties to fine-tune variants, spacing, or component selections. The prototype stays synced with production components, so any updates from your engineering team automatically reflect in the design.
Adjusting Components for US-Specific Requirements
While Forge builds layouts based on Claude’s specs, you’ll need to ensure components meet US-specific standards. After generating the prototype, go through each relevant component in UXPin to configure its properties:
- Currency: Set
currency="USD"andlocale="en-US"for price labels and cart summaries. Confirm values display correctly, like$1,249.00(comma for thousands, period for decimals). - Date pickers: Use
format="MM/DD/YYYY"and update helper text to something like "Use MM/DD/YYYY format, e.g., 09/30/2026." - Address fields: Replace generic labels with US-specific ones, such as "ZIP code", "State", and "Street address, Apt/Suite."
- Measurement inputs: Add unit suffixes in labels or helper text, like "Weight (lb)" or "Height (ft/in)."
Wherever possible, tie these configurations to design tokens (e.g., token.currencySymbol.us, token.dateFormat.us). This approach ensures that a single token update can apply changes across all screens, saving time and effort if localization requirements evolve.
Adding Conditional Logic to Simulate Realistic UX Flows
Once the components are localized, you can enhance the prototype by adding dynamic interactions. Claude Opus 4.5 often includes interaction rules, such as "If the user selects annual billing, display price per month and total per year" or "If the ZIP code doesn’t match a 5-digit US pattern, show an inline error." UXPin’s variables and conditional interactions make it possible to bring these rules to life.
Define variables that align with Claude’s logic, link them to component properties, and use the Interactions panel to create dynamic flows. For example, simulate state-specific tax calculations by updating a taxRate variable based on the selected shippingState. This creates a checkout flow that feels realistic during testing. By building these behaviors with production-ready components, stakeholders get a clear sense of the final product, not just a rough approximation.
These steps effectively transform AI-generated UX specs into interactive, US-localized prototypes that are ready for usability testing and deployment.
Validating, Collaborating, and Preparing for Deployment
With your interactive, US-localized prototype complete and conditional logic in place, the final step is to ensure everything meets expectations. This involves usability testing, accessibility checks, and team-wide approval before moving to development.
Running Usability and Accessibility Checks on Your Prototype
Kick things off by leveraging Claude Opus 4.5 to create a structured usability test plan. Use your defined user flows to generate 5–7 scenario-based tasks written in plain US English. These tasks should align with specific personas, such as a "US-based enterprise procurement admin" or a "US consumer completing a mobile checkout." Claude can also help craft recruitment criteria, task instructions, and pre- and post-test questionnaires tailored to US cultural norms.
Because UXPin Merge prototypes use production-ready components, test participants interact with elements that mirror the final product. This makes the results far more accurate than static mockups. After testing, paste anonymized notes into Claude, which can organize issues by severity, frequency, and affected user type. Each issue can then be mapped back to a specific component or state in your design system, speeding up the cycle from insight to updated prototype – often reducing the process to hours instead of days.
For accessibility, validate your prototype against WCAG 2.1 AA and US-specific requirements like ADA and Section 508. Test critical flows using keyboard-only navigation, ensure focus states are visible on all interactive elements, and verify screen reader compatibility (e.g., VoiceOver, NVDA, or JAWS). Pay special attention to localized formats, such as currency ($1,299.00), dates (MM/DD/YYYY), and 12-hour time with AM/PM. Claude can also turn accessibility audit notes into a prioritized defect log, offering actionable fixes like updated color tokens or more descriptive aria-labels.
"When I used UXPin Merge, our engineering time was reduced by around 50%. Imagine how much money that saves across an enterprise-level organization with dozens of designers and hundreds of engineers." – Larry Sawyer, Lead UX Designer
How UXPin Merge Removes the Need for Design Handoffs
Traditional design handoffs often involve static files, detailed specs, and tedious translations between design and development. UXPin Merge eliminates these inefficiencies by enabling designers to build prototypes using the same React components developers maintain. These components, pulled from GitHub, Storybook, or npm, ensure that both teams work from the same source of truth right from the start.
Instead of exporting static screens, designers configure real component properties, states, and interactions directly in UXPin. Developers can inspect these components, review their properties, and reference the same design tokens during code reviews. This shifts the process from a one-way handoff to a collaborative workflow. Designers can request new component variants, developers implement them, and UXPin Merge automatically updates the design.
"We synced our Microsoft Fluent design system with UXPin’s design editor via Merge technology. It was so efficient that our 3 designers were able to support 60 internal products and over 1,000 developers." – Erica Rider, UX Architect and Design Leader
For enterprise teams, this approach enables cross-functional review sessions within the prototype itself. Designers validate flows, developers confirm feasibility and API alignment, and product owners ensure compliance with US-specific requirements, such as regulatory disclosures. Everyone reviews the same prototype, making sign-off a collaborative and streamlined process.
Confirming Your Design Is Ready for Deployment
Before marking the prototype as ready for implementation, conduct these three critical checks:
- Component Parity Audit: Verify that all components in the prototype exist in the current production library. Replace any outdated variants and confirm that no hard-coded values have been used instead of design tokens.
- US Localization Checklist: Perform a final review to ensure everything adheres to US localization standards. Check that currency uses comma-thousands and period-decimal formatting (e.g.,
$1,299.50), dates follow theMM/DD/YYYYformat, times use a 12-hour clock with AM/PM, measurements are in imperial units, and all text uses US English spelling. This step ensures consistency across the entire project. - Joint Sign-Off Session: Bring together designers, developers, QA, and compliance stakeholders for a joint review. Confirm that all components align, interaction flows are realistic, and US-specific requirements – like accessibility and disclosures – are met. QA should test critical paths, such as sign-in, payment, and error handling, using realistic data. Once all stakeholders agree, mark the prototype as "implementation-ready" and link it to the corresponding release branch in your repository. This provides a clear, traceable reference for the development team as they begin work.
Conclusion: Scaling UX with Claude Opus 4.5 and UXPin Merge
This guide boils down to one key principle: play to each tool’s strengths. Claude Opus 4.5 excels at scaling UX strategy and generating content, while UXPin Merge takes those ideas and transforms them into interactive prototypes using production-ready components. Together, they bridge the gap between early UX planning and deployment-ready designs, creating a seamless, iterative workflow for design and development.
What makes this approach scalable is its component-driven foundation. By focusing on reusable components, teams maintain consistency and efficiency without constantly reinventing designs. This integration of AI-driven strategy with hands-on prototyping eliminates design drift and reduces implementation guesswork, ensuring smooth collaboration between tools and teams.
Over time, team roles naturally align. Designers sharpen their skills in creating effective prompts, refining UX decisions, and enhancing interactions in UXPin. Engineers dedicate their efforts to maintaining the component library and delivering code that mirrors the prototypes. Meanwhile, tools like Claude and Forge handle repetitive, generative tasks, allowing every team member to focus on what they do best.
To measure success, focus on metrics like the speed of moving from concept to testable prototype, the frequency of usability issues stemming from system-wide patterns instead of isolated decisions, and the amount of rework needed between design sign-off and production. These indicators help pinpoint where to invest next – whether it’s expanding your token library, improving Claude prompts, or adding component variants in UXPin Merge.
Start small with a single initiative, like creating a new onboarding flow, redesigning a subscription page, or localizing an account settings area for US users. Follow the full workflow: prepare your system, generate with Claude, build in Merge, localize, and validate before handoff. Once you’ve mastered the process for one project, replicate it across your portfolio to accelerate your UX transformation at scale.
FAQs
What do I need in my design system before using UXPin Merge?
Before diving into UXPin Merge, make sure you have a React-based custom design system or component library ready. This should include proper documentation, property definitions, and usage examples.
If you’re planning to integrate with Storybook, ensure you’re using version 6 or newer. For Git integration, you’ll need a well-configured repository that includes Webpack and a Wrapper component.
If you’re working with built-in libraries like MUI, Ant Design, Bootstrap, or shadcn/ui, there’s no additional setup required. However, for custom libraries, you’ll need to rely on either Git or Storybook integration to get things running smoothly.
How do I prompt Claude to follow US formats for dates and currency?
To ensure Claude aligns with US standards, provide clear and specific instructions in your prompts. For example, mention the following:
- US date format: MM/DD/YYYY
- Currency format: $X,XXX.XX
- Measurement units: Imperial (e.g., inches, feet, pounds)
By explicitly stating these preferences, you can help Claude follow US conventions more accurately and consistently.
How can I keep prototypes synced with production components in UXPin Merge?
To ensure your prototypes stay aligned with production components in UXPin Merge, you can integrate your design system through Git or Storybook. This setup allows any updates in your design system to automatically appear in UXPin prototypes, keeping everything consistent and up-to-date.
How to Sync Your Design System:
- Connect Your Design System: Use Git or Storybook to link your design system to UXPin Merge.
- Set Up Git or Storybook: Configure Git with Webpack and CI/CD pipelines, or deploy components through Storybook.
- Automatic Updates: Any changes in your design system will sync directly to UXPin, ensuring your prototypes always reflect the latest version.
This approach simplifies the process of maintaining design consistency across your projects.
Related Blog Posts
- How to prototype using Claude Opus 4.5 + shadcn/ui – Use UXPin Merge!
- How to prototype using Claude Sonnet 4.5 + Custom Design Systems – Use UXPin Merge!
- How to build UI using Claude Opus 4.5 + shadcn/ui – Use UXPin Merge!
- How to build UI using Claude Opus 4.5 + Custom Design Systems – Use UXPin Merge!