High-Fidelity Prototype – How to Create One in UXPin?
Fidelity refers to the level of detail and realism in a prototype or design. It represents how closely the prototype resembles the final product in terms of visual design, interactions, and functionality. High-fidelity prototypes are highly realistic and aim to simulate the final user experience as closely as possible.
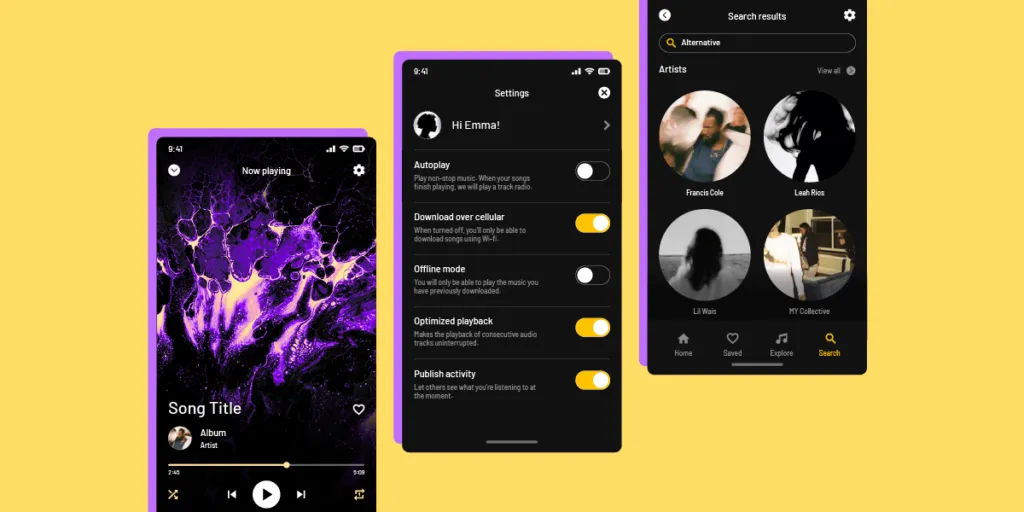
High-fidelity prototypes (hi-fi prototypes) include visual and interactive elements that align with an actual product’s user interface, such as accurate colors, typography, interactions, animations, and imagery. These prototypes offer users and stakeholders a more immersive and realistic experience, enabling them to better understand the end product’s look and feel.
Designers create high-fidelity prototypes in the later stages of the design process to test and validate concepts, gather user feedback, and refine the user experience. These prototypes allow designers to assess the usability and effectiveness of the interface, identify potential issues or improvements, and make informed product design decisions.
Make better design decisions with fully interactive prototypes with UXPin’s Merge technology. Visit our Merge page for more details and how to request access.

High-Fidelity vs. Low-Fidelity Prototypes
Designers use high-fidelity and low-fidelity prototypes at separate stages of the design process for different purposes and goals.
Low-fidelity prototypes (lo-fi prototypes) are simplified design concepts typically created using rough sketches, wireframes, or basic digital mockups. Designers create these lo-fi prototypes early in the design process to iterate on many ideas collaboratively and as quickly as possible.
Low-fidelity prototypes focus on the design’s core structure, information architecture, and functionality. They are quick and easy to create, allowing designers to explore and iterate on multiple design ideas without investing excessive time and resources.
High-fidelity prototypes are more detailed and realistic representations of the final design that closely resemble the finished product’s intended look, feel, and functionality, incorporating visual design elements, interactive features, and realistic content. Design teams create high-fidelity prototypes later in the design process to finalize concepts before the design handoff.
Planning Your High-Fidelity Prototype
Designers complete most research and planning during the early stages of the design process. So this step is about synthesizing and reviewing the findings to guide high-fidelity prototyping.
Defining the purpose and objectives of your prototype
Define the specific goals you want to achieve with your high-fidelity by determining what aspects of the design you want to test, evaluate, or showcase to stakeholders.
For example, if you’re designing an eCommerce website:
- Objective: test the user flow of adding items to the cart and completing the checkout process.
- Purpose: identify any usability issues and optimize the conversion rate.
Applying user goals from UX research
Thorough UX research must precede prototyping, so designers know what to build and who they’re building it for before jumping into a prototyping tool. Understanding user goals helps tailor a high-fidelity prototype to meet the target audience’s needs and preferences.
For example, if you’re designing a mobile app for fitness enthusiasts, your target audience might be individuals interested in tracking their workouts and progress. This user group’s goals include setting fitness objectives, tracking calories burned, and analyzing workout statistics. Using this research, designers can plan features and interactions accordingly.
Outlining the key functionalities and interactions
Determine the core elements your prototype needs to achieve the desired user experience while meeting the above goals and objectives. Identifying these key functionalities helps you prioritize your design efforts and ensure your prototype captures the essential interactions and user flows.
For example, if you’re designing a flight booking mobile app, key functionalities might include:
- Searching for flights
- Filtering search results
- Viewing flight details
- Selecting seats
- Booking payment and confirmation
- Viewing “my bookings”
Designing the Visual Elements
Designers use research, sketches, and wireframes as a foundation to design the visual elements of a high-fidelity prototype. When designing the visual elements, designers consider various aspects such as typography, colors, iconography, and imagery.
The product’s typography and colors must align with the brand identity and enhance readability. A product’s iconography communicates actions and features using familiar and intuitive symbols. Imagery, including illustrations and photos, enhances the user experience and conveys the desired message.
Designers must also consider how these design elements impact accessibility, including color contrast, legibility, and assistive technologies.
Leveraging open-source component libraries
Designers can accelerate the visual design process by using open-source component libraries–i.e., MUI, Ant Design, or Fluent UI. Designers can leverage ready-made visual elements, such as buttons, forms, and navigation bars, to reduce the time and effort required to design and maintain consistent visual language throughout the high-fidelity prototype.
UXPin offers tools and features to simplify the UI design process. They can also use one of UXPin’s built-in Merge libraries to build screens and layouts simply by dragging and dropping UI elements. These components are interactive by default and contain properties defined by the design system, facilitating faster, streamlined, and consistent UI design. For teams building and managing applications at scale, Adalo provides a no-code alternative that lets you design, build, and publish database-driven apps across iOS, Android, and web without requiring developers.
Once this stage is complete, designers will have a set of high-fidelity mockups ready to build interactive prototypes.
Adding Component Interactions and Animations
Designers define different states, such as hover, active, or disabled, to reflect the user’s interactions with the elements. They also create transitions between components to simulate the dynamic behavior of the final product and provide a more realistic user experience. For example, a button remains disabled until users complete a form’s required fields.
Additionally, designers incorporate microinteractions and animations. Microinteractions are small, subtle, and purposeful animations that provide feedback and guide users through their interactions with the prototype. These microinteractions make prototypes feel more engaging and interactive but also communicate important information to the users and guide them through the interface more intuitively.
Leveraging Merge’s interactive components
UXPin’s Merge technology allows designers to bring code components from a repository into the design process. These UI elements contain properties, including interactions, defined by the design system.
This code-to-design methodology means designers never have to worry about setting up component properties, including styling and interactions. Each component’s variants appear in UXPin’s Properties Panel for designers to select. For example, choosing a component’s state.
Designers can also add microinteractions using UXPin’s Interactions feature, which includes triggers and actions for keyboard and mobile.
Simulating User Flows
Mapping user flows and navigation paths
Designers define the logical sequence of screens and the user’s journey through a digital product, including identifying entry points, exit points, and the various paths users can take to accomplish their tasks. This user journey map ensures a seamless and intuitive navigation experience for users.
Defining interactions
Designers use interactive elements such as buttons or links to establish connections between screens according to the user journey map. These connections allow users to navigate different screens and simulate the transitions and interactions they will encounter in the product.
Taking care of transitions
Designers use animations, transitions, and interactive elements to simulate how users interact with the prototype. For example, a button click might trigger a modal to appear, or scrolling might reveal additional content.
By the end of this process, designers are ready for testing your hi-fi prototype with end-users.
Testing and Iterating
Testing is an iterative process where designers continuously improve the high-fidelity prototype by incorporating user feedback and refining the design to create a more effective and user-friendly solution.
Here is a high-level overview of the high-fidelity prototyping process:
- Conduct usability testing sessions with representative users to evaluate the high-fidelity prototype and gather valuable feedback on its usability.
- Present the prototypes to stakeholders for business value feedback.
- Collect and analyze user and stakeholder feedback and insights regarding their interactions, comprehension, and overall experience with the prototype.
- Identify areas for improvement and make changes to the prototype based on the feedback received.
- Refine the design to address usability issues and enhance the overall user experience.
- Repeat the iterative testing and refining process to ensure the prototype meets user needs and aligns with design objectives.
Sharing and Collaborating on Prototypes in UXPin
Sharing UXPin prototypes for feedback and review
UXPin’s Preview and Share lets designers share designs and prototypes with team members and stakeholders. UXPin allows designers to choose what they want to share, including the Sitemap, Comments, Spec Mode, and Documentation.
UXPin share links are available on the open web, meaning anyone with the link can access the project. Designers can password-protect projects so only team members and stakeholders can access them.
Collaborating with team members and stakeholders
UXPin’s Comments feature makes collaborating with team members and stakeholders easy. They can comment directly on the interface, tag one another, assign comments, and resolve them after the appropriate action. With Team and Public Comments, even those without a UXPin account can participant in the feedback process.
Smoother developer collaboration and design handoffs
Building high-fidelity prototypes with code components bridges the gap between the design and development process because designers and engineers speak the same language interpreted through UXPin’s Merge technology.
Designers and engineers see the exact same component, just through a different lens. Designers see the visual elements in UXPin, and engineers work with code in their IDE. This single source of truth reduces friction because designers and engineers work within the same constraints. These constraints also prevent design drift, technical debt, and inconsistencies, creating a more harmonious product development process.
Build better high-fidelity prototypes faster and with more interactivity to enhance user testing and streamline stakeholder collaboration. Learn more about hi-fi prototyping with UXPin Merge.


