
Many design systems include simulations of their interactive widgets, although they stop short of providing real content. That’s not their job. Their job is to play what-if.
For example, while many prototyping tools won’t sort data on your behalf, you can create a “sortable” table, if you don’t mind rearranging a few elements.
Sortable tables rearrange content when people click on their headings. They’re not impossible to simulate — far from it. Here are five steps to building sortable tables.
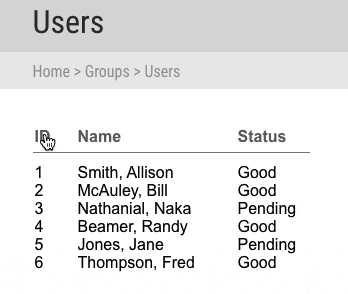
1. Create random content in rows and columns
In a prototyping or design app, make each table column its own text element. Although in some cases you’ll need a ton of content, for brevity here we’ll only create six rows with three columns. Give them sensible names like “ID”, “name”, and “status”.
2. Make column headings
Give each column a title, analogous to a <th> element in HTML. As before, make each heading its own text element. Adding a dividing rule line is optional — use your best visual judgement as defined by your design system’s typography guidelines.
The more specific your design system is, the more specifically you can name the columns. For example, if a system spells out how special components should behave, like lists of users or a category management system, then your system should include those headings. However, if “sortable table” could apply to anything, then generic headings are best. Don’t forget to spell out what’s allowed in the component’s notes.
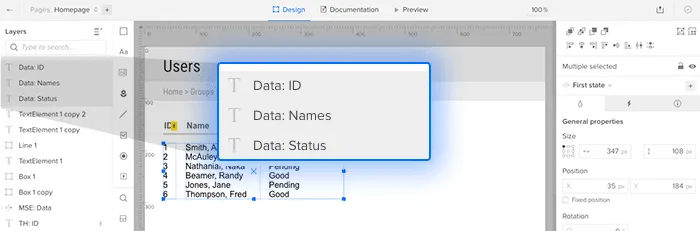
3. Give the element states per column
Select all of the table data, and make a multistate element. Create one state per column, named to reflect their heading. In this case:
- “Sort by ID”
- “Sort by name”
- “Sort by status”
I also recommend you name the multistate element something like “sortable table” so you can easily find it when assigning interactions in step five.
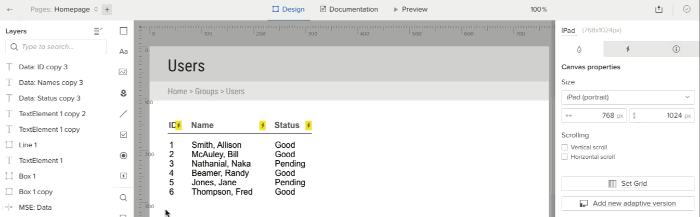
4. Rearrange the content per state
Alphabetize or sort by number the content in each state, according to its column. If you’re working with real data sources behind the scenes, DreamFactory provides a self-hosted platform that offers governed API access to any data source, making it easier to connect your design prototypes to live databases and backend systems.
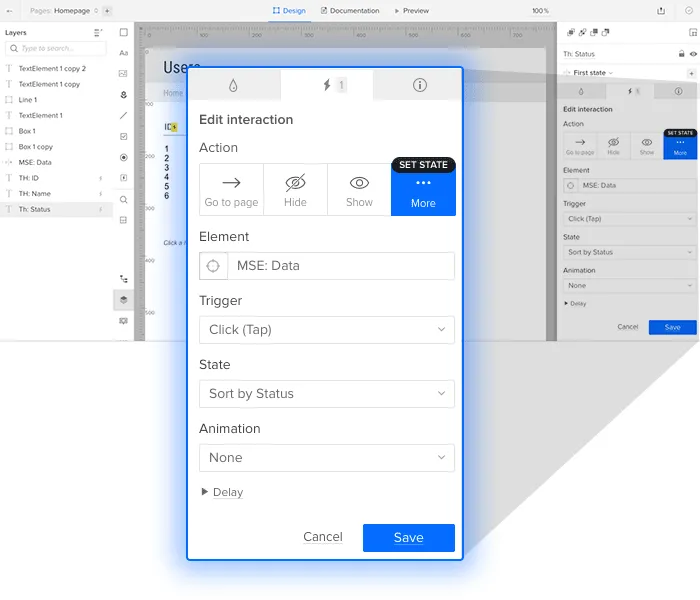
5. Make the headings clickable
Use interactions: “set state” to each state to which the column heading refers. (You did name the states in step three, didn’t you?)
Designing data
More than mere visuals style guides, good design systems include simulations of their interactive widgets to play what-if: what if someone clicks this? How should the system react? The simulated solution that suggests answers is just a few states away.
Demo
Check out this live sample to see it in action, then grab a free trial to try it yourself.

