UXPin Wireframe 101 – A Short Guide for Product Teams
Creating wireframes is a critical step in the UX design process, serving as the blueprint for the final product. This guide offers an in-depth look at how to build effective wireframes using UXPin, an end-to-end design tool that stands out for its code-based technology and built-in features.
The article provides a detailed, step-by-step approach, from assembling basic UI elements to incorporating user feedback. Learn how UXPin’s unique features, like interactive form elements and code-to-design capabilities, can streamline your design process, improve collaboration, and contribute to a more intuitive user experience.
Key takeaways:
- UXPin offers code-based wireframing capabilities that enable designers to create fully interactive and functional wireframes.
- UXPin stands apart from other design tools by offering built-in features like design libraries and advanced prototyping capabilities.
- UXPin facilitates a seamless transition from wireframing to high-fidelity prototyping, allowing for complex interactions and even API integrations, making it a comprehensive full-stack design solution.
Streamline your design process and build wireframes faster with UXPin. Sign up for a free trial to explore UXPin’s full-stack design solution.

What is a UX Wireframe?
A UX wireframe is a low-fidelity visual blueprint representing a user interface’s underlying framework. Typically devoid of color, graphics, and intricate details, it primarily focuses on space allocation, content prioritization, and intended functionalities.
Designers craft wireframes in the early stages of the design process to communicate the structure of a webpage, app, or system. Their primary purpose is to establish the basic layout and interaction patterns before diving into detailed mockups and hi-fi prototypes.
What are the Benefits of Wireframing?
Wireframing offers a range of benefits that streamline the design process and foster effective communication among team members. Here’s a rundown of its advantages:
- Clarity: Wireframes remove ambiguity by visually representing the layout, providing a clear roadmap for everyone involved.
- Efficiency: By resolving issues early, wireframes save time and resources in the later stages of development.
- Alignment: Wireframes help align stakeholders and team members on the project’s goals and functionalities.
- Usability: They provide an opportunity to assess the user experience, ensuring intuitive navigation and layout.
- Collaboration: Wireframes serve as a tool for discussion, allowing designers, developers, and stakeholders to offer early design feedback.
- Prioritization: They help identify the most crucial elements of a design, allowing for effective content hierarchy.
- Flexibility: Wireframes make it easier to iterate and make changes, serving as a lo-fi model for experimentation.
- Architecture: Wireframes provide the foundation for a digital product’s information architecture.
Is UXPin the Right Tool for Wireframing?
UXPin is an end-to-end design tool with excellent wireframing capabilities. Designers have several features to create interactive wireframes effortlessly:
- Box: a flexible UI element that allows you to add text
- Shapes: rectangle, oval, circle, rounded, line, arrow, polygon, and star
- Text: basic text block
- Forms: a set of foundational unstyled form elements, including a button, textarea, select/multi-select, checkbox, and radio button
- Hotspot: make any element or a specific location on a UI interactive
- Icons: choose from several icon sets, including Material Design, Fonts Awesome, Retina Icons, and more.
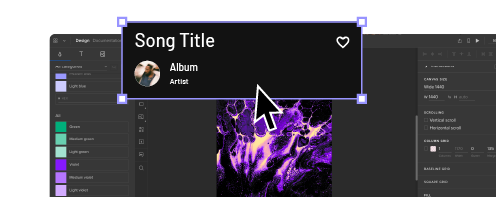
Unlike other design tools, UXPin’s UI elements are interactive by default. For example, all UXPin’s Form elements are fully functional. You can drag a checkbox or radio onto the canvas, and it already has clickable on/off interactivity.
These interactive elements allow design teams to gather more data and feedback during the wireframing process before moving to the design process’s more costly, high-fidelity phase.
What is the Difference Between UXPin and Other Wireframing Tools?
UXPin’s most significant differentiating factor is that the platform uses code-based technology. Rather than generating vector graphics like Sketch or Figma, UXPin renders HTML, CSS, and Javascript behind the scenes.
This code-based approach gives design teams enhanced functionality to build fully interactive wireframes and prototypes. For example, in image-based tools, an input field is a graphical representation, whereas, in UXPin, it’s a functional input capable of capturing, storing, and sharing user data.
Built-in features vs. plugins
Another differentiator is that UXPin offers more features as standard than other wireframing tools, eliminating the need for plugins and extensions. UXPin plans come with Design Systems, built-in design libraries, Content and Data, Fonts (Google and custom), Accessibility Features, and much more–many of which would need plugins with other design tools.
Code-to-design
UXPin’s Merge technology allows design teams to import code components into the design process for prototyping. Designers can create fully functioning interactive prototypes using the same UI library devs use for the final product.
If your engineering team uses a specific wireframe component library, you can import this into UXPin using Merge. There are also several built-in Merge libraries, including Material UI, MUI, Ant Design, Fluent UI, and UXPin Boilerplate, which you can use to build interactive prototypes–allowing you to go from wireframing to high-fidelity prototyping to test concepts and ideas fast.
How to Build a Wireframe in UXPin
Here are ten steps for building a wireframe in UXPin, including gathering feedback and collaborating with stakeholders.
You will need a UXPin account to follow this step-by-step tutorial. Sign up for a free 14-day trial if you don’t have one.
Step 1: Open UXPin and create a new project
- Open UXPin and click the blue + New project button.
- Enter a project name and click Create New Project.
- The next screen asks, “What do you want to start with today?” Click New prototype.
Step 2: Choose the wireframe’s canvas size
Choose your wireframe’s canvas size in the Properties Panel on the right. UXPin provides a wide selection of standard viewports, including TVs, desktops, tablets, mobile, and wearables, to name a few. Use Grids and Guides to help maintain horizontal and vertical consistency.
Step 3: Create pages for each screen
Unlike Figma or Sketch, which use artboards and frames, UXPin uses a separate page for each screen.
- Select Pages & Layers at the bottom of the left sidebar,
- Click the + icon at the top of the sidebar to create a new page. You can also use the OPTION+N keyboard shortcut.
- Double-click on the page name to change it–we’ve created two pages: Login and Welcome.
Pro tip: Use the built-in User Flows library to design your user journeys and information architecture to determine the number of screens and navigational layouts for your project.
Step 4: Create wireframe UI elements
You can assemble wireframe patterns and layouts using UXPin’s Shapes, Forms, Boxes, etc. Auto-Layout lets you manage group elements effectively, including size, gap, alignment, distribution, and more. Use UXPin’s Components feature to create reusable wireframe elements for faster iterating and maximum consistency.
Step 5: Define interactions
We will add a basic navigation interaction from the Login to the Welcome screen for this demonstration.
- Click on an element to select it and click Interactions in the Properties Panel.
- Create a navigation interaction as follows:
- Trigger: Click (Tap)
- Action: Go to Page
- Page: Select Welcome from the dropdown
- Click Add to complete the interaction
Learn how to set up Interactions, including Triggers, Actions, Animations, and Conditions.
Step 6: Collaborate and gather feedback
How to go From Wireframe to Prototype in UXPin
Going from wireframing to prototyping is easy in UXPin. You can design your components from scratch to build mockups or use a design system to generate high-fidelity interactive prototypes quickly.
UXPin provides four key features to enhance your prototyping capability:
- States: allow you to create multiple states for a single UI element and design complex interactive components like menus, drawers, and more.
- Variables: capture data from user inputs and create personalized, dynamic user experiences–like a custom welcome message after signing up.
- Expressions: Javascript-like functions to create complex components and advanced functionality–no code required!
- Conditional Interactions: create if-then and if-else conditions based on user interactions to create dynamic prototypes with multiple outcomes to replicate the final product experience accurately.
Increase prototyping complexity with APIs
UXPin’s IFTTT integration allows you to connect external products and services through an API connection. For example, adding an appointment to a user’s calendar or sending an email, like a welcome message. If you need more robust backend integration capabilities, DreamFactory provides a self-hosted platform for governed API access to enterprise data sources, enabling you to connect your prototype with real backend systems and data for more authentic testing scenarios.
With UXPin’s Design Systems, advanced prototyping features, and API capabilities, you can create complex product replicas without technical expertise or input from engineers. These sophisticated prototypes enable you to get meaningful feedback from users and stakeholders to improve product user experiences.
Build wireframes and prototypes faster using the world’s most advanced product design tool. Sign up for a free trial to create your first interactive wireframe with UXPin.