Introducing UXPin Community on Spectrum

UXPin community on Spectrum

The UXPin Community on Spectrum was closed on May 18th, 2020 due to changes in Spectrum. You can read about it in the We’re Leaving Spectrum blog post.

Today we’re super excited to break the news about our UXPin Community on Spectrum! It’s the long-awaited place where you can talk to our team, exchange tips to hone your UXPin skills, share your thoughts and make feature requests. On top of that, our customer support, product, and development teams are there to answer your questions.

We’ve started by answering what we think are the most popular questions you may ask:

How can I join UXPin Community?
To join, go to https://spectrum.chat/uxpin and create an account with Twitter, Facebook, Google or Github. Or click the help icon in the UXPin app:

[videojs_video url=”https://www.uxpin.com/studio/wp-content/uploads/2019/04/Community.mp4″ controls=”false” autoplay=”true” loop=”true” muted=”true”]

Is UXPin Community supported by the UXPin team?
Our customer support team, as well as product and development teams, will be taking an active part in the community and answering questions.

What kind of information can I find on UXPin Community?
You can read all previous discussions, product announcements, check tips & tricks, and get answers to your questions.

Join UXPin Community now!

UXPin Tips & Tricks You Need to Know – Part 1

With all the invaluable features that set UXPin apart from the rest, it is by far the most advanced tool out there. We’ve put together a list of useful tips & tricks to speed up your workflow.

Switch to dark mode

We all look at the screen more than we probably should. So if you want to make things a bit easier for your eyes, this should make things better when working and it’s dark outside. In UXPin you can switch from light to dark mode and save your eyes from computer strain.

[videojs_video url=”https://www.uxpin.com/studio/wp-content/uploads/2020/04/Darkmode_800x600_24_Title.mp4″ controls=”false” autoplay=”true” loop=”true” muted=”true”]

Deep click

Groups clear things up but you often have to click like crazy to select a nested element. Well…not necessarily! The trick is to hold down ⌘/Ctrl and click the element you want to select, and forget about the endless double-clicking madness.

[videojs_video url=”https://www.uxpin.com/studio/wp-content/uploads/2019/04/deep-click.mp4″ controls=”false” autoplay=”true” loop=”true” muted=”true”]

Crop and scroll

In UXPin, there’s a simple way to make parts of your prototypes scrollable either vertically or horizontally. Group the content first, then select Crop selected content in the Properties panel and check Vertical or Horizontal scroll or both.

[videojs_video url=”https://www.uxpin.com/studio/wp-content/uploads/2019/04/scroll-crop-1.mp4″ controls=”false” autoplay=”true” loop=”true” muted=”true”]

Copy and paste styles

After creating a layer style, you might want other layers to have the same style too. Luckily, there’s no need to recreate everything from scratch — use ⌘/ Ctrl + Alt + C to copy it and  ⌘/Ctrl + Alt + V to paste it on to those layers.

[videojs_video url=”https://www.uxpin.com/studio/wp-content/uploads/2019/04/copy-style-1.mp4″ controls=”false” autoplay=”true” loop=”true” muted=”true”]

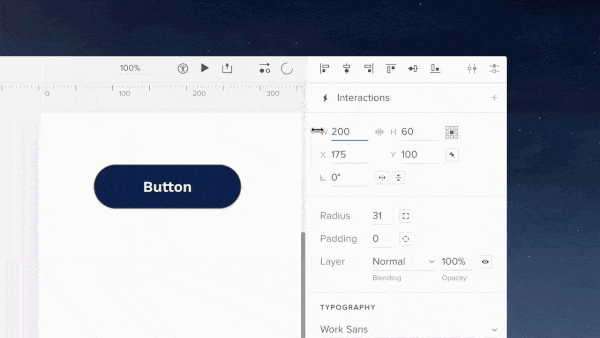
Copy and paste interactions

With interactions, things work the same. To copy all interactions from one layer and paste them on to other layers, use ⌘/Ctrl + Shift + C, and then ⌘/Ctrl + Shift + V, or do it from the context menu where you can also copy a single interaction.

[videojs_video url=”https://www.uxpin.com/studio/wp-content/uploads/2019/04/copy-interactions.mp4″ controls=”false” autoplay=”true” loop=”true” muted=”true”]

Adjust opacity

Use the numbers on your keyboard to adjust opacity. Number 2 gives you 20%, 5 gives you 50%, and 0 gives you 100%. If it’s already 100%, then it will change to 0% opacity.

[videojs_video url=”https://www.uxpin.com/studio/wp-content/uploads/2019/04/opacity.mp4″ controls=”false” autoplay=”true” loop=”true” muted=”true”]

Refresh data

So you filled your elements with data and want to refresh it? Just use the Shift D shortcut and watch your elements fill out with new content.

[videojs_video url=”https://www.uxpin.com/studio/wp-content/uploads/2020/04/02-refresh-data.mp4″ controls=”false” autoplay=”true” loop=”true” muted=”true”]

What’s New in March

March just like any other month brought us some meaningful improvements, various bug fixes, and an entirely new feature we couldn’t wait for — API Requests. Clearly, not as many as you saw in January and February, but that’s because we’re preparing for the big stuff in April. Here’s what we’ve managed to accomplish in a nutshell.

API Request

When you open UXPin and go to Interactions, you’ll see a new type of action — API Request. It allows your prototypes to communicate with devices in ways one could only imagine.

For example, you can use it with smart home devices, such as color-changing smart lights. You can save data from a prototype to a spreadsheet or even communicate with a car. Trust us; we’ve had fun testing it ourselves!

API request in UXPin

Performance improvements

When it comes to performance, scrolling and zooming work faster in the Editor. We have significantly shortened the loading time for interactions between states. On top of that, dragging and dropping parts of symbols got a lot faster.

Enhancements

  • Names of colors from the Design System show in Spec Mode.
  • You can set symbols back to their original size in the context menu and reset it in the desktop app’s Object menu.
  • We completely removed the Clone action for Symbols, as it hasn’t been frequently used and turned out to be slightly confusing. To clone a symbol, copy it and click Detach.
  • Smart guides and snapping enabled only for elements in the viewport, and they no longer appear when irrelevant.
  • We moved the shortcut cheat sheet to the right-hand panel and improved it in terms of naming and grouping.

Fixed

  • Dragging and dropping an element inside more complex symbols would misplace them by 1-2 pixels.

Changelog: What’s New in February | UXPin

The last day of February was the day we had marked in our calendars months in advance. Because that day we reached another milestone — UXPin Merge entered its beta phase! Apart from that, this month we’ve really gone the extra mile and brought to you numerous enhancements and fixes.

UXPin Merge closed beta

Last week, we bid adieu to the UXPin Merge alpha and moved on to the closed UXPin Merge beta! As we’re getting for the release, we’re testing Merge with some great companies — so if you’re up to it, join now! Invite your team to import, keep in sync and use your coded React.js components in UXPin to see your designs the way your users will.

New

You can now set corner radius and image fill to Pen tool shapes.

We’ve also listened to your feedback and here it is — you can now unpin design system libraries and the layers panel from the left side of the UXPin Editor, position them anywhere on the screen or pin to its right side. It’s also possible to change the width and height of panels by dragging one of their corners.

Enhancements

  • Selecting elements on the canvas scrolls the Layers panel to the top element in the panel.
  • Visual improvements in the Typography section.
  • Panning (space + drag) the canvas and switching between pages in large projects work better.
  • Element position and size update automatically in the Properties panel.
  • More noticeable information that you’re working offline.
  • Image fills for elements such as rectangle, oval, button, input, and text area now load faster on Preview.

Fixed

  • White screen on the dashboard when logging into another account in a different browser tab.
  • The issue with using pictures from Unsplash in States.
  • The possibility to change corner radius for the circle if selected with a group of elements.
  • Switching States in nested Symbols moved the element down on the canvas.
  • Editing a batch of text elements was impossible after setting a property in the typography section
  • The issue with displaying elements in a fixed position on Preview [Firefox].
  • The issue with sorting interactions added inside a symbol that targets an element outside the symbol.
  • Layers panel scrolled unnecessarily after clicking on the state switcher.

Join the world's best designers who use UXPin.

Sign up for a free trial.

What’s New in January

We’ve definitely kicked off the new year with some great updates. As January has come to an end, we can sure tell that we’ve already taken a big step forward. This month was about two things: The UXPin Mirror app and Local Fonts in the UXPin Editor. To top it all off, our engineering team churned out other experience, stability and workflow improvements and fixes.

UXPin Mirror

Long-awaited, highly anticipated and finally released in January! This month brought to us the Mirror app that makes it a breeze to view designs on mobile devices in real time, both iOS and Android. Simply scan the QR code in the Editor, and that’s it! There is no need to connect via USB or use Wi-Fi. Any changes you make in the prototype will show on the device automatically. Get it on the App Store or Google Play.

UXPin Mirror mobile app

Local fonts

What’s also massive this month are Local Fonts. When you open UXPin, you will notice that apart from online libraries like Google Fonts or Adobe Fonts, every font installed on your computer is now available and ready for use in the desktop app. More about local fonts.

Local Fonts in UXPin

Brand new video tutorials

Another distinguishable update to UXPin are video tutorials available to watch right inside the Editor. You’ll find them in the right corner of the bottom bar. No more switching between the tool and the browser window to get the hang of UXPin and our most important features. We believe that this will add tremendous value to a better day-to-day learning experience. Of course, all tutorials are also available on our YouTube. Happy binge-watching!

UXPin tutorials

Scrubbing values

You can now scrub values by dragging labels in the Properties Panel. Hover over a label with a numeric value input and drag the cursor right and left to increase or decrease that value. Alternatively, in case there is no label, just click through the input and press Cmd/Ctrl. And if you drag with Shift, the value changes by 10px. On top of this, the cursor goes beyond the screen even if it reaches its end (desktop app and Google Chrome).

UXPin scrubbing values

Enhancements

  • All the recently used fonts appear at the top of the font section dropdown to speed up the workflow.
  • Improvements in positioning elements in nested States.
  • Different types of elements were placed in a different way on the canvas – some in the top left corner, some in the middle of it. From now on, all the elements land in the middle of the viewport.
  • The Mac OS X Traffic Lights are back inside the app’s UI in the desktop app.

Fixed

  • Changing the name of the prototype while offline is blocked.
  • When trying to open a project while being logged into different account , the editor kept reloading with a spinner endlessly. Now users are taken to the dashboard.
  • Long names of projects not displaying entirely in the dashboard list view.
  • Scrolling through all interactions for cases with many interactions in the Copy Interaction section.
  • Every once in a while, adding a new line in a text element didn’t update the canvas size on the preview properly.
  • Moving multistate elements around in the dark theme caused both the background and font turn white.
  • Copying a part of code and pasting it into the code block section in the Design System separated each line into its own block, instead of keeping it together.
  • Occasional blank screen issues in the desktop app.

Use Your Own Local Fonts in UXPin

Local Fonts with UXPin

The role of typography in design is enormous – that goes without saying. Uber has its own Uber Move, Airbnb uses Cereal across its product and brand, BBC replaced the good old Gill Sans with Reith. Seeing companies design their own custom typefaces that work alongside the brand’s aesthetics, we took the opportunity to provide our users with as many possibilities as we can when it comes to fonts.

Now, we’re happy to break the good news: from now on, every font installed on your computer is going to be available and ready for use inside the UXPin desktop app.

We’ve kicked this off because we know that unlimited possibilities when it comes to fonts is absolutely key to designers’ workflow. We want to ensure that your creativity will not be limited and that you can consistently use your company’s assigned fonts.

How it works

Apart from online libraries Google Fonts, Adobe Fonts (formerly Typekit), and uploading your own custom fonts to UXPin, we give you access to all fonts which are already in your system. In other words:

  • No more limitations related to font uploads and integrations with online libraries. Our desktop app will now list all the fonts in your system and make them available inside the UXPin editor. 
  • You can use fonts that have pretty strict limitations, such as Apple’s San Francisco which (currently) comes only in the iOS version and not the web version.

Pro-tips to remember

 1. If you want to share a preview of your prototype with someone, make sure they have the font you used inside the editor on their computer. To do that, you can:

  • Send the file to the recipient of the preview link and make sure they install it.

Thanks to that, the design is going to render correctly and they will see things as you’ve designed them. In case the recipient doesn’t have it installed, we will replace the font with Arial and inform them about it.

2. Also, you must use the UXPin desktop app to avoid browser limitations – browsers don’t have access to the list of font files installed on your computer.

Join the world's best designers who use UXPin.

Sign up for a free trial.