What Is Progressive Disclosure in UX? Definition, Examples & Best Practices (2026)
Progressive disclosure is one of the most effective techniques for reducing interface complexity. Whenever a product feels overwhelming — too many fields, options, or features on a single screen — progressive disclosure helps designers show only what matters right now and reveal the rest on demand.
This guide covers what progressive disclosure is, the three categories, when and how to implement it, UI patterns you can use, real-world examples from products like Google, Dropbox, and Shopify, and a step-by-step design process you can follow today.
Want to prototype progressive disclosure patterns with real interactivity? Try UXPin for free — build multi-step forms, accordions, and conditional UIs using States, Variables, and Expressions.

What Is Progressive Disclosure?
Progressive disclosure is a user interface design technique that reduces cognitive load by gradually revealing more complex information or features as a user progresses through a product. Instead of presenting every option at once, designers surface only what’s relevant to the user’s current step — and make the rest available on demand.
Jakob Nielsen, co-founder of the Nielsen Norman Group, introduced progressive disclosure in 1995 as an interaction design pattern to reduce user errors in complex applications. The principle remains one of the cornerstones of good UX design.
Designers achieve this by breaking complex tasks into smaller, manageable steps and presenting them one at a time. This lets users complete large tasks without being overwhelmed by too much information on a single screen.
The most common example is a multi-step checkout form:
- Step 1: Name and delivery address
- Step 2: Shipping options
- Step 3: Order review and payment details
- Step 4: Confirmation / thank-you page
The Three Categories of Progressive Disclosure
- Step-by-step: Breaking a complex workflow into manageable sequential stages (e.g., a multi-step form or wizard).
- Conditional: Hiding certain elements until the user explicitly requests them (e.g., “Advanced settings” toggle).
- Contextual: Surfacing additional information based on the user’s current situation or prior inputs (e.g., showing shipping options only after an address is entered).
Progressive Disclosure vs. Progressive Enabling
Progressive enabling is a related but distinct technique. While progressive disclosure manages information visibility, progressive enabling manages feature access — incrementally unlocking capabilities as users gain familiarity with a product.
Video games are the classic example: players start with basic controls and new abilities unlock as they progress. In SaaS products, progressive enabling often appears as guided onboarding that unlocks advanced features after users complete initial setup.
When to Implement Progressive Disclosure

Complex Tasks
Breaking complex tasks into manageable chunks makes them easier for users to understand and complete. If you save progress at each step, users can return later without losing work. This approach is particularly effective when building data-driven applications where users need to process, transform, and integrate information across systems — tools like Integrate.io apply similar progressive principles to data integration pipelines, breaking ETL and ELT workflows into logical stages that users configure step by step.
Contextual Help and Guidance
Designers use tooltips, popups, hotspots, and other UI elements to direct users through tasks without cluttering the interface.
User Onboarding
Progressive disclosure is ideal for onboarding flows, where in-app tutorials introduce features incrementally rather than overwhelming new users.
Content-Heavy Interfaces
Product documentation, help centers, and data-dense dashboards can overwhelm users. Content designers use progressive disclosure to present critical information first, with expandable sections for deeper detail.
AI-Generated Interfaces
As AI tools generate more UI surfaces automatically, progressive disclosure becomes a critical guardrail. When using tools like UXPin Forge to generate interfaces from text prompts, teams can apply progressive disclosure principles to ensure AI-generated layouts don’t present too much complexity at once.
UI Patterns for Progressive Disclosure
Accordions
Accordions give users control over when they see additional content. They’re especially useful for structured information like FAQs, product specs, or documentation.
Tabs
Tabs organize content into labeled categories, letting users switch views without scrolling. Particularly effective on mobile where vertical space is limited.
Dropdown Menus
Dropdown menus keep interfaces uncluttered by hiding long option lists until needed. Imagine completing a form where every country, state, and city were visible simultaneously.
Scrolling and Lazy Loading
Placing the most important content above the fold lets users find key information immediately. Supplementary content loads as users scroll.
Explore: 4 types of scrolling patterns.
Dialog Boxes, Popups, and Tooltips
These provide additional context when users hover or click on a UI element. They let users get answers without leaving the current task while keeping interfaces clean.
Conditional Form Fields
Showing form fields only when they become relevant based on previous inputs. For example, displaying company fields only when a user selects “Business” instead of “Personal.”
Real-World Examples of Progressive Disclosure
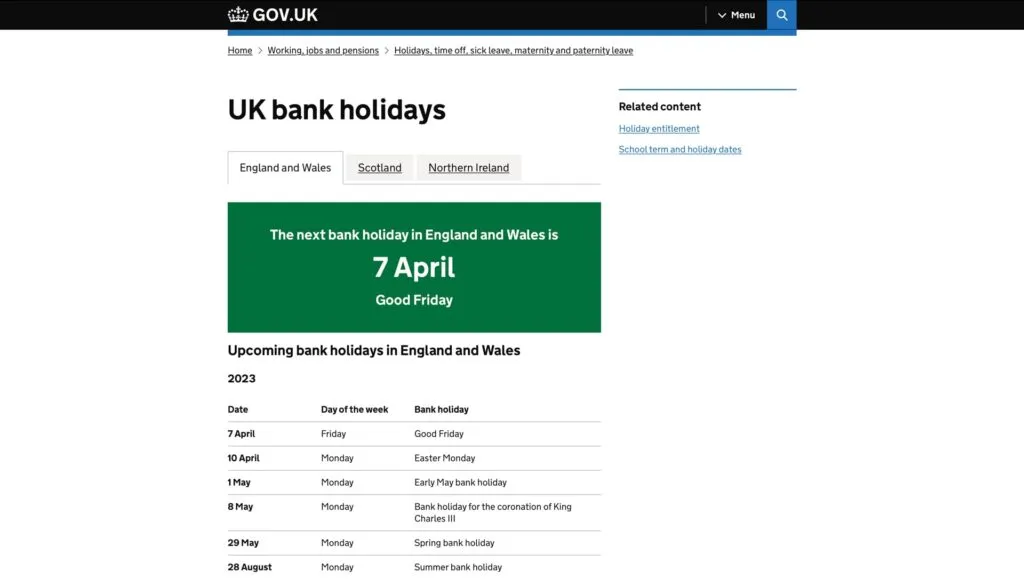
GOV.UK Bank Holiday Page
One of the most famous progressive disclosure case studies comes from the UK government’s GOV.UK bank holiday page redesign. Through user research, the team discovered most visitors simply wanted the date of the next bank holiday. The redesign places that prominently at the top with subsequent dates in smaller text below.
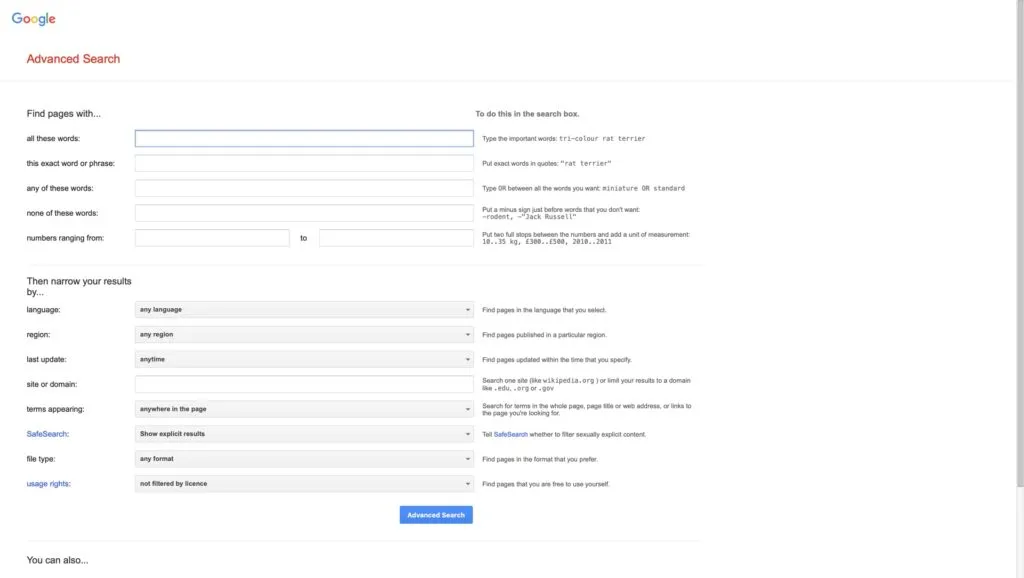
Google’s Advanced Search
Google’s primary search is minimalist: one input field and two buttons. Google’s Advanced Search reveals a much more complex interface with filters for language, region, exact phrases, and date ranges — but only for power users who seek it out.

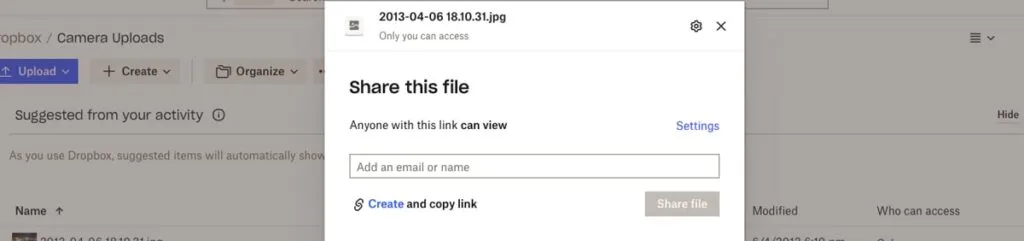
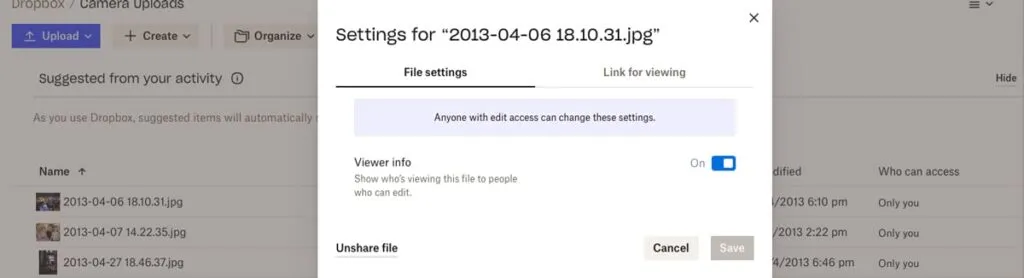
Dropbox’s File-Sharing Options
When you share a file in Dropbox, the initial view shows just an email field and “Share file” button. Clicking “Settings” reveals advanced permissions and link-for-viewing controls — textbook conditional progressive disclosure.
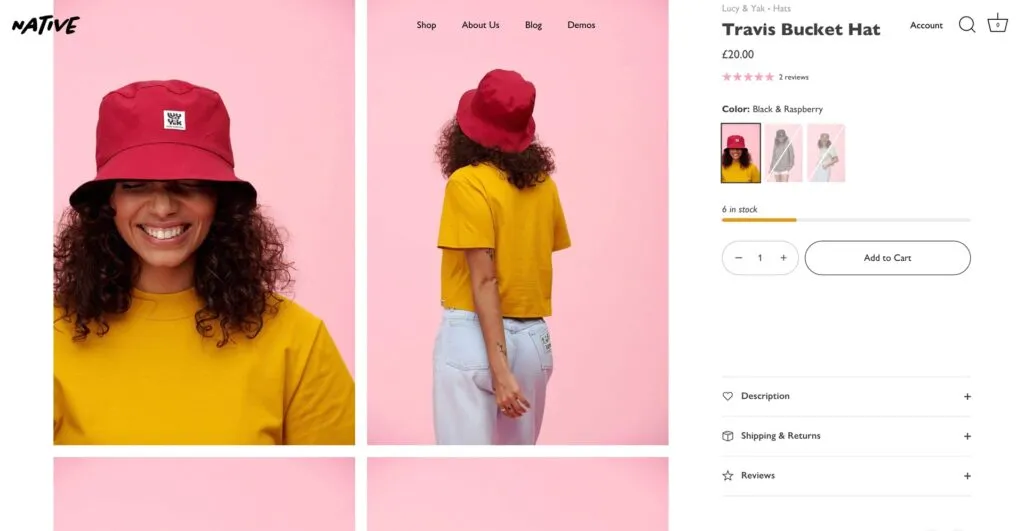
eCommerce Product Pages
On this Shopify Themes product page, only the quantity selector and “Add to Cart” button are immediately visible. Product descriptions, shipping details, and reviews are tucked behind accordions.
How to Design Progressive Disclosure: A Step-by-Step Process
Step 1: Identify User Needs
Use usability testing, interviews, and analytics to determine which content matters most and which can be deferred.
Step 2: Prioritize Information
Use card sorting and affinity mapping to rank information by importance. Low-priority items become candidates for progressive disclosure. High-priority items stay visible and determine the order of a multi-step process.
Step 3: Determine the Right Level of Detail
For each piece of information, decide: What must be shown immediately? What can follow? In the GOV.UK case, the essential detail was the name and date of the next holiday — nothing more.
Step 4: Design for Simplicity
Each screen should present only the content needed for one task or decision. John Maeda’s 10 Laws of Simplicity provide a useful framework for achieving design simplicity:
- Reduce: Remove what isn’t needed
- Organize: Make complex systems easier to navigate
- Time: Saving time feels like simplicity
- Learn: Knowledge makes things feel simple
- Differences: Balance simplicity and complexity deliberately
- Context: What lies in the periphery matters
- Emotion: More emotion is better than less
- Trust: Simplicity builds trust
- Failure: Some things can’t be simplified
- The One: Subtract the obvious, add the meaningful
Step 5: Prototype and Test
Prototype and test your progressive disclosure implementation. Pay special attention to discoverability — hiding features is only effective if users can still find them when needed.
Tools like UXPin Merge let you prototype with real, code-backed components, so your progressive disclosure patterns behave exactly as they would in production.
Prototype Progressive Disclosure Patterns With UXPin
UXPin’s advanced features enable designers to create prototypes with real interactivity — ideal for testing progressive disclosure before development.
- States: Build interactive accordions, dropdown menus, steppers, and carousels that expand and collapse like production components.
- Interactions: Use Triggers, Actions, and Animations to create fluid show/hide transitions. Conditional Interactions reveal content dynamically based on user behavior.
- Variables: Capture user input and use it to personalize subsequent steps — essential for contextual progressive disclosure.
- Expressions: Add form validation, compute values, and create logic-driven visibility rules.
For teams with an established design system, UXPin Merge lets you drag and drop production React components. And with Forge, UXPin’s AI design assistant, you can generate initial layouts from a text prompt and then refine the progressive disclosure flow using professional design tools.
Sign up for a free UXPin trial and create your first interactive progressive disclosure prototype today.
Frequently Asked Questions About Progressive Disclosure
What is progressive disclosure in UX design?
Progressive disclosure is a UX design technique that reduces cognitive load by showing only essential information first, then gradually revealing more complex options as users need them. It prevents overwhelm and guides users through tasks step by step.
What are common examples of progressive disclosure?
Common examples include multi-step checkout forms, accordion menus, tooltips on hover, dropdown menus, tabbed interfaces, and onboarding walkthroughs that introduce features incrementally.
What are the three types of progressive disclosure?
The three types are: (1) Step-by-step — breaking complex tasks into sequential stages, (2) Conditional — hiding elements until the user requests them, and (3) Contextual — offering additional information based on the user’s current actions.
What is the difference between progressive disclosure and progressive enabling?
Progressive disclosure manages information visibility. Progressive enabling manages feature access — incrementally unlocking functionality as users become more proficient.
How do you prototype progressive disclosure patterns?
Use a design tool with interactive capabilities like UXPin, which supports States, Conditional Interactions, and Variables. These let you build working accordions, multi-step forms, and conditional UIs that behave like real code during usability testing.
When should you NOT use progressive disclosure?
Avoid it when users need all information visible simultaneously for comparison, when hiding critical safety information could cause harm, or when the extra steps create more friction than the complexity they reduce.