How to Make a Web App from Scratch: A Step-by-Step Guide (2026)

Building a web app from scratch sounds intimidating, but every successful web application — from Gmail to Notion — started with the same basic steps. This guide walks you through the complete process: from initial research to deployment and maintenance.
Whether you’re a solo founder building an MVP, a product team scoping a new project, or a designer who wants to understand the full development lifecycle, this step-by-step guide gives you a clear roadmap.
Designing your web app’s interface? UXPin Merge lets you build production-quality UI prototypes using real code components — then hand off clean code to your developers. Learn how it works.

What Is a Web App?
A web application is software that runs in a web browser instead of being installed on a device. Unlike a traditional website that primarily displays static content, a web app lets users perform actions: manage data, create content, communicate with others, or complete workflows.
Examples of web apps include Gmail, Trello, Figma, Notion, and Spotify’s Web Player.
Web apps offer three key advantages over native applications:
- Cross-platform compatibility: They run on any device with a browser — no separate iOS, Android, or Windows builds.
- Instant updates: Users always access the latest version without manually installing updates.
- Easy distribution: No app store approval process. Users access your app via a URL.
Types of Web Applications
Before building, understand which type of web app fits your use case:
By architecture: SPA vs. MPA
- Single-page applications (SPAs) load one HTML page and dynamically update content as users interact. They feel fast and app-like because they avoid full-page reloads. Gmail and Google Maps are SPAs.
- Multi-page applications (MPAs) load a new HTML document for each page. They’re simpler to build and better for SEO by default. Most blogs, news sites, and e-commerce platforms are MPAs.
By behavior: Static, dynamic, and PWA
- Static web apps serve pre-built files with no server-side processing. They’re fast and cheap to host but limited in functionality.
- Dynamic web apps generate content on the server in response to user requests. They can fetch, process, and display real-time data.
- Progressive Web Apps (PWAs) combine the best of web and native apps: offline capability, push notifications, installability, and fast performance. Twitter Lite and Starbucks use PWAs.
3 Web App Examples
Spotify Web Player

Spotify’s web player is a SPA that delivers the full streaming experience in a browser. A left-hand navigation panel provides access to Home, Search, and Your Library, while the central area shows personalized playlists and recommendations. Playback controls remain fixed at the bottom for persistent access.
Google Drive
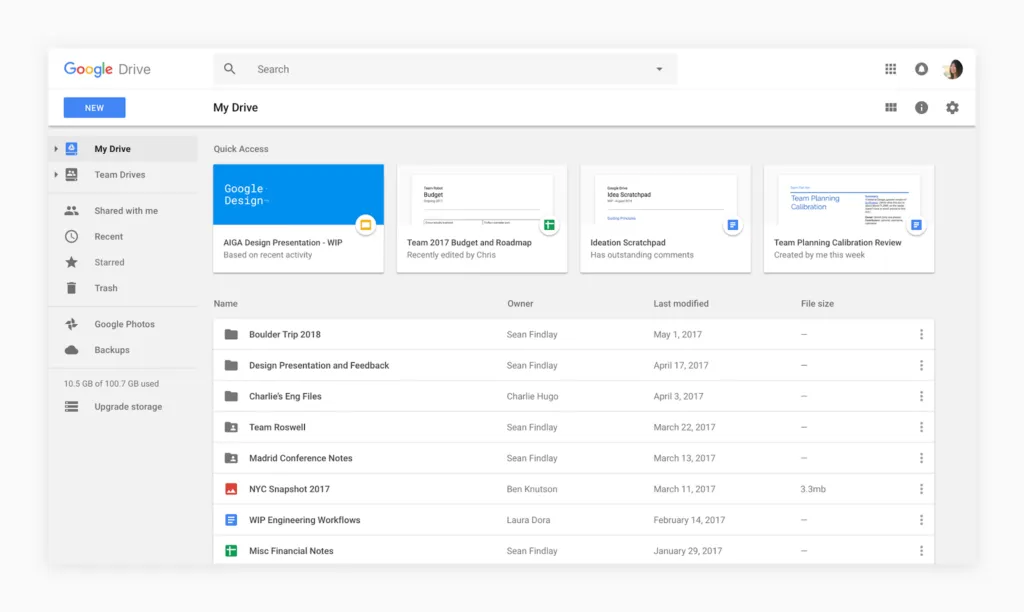
Google Drive is a dynamic web app for cloud storage and real-time collaboration. Its clean interface uses a left-hand panel for folder navigation and a main area for file management. Real-time collaborative editing is seamlessly integrated for Docs, Sheets, and Slides.
Amazon
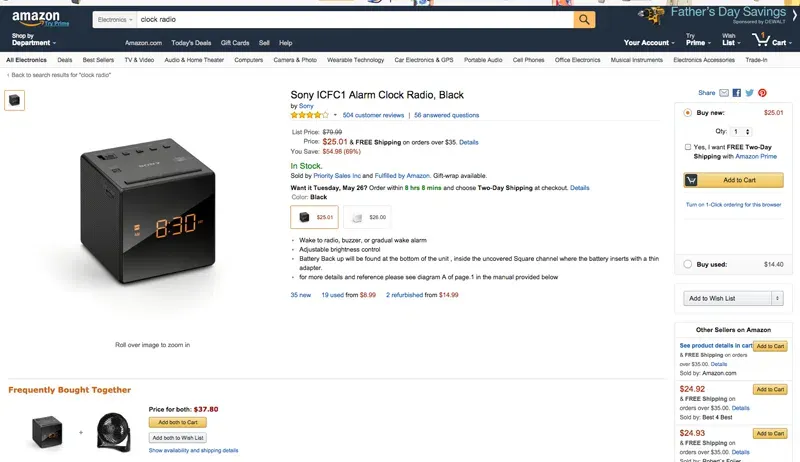
Amazon is one of the largest MPAs on the web. Its interface combines server-rendered product pages with dynamic elements like personalized recommendations, real-time pricing, and an interactive cart. A persistent top navigation bar provides access to search, account, and orders across every page.
How to Make a Web App: 8 Steps
Step 1: Research your idea
Every successful web app starts with understanding the market. Before writing any code or designing any screens:
- Define the problem: What specific pain point does your web app solve? Be precise — “a project management tool” is too broad; “a Kanban board for freelance teams under 10 people” is actionable.
- Analyze competitors: Conduct a competitive analysis to identify what existing solutions do well and where they fall short.
- Identify your differentiation: Find your unique value. Consider whether you’ll build something simpler, more specialized, or more integrated than existing options.
- Validate demand: Talk to potential users. Run surveys, interviews, or landing page tests before committing to development.
Step 2: Plan and scope the project
Effective planning prevents scope creep and wasted resources:
- Create a product roadmap with phased releases.
- Choose your technology stack (front-end framework, back-end language, database, hosting).
- Define roles and responsibilities if you’re working with a team.
- Set milestones tied to functionality, not calendar dates.
Step 3: Define your MVP
Don’t build everything at once. A Minimum Viable Product (MVP) includes only the core features needed to test your idea with real users.
To scope your MVP effectively:
- Identify core workflows: What are the 2–3 tasks users must complete for the app to deliver value?
- Prioritize features ruthlessly: Use a framework like MoSCoW (Must-have, Should-have, Could-have, Won’t-have) to rank features.
- Create user stories: Write stories that describe how users interact with each feature. This keeps development focused on real user needs.
Step 4: Design the user interface
Your web app’s interface determines whether users can accomplish their goals or get frustrated and leave. Good UI design follows these principles:
- Clear navigation: Users should always know where they are and how to get where they need to go. Use clear labels and familiar patterns.
- Visual consistency: Use a consistent color scheme, typography, and layout structure throughout the app.
- Responsive design: Your app must work on phones, tablets, and desktops. Design mobile-first, then scale up.
- Feedback and confirmation: Every user action should produce visible feedback — loading indicators, success messages, or error notifications.
- Visual hierarchy: Use size, color, and spacing to guide the eye toward important actions and content.
- Accessible design: Follow WCAG guidelines to ensure your app works for all users, including those using assistive technology.
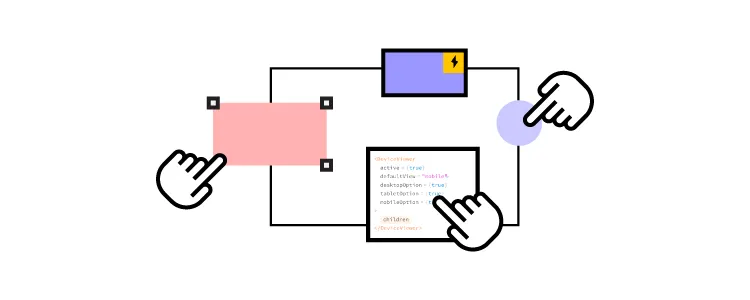
Pro tip: Design your UI with production components from the start. UXPin Merge syncs your team’s code component library into the design editor, so prototypes use the same elements developers will ship. This eliminates rework and ensures pixel-perfect consistency. For rapid ideation, UXPin Forge can generate layouts from text descriptions or screenshots using your component library — output is exportable as production-ready JSX.
Step 5: Build the front end
The front end is everything users see and interact with. The modern front-end stack typically includes:
- HTML: Provides the structural foundation using semantic tags.
- CSS: Handles visual styling, layout (flexbox/grid), and responsive breakpoints.
- JavaScript/TypeScript: Adds interactivity, handles user events, and communicates with the back end.
- A front-end framework: React, Vue, Angular, or Svelte provide component-based architecture that scales.
When choosing a framework, consider your team’s existing expertise, community size, and the availability of component libraries like MUI, shadcn/ui, or Bootstrap. Using an established component library accelerates development and provides built-in accessibility.
Step 6: Build the back end
The back end handles server-side logic, database operations, authentication, and API management. DreamFactory provides a self-hosted platform that delivers governed API access to any data source, allowing you to quickly build secure, role-based access layers for your web app’s back end without writing custom API code.
- Choose your stack: Node.js (JavaScript), Django/Flask (Python), Rails (Ruby), or Laravel (PHP) are the most popular options.
- Set up a database: PostgreSQL and MySQL for relational data; MongoDB or Firebase for document-based data. Choose based on your data structure and query patterns.
- Build your API: RESTful or GraphQL endpoints that your front end calls to read and write data.
- Implement authentication: Use established services like Auth0, Firebase Auth, or Supabase Auth rather than building auth from scratch.
- Configure hosting: AWS, Google Cloud, Vercel, Railway, or Render can host your back end. For simpler apps, platforms like Supabase or Firebase handle much of the back-end infrastructure.
Step 7: Test and debug
Comprehensive testing prevents bugs from reaching users:
- Unit testing: Test individual components and functions in isolation using frameworks like Jest, Vitest, or pytest.
- Integration testing: Verify that front-end and back-end components work together correctly.
- End-to-end (E2E) testing: Simulate real user workflows using tools like Playwright or Cypress.
- User acceptance testing: Have real users test the app and provide structured feedback.
- Performance testing: Check load times, API response times, and behavior under concurrent users.
Step 8: Deploy and launch
Deployment makes your web app accessible to users:
- Choose a hosting platform: Vercel and Netlify are excellent for front-end-heavy apps. AWS, Google Cloud, and Railway handle full-stack deployments.
- Set up CI/CD: Use GitHub Actions, GitLab CI, or similar tools to automate testing and deployment on every code push.
- Configure your domain: Register a domain and configure DNS to point to your hosting platform.
- Enable SSL: HTTPS is non-negotiable. Most hosting platforms provide free SSL certificates.
- Set up monitoring: Use tools like Sentry (error tracking), Google Analytics (user behavior), and Uptime Robot (availability) to monitor your app post-launch.
Maintaining and Growing Your Web App
Launch is the beginning, not the end. Successful web apps require ongoing attention:
- Monitor performance: Track Core Web Vitals, API response times, and error rates. Set up alerts for anomalies.
- Collect feedback: Use in-app feedback tools to capture user input directly within the product.
- Ship iteratively: Release small, frequent updates rather than large, infrequent releases. This reduces risk and keeps users engaged.
- Update dependencies: Regularly update frameworks, libraries, and security patches to prevent vulnerabilities.
- Scale deliberately: Monitor usage patterns and scale infrastructure (database, CDN, compute) ahead of demand.
Frequently Asked Questions
What is a web app?
A web app is software that runs in a browser. Unlike static websites, web apps let users perform interactive tasks — managing data, creating content, or completing workflows. Examples include Gmail, Trello, and Notion.
How much does it cost to build a web app?
Costs vary widely. A simple MVP might cost $5,000–$25,000. Mid-complexity apps run $25,000–$100,000. Enterprise applications can exceed $250,000. Using component libraries and AI-assisted design tools like UXPin Forge can reduce both design and development time.
What is the difference between a website and a web app?
Websites primarily deliver informational content. Web apps provide interactive functionality where users perform tasks, manage data, or collaborate. Many modern products blend both.
What technologies do I need?
At minimum: HTML, CSS, and JavaScript for the front end. Most apps also use a front-end framework (React, Vue, Angular), a back-end language (Node.js, Python), a database (PostgreSQL, MongoDB), and a hosting platform (Vercel, AWS).
Can I build a web app without coding?
Yes. No-code platforms enable non-developers to build functional web apps. For UI design and prototyping, UXPin Merge lets designers create interactive prototypes with real code components — no coding required.
What is an MVP and why build one first?
An MVP (Minimum Viable Product) is a stripped-down version with only core features. It lets you validate your idea with real users, gather feedback, and iterate before investing in full-scale development.
Start Building Your Web App
Building a web app from scratch is a structured process: research, plan, design, build, test, deploy, and iterate. The tools and frameworks available in 2026 make it more accessible than ever — whether you’re a solo developer or leading a product team.
Start with the interface. UXPin Merge lets you design with production-ready components, so your prototypes translate directly into shipping code. Try it today.

