Figma Plugin Tutorial – Copy and Paste Design from Figma to UXPin
Designers are always looking for ways to improve their prototypes–for stakeholder feedback, accurate user testing, and design handoffs. Figma is a fantastic design tool but lacks prototyping features, meaning designers must use external tools.
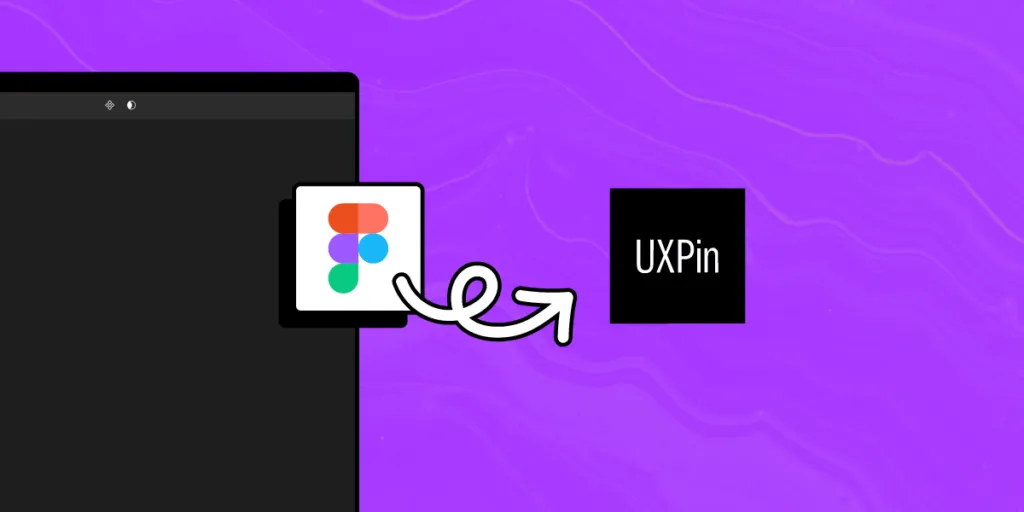
UXPin has a plugin for Figma called UXPin – Copy. Paste. Prototype. Designers can literally copy Figma designs to UXPin and add interactivity to static Figma mockups. Let’s see how it works.
Key takeaways:
- UXPin’s plugin for Figma helps you turn static Figma designs into interactive prototypes. that behave like an end-product.
- The plugin is free to use, but it needs to be installed in Figma.
- After clicking Command+V in UXPin (or Control+V), you can paste your Figma design to UXPin.
- Once you have a design copied to UXPin, you can add interactions (variables, expressions, and states).
Turn static Figma mockups into designs that have interactivity baked into them. Improve collaboration between designers and developers and simplify design handoff. Sign up for a free trial.

What is Figma?
Figma is a web-based design tool used primarily for interface design. It allows multiple designers to work on the same project simultaneously, enabling real-time collaboration and feedback.
Figma is popular among designers and design teams for its ease of use, powerful features, and ability to streamline the design process.
Figma allows designers to ass interactivity to the UI design by linking different screens together. This isn’t the best solution for usability testing or design handoff. You want to be precise in those scenarios to avoid rework and miscommunication. This is where UXPin fills in for Figma’s blind spots.
What is the difference between Figma and UXPin?
Both Figma and UXPin are design tools that boost collaboration. Figma focuses on designer end of the spectrum, while UXPin tries to fill the gap between design and development.
Figma allows designers to design beautiful static mockups but lacks advanced prototyping features. Designers must use additional tools or rely on engineers to build interactive prototypes–adding time and resources to design projects.
UXPin is powered by code, significantly enhancing its capability for creating high-fidelity, fully functioning prototypes that accurately replicate the end product’s experience. Design teams can create prototypes and hand them off to developers for production without any extra tools that need to translate design to code.
What’s great about UXPin is that it has a technology for handling MUI, Ant design, Bootstrap, and other open-source UI components that look and behave exactly like they do in the end product. Using it, you can reach ultimate consistency between design and code. Read more about UXPin Merge.
Integrate Figma with UXPin to make UI interactive
Even though UXPin is an end-to-end design tool, we recognize that many designers love designing their wireframes and mockups in Figma. So, we created the UXPin – Copy. Paste. Prototype. plugin to allow design teams to export their Figma designs into UXPin for prototyping–the best of both worlds.
This step-by-step guide will demonstrate how to install the UXPin plugin for Figma, copy designs into UXPin, and what they can expect from UXPin’s advanced, interactive prototyping capabilities.
Note: UXPin – Copy. Paste. Prototype. works best with the Chrome browser or when copying from the Figma to UXPin desktop applications.
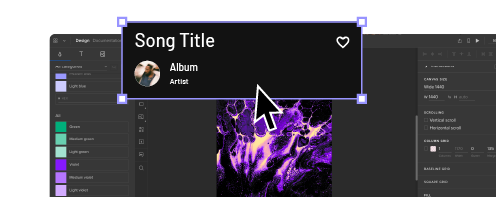
We’re using the Moood Music App UI Kits, which you can download from the creator, Fabrx’s website.
Step 1: Install the plugin
You’ll find the UXPin – Copy. Paste. Prototype. plugin in Figma’s Community. Click “Try it out” to install.
Step 2: Copy a Figma design
Open a Figma project and select the screen you want to copy. We recommend copying one screen at a time. Select the frame or drag your cursor around the components you want to copy.
Step 3: Activate the plugin
Right-click on the design, navigate to Plugins > Saved Plugins > UXPin – Copy. Paste. Prototype.
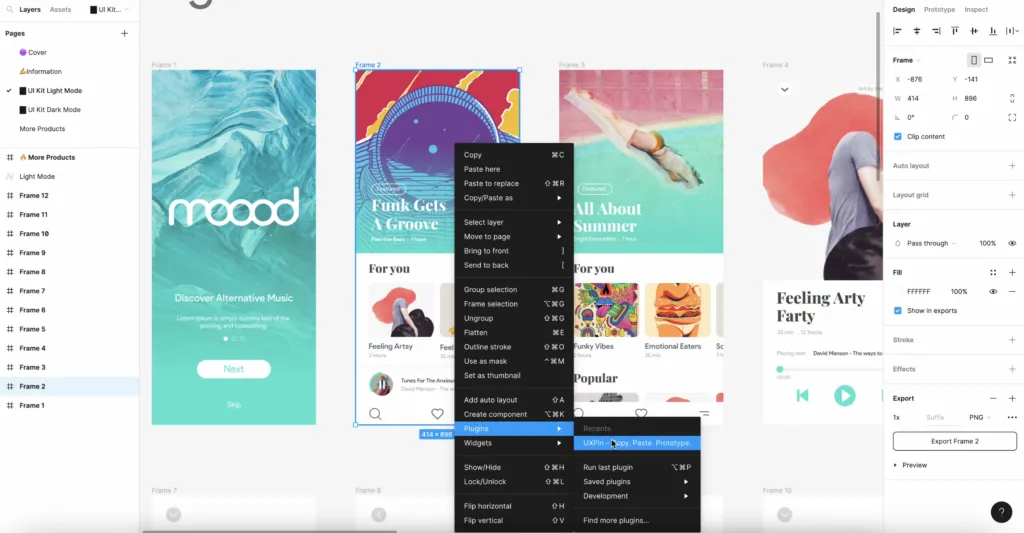
In Figma’s desktop app, the plugin will copy automatically. In Chrome, you must click “Copy to Clipboard” to trigger the copy process.
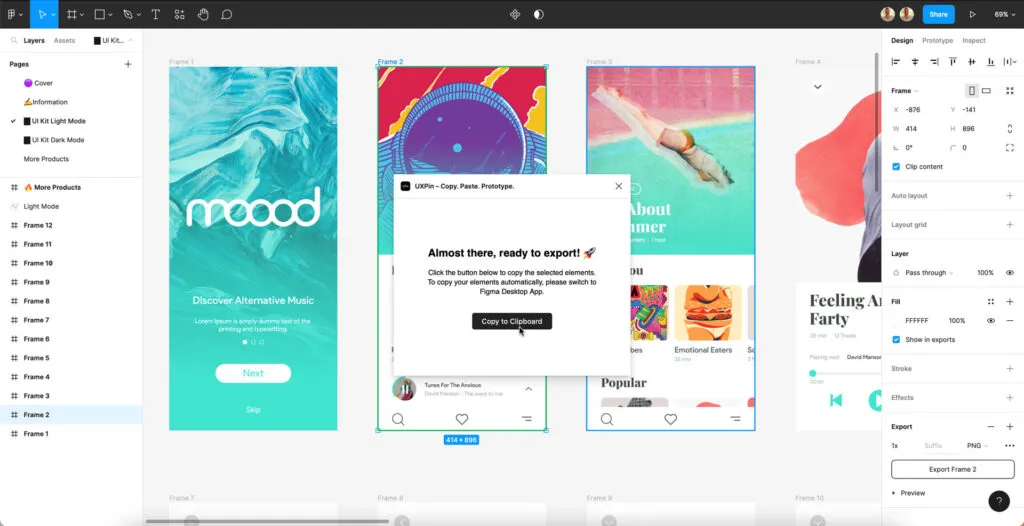
A message will appear at the bottom of the screen saying “Copied to clipboard” once complete.
Step 4: Paste into UXPin
Create a project in UXPin, and open it. Use the paste shortcut COMMAND+V or right-click Paste > Paste Here.
Drag the design to position it if necessary.
If you have more than one screen, add a new page and repeat steps 2 & 3.
Note: In Figma, you have multiple screens on a single artboard or view, whereas UXPin uses a single screen per page. You’ll notice this workflow is more intuitive when you create prototypes with interactions and page transitions.
Step 5: Add interactivity
Once you have imported your Figma designs, it’s time to create interactive prototypes in UXPin. We have several example apps and patterns demonstrating UXPin’s prototyping features. You can also follow our example YouTube video for this application.
Here are some examples of UXPin’s prototyping features.
A desktop Carousel example demonstrates three methods for creating animated carousels. One is automatic, while the other two rely on a click/tap trigger.
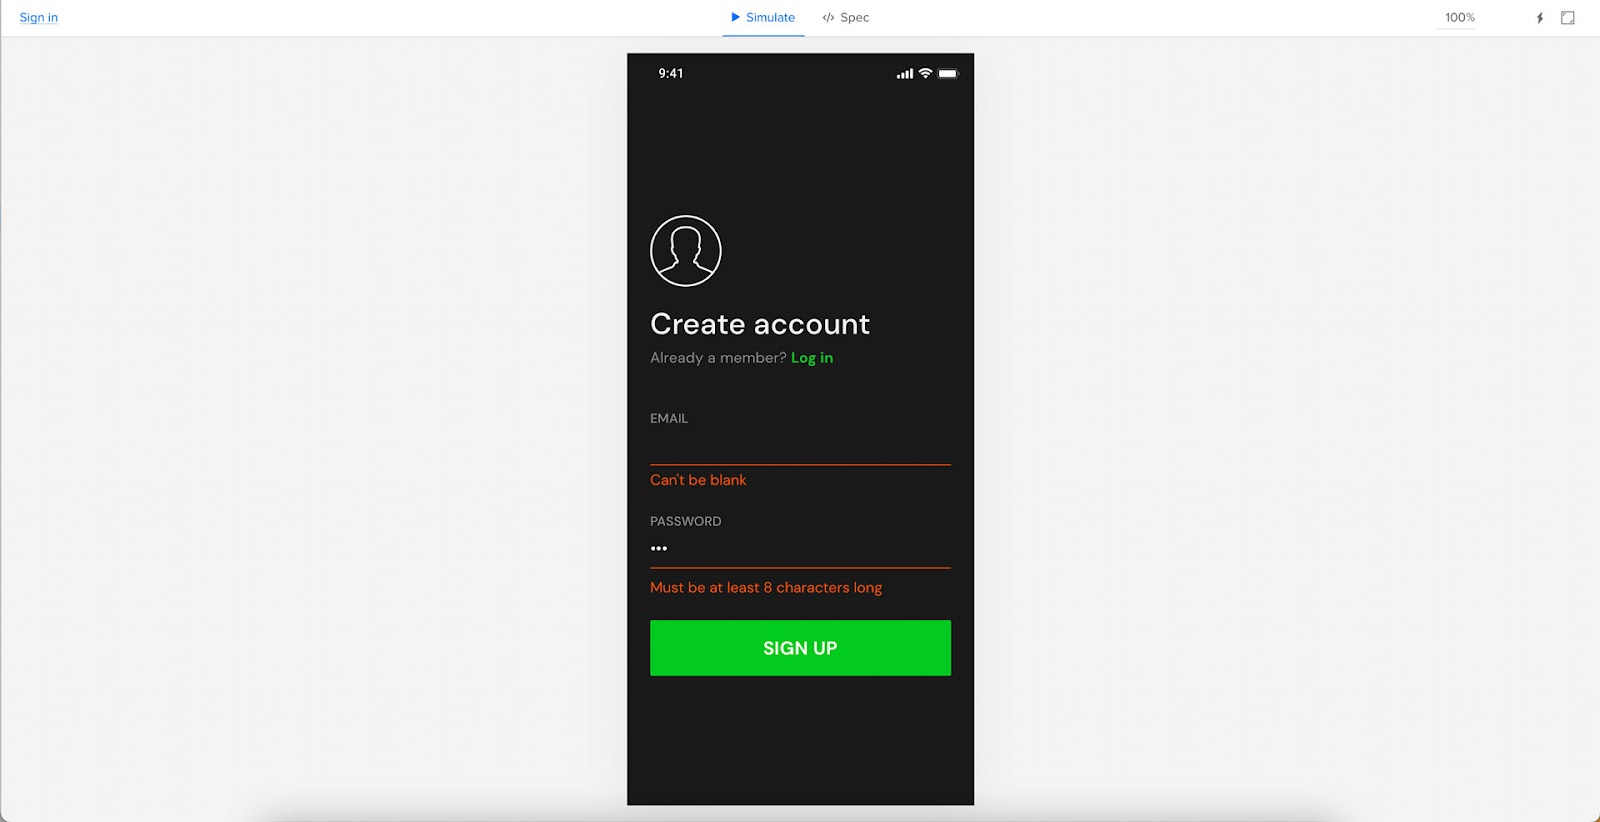
UXPin’s sign-up form example demonstrates how designers can create fully functioning forms that capture user data (using UXPin’s Variables) and use it elsewhere in the prototype–like a personalized confirmation screen.
The sign-up form uses a combination of Interactions and Expressions for dynamic error messages that respond to user inputs.
This stepper example shows how you can combine an interactive button with an input field–a standard eCommerce UI pattern. Users can use the + or – buttons to step up or down or use the input field to enter a custom amount.
The bottom line is that design teams can recreate in UXPin most of what engineers can do with HTML, CSS, and Javascript. Designers can connect to APIs using IFTTT (If This, Then That) to go beyond any image-based design tool’s capabilities.
Step 6: Share prototype with stakeholders
Stakeholder feedback is an essential part of the design process. The problem with image-based prototyping is that stakeholders battle to interpret designs, adversely impacting the design team’s ideas and buy-in.
UXPin prototypes look and feel like the final product, so there’s no confusion about what the designs should do. Stakeholders can interact with UXPin prototypes, including completing forms, making purchases, upgrading/downgrading plans, and more.
Designers use Preview and Share to share prototypes in the browser or UXPin Mirror for mobile applications. They can also password-protect designs so that only those authorized can view them.
UXPin Comments allow stakeholders to share feedback on prototypes. They can assign comments to team members who can action and mark them as resolved once complete. You can add these extra team members and stakeholders for free, allowing everyone to collaborate in UXPin without purchasing additional users for non-designers.
Step 7: Run usability tests
As with stakeholder feedback, designers can use Preview and Share to test in the browser or UXPin Mirror for native app testing.
With UXPin’s advanced prototypes, design teams receive meaningful, actionable feedback from usability participants, allowing them to identify more problems and opportunities.
UXPin uses a component-based approach to designs, meaning designers create fully interactive components rather than multiple frames as they would in image-based design tools. The result is fewer screens, making it easier and faster to test and iterate.
Step 8: Design handoff
Design handoffs are much smoother with less confusion in UXPin. Prototypes look and feel like the final product, giving engineers an immersive understanding of triggers, interactions, animations, and user flows.
Designers can include prototypes, design files, documentation, assets, and technical specs for engineers to examine. With final product-like functionality and fidelity, prototypes need less explanation and documentation.
Team members can use UXPin Comments to collaborate throughout the design handoff, keeping everything in one location, minimizing errors and “missed” files.
Create prototypes that are fully interactive
UXPin’s code-based features enable designers to go beyond what’s capable in image-based design tools like Figma, Adobe XD, InVision, and others.
Here are five UXPin features to take your prototyping to the next level.
States
Many design tools offer features to change component states, but these are limited to basic interactivity, like active, hover, disabled, etc. UXPin’s States enable designers to create complex components, including fully functioning accordions, multilevel dropdown navigation, and carousels.
Interactions
Interactions are the heart of any prototype or digital product. Without interactivity, the prototyping scope is severely limited. UXPin’s Interactions include multiple Triggers, Actions, and Animations to create immersive experiences that respond to user engagement and system changes.
Designers can use Conditional Interactions to design “if-then” and “if-else” conditions (similar to Javascript functions) to recreate dynamic “code-like” outcomes–as the user would experience using the final product.
Variables
UXPin comes with several form elements that respond to user engagement like they would in code. Designers can use UXPin’s Variables to capture user inputs and use that data elsewhere in the prototype.
In the sign-up form example above, the prototype captures data from the email input to tell that an email was sent to the address they entered and to check their inbox–accurately replicating a typical sign-up confirmation screen with dynamic user information.
Expressions
Expressions allow designers to increase prototype complexity with code-like functionality. Returning to our sign-up form, we used Expressions to ensure the email and password inputs met specific criteria and triggered error messages when they weren’t met.
Some of the data designers can use in Expressions include:
- Numbers – matching numerical values
- Strings – text specified in double quotation marks, e.g., “Text”
- Content of elements – content of an element specified in single quotation marks, e.g., ‘Box’
- Function – any of the supported functions, e.g., length(string)
- Boolean values – true or false value
When designers combine these features, the possibilities are endless. They’re only constrained by code, thus enhancing prototype capability and developer collaboration.
Component import
Code import is a way to sync development components with UXPin. If you want to increase productivity, reach consistency, and collaborate better with engineers, here’s something for you. With this import, you can bring components from Git, Storybook, or npm, and speed up every part of product design process, from prototyping to design handoff.
Don’t let image-based design tools limit prototyping scope. Improve prototypes with UXPin for better stakeholder feedback and user testing. Design the user experiences your customers deserve with the world’s most advanced design tool. Sign up for a free trial.