UX Case Study – Step-by-Step Guide [+Template]

Would you believe that a good user experience case study has the potential to get your job application noticed in the eyes of recruiters in case you get that job interview? If you are all set to share your portfolio with the hiring managers, why not take the final plunge and include the element that can transform your overall impression as a candidate entirely?
Case studies lay out a quick roadmap in front of your recruiters that lets them get a sneak peek into your analytical and creative mind. Reading a UX case study is like your hiring manager taking a walk with you through the design problem at hand. You get to explain the process that you followed to curb the user pain points with your unique design thinking process, which also captures the essence of what is a user-centered design.
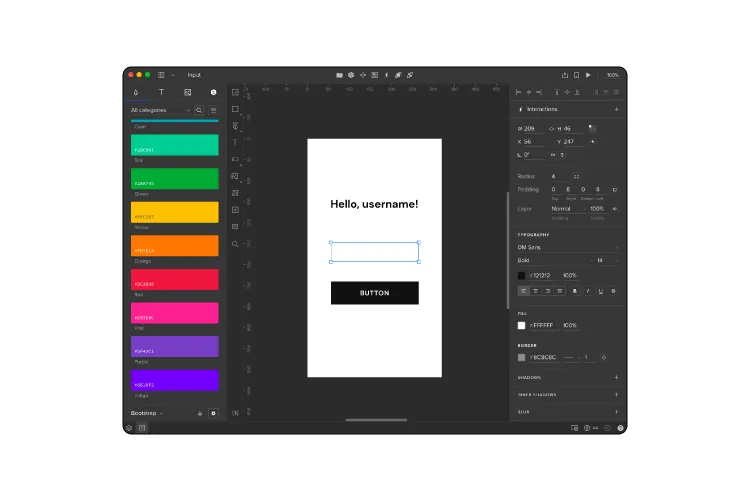
Try UXPin. One of the best prototyping tools that allow users to create high-fidelity prototypes with real HTML, CSS, and JavaScript, making designs highly interactive and closer to the final product. Build prototype that you can share in your UX portfolio as a case study to hiring managers. Try UXPin for free.

What Are UX Case Studies?
A UX case study is a story that explains how you solved a design problem. It shows your design process step-by-step—from understanding user needs to creating solutions.
n a case study, you’ll typically explain the problem you faced, the research you did, the ideas you explored, how you tested your designs, and the final outcome. It’s a way to show your problem-solving skills and thinking as a UX designer, often used in portfolios to land jobs or impress clients.
Why Case Studies Should Be in Your Portfolio?
Case studies should reflect a curious and creative thinker within you. They should also let you demonstrate your ability to turn research and relevant insights into something concrete for design.
When you’re interviewing for an analytical position such as a UX role, you’re showing off your problem-solving skills because UX is problem-solving first and design second. Your case study should demonstrate not just your process but also your ability to tackle complex problems.

The Anatomy Of a Great UX Case Study
A memorable UX case study explains in graphic detail the design process you follow throughout every stage of the design project. It pens out not only your research but also the reasoning for your ultimate design decisions while accentuating your design skills.
Let’s begin with the structure you should follow to capture everything chronologically:-
Step-1: Start with “An Introduction”
Step-2: Familiarise with the “Process Followed”
Step-3: Lead with “The Research”
Step-4: Engage with “Design Iterations”
Step-5: Conclude with “Final Observations/Result”
The key here is to keep the content of the case study short, crisp and to the point for hiring managers and recruiters. No one’s going to sit there and sift through your case study for an hour. Reviewing case studies by experienced professionals means scanning them in mere minutes and knowing whether you have what it takes or not.
Also, make it a point to give each section an equal amount of attention when crafting your case study. You never know when recruiters and hiring managers might take notice of something you avoided.
How to Write a UX Case Study for Portfolio
UX Case Studies highlight challenges, research, ideation, prototyping, testing, and the final outcome. There are 5 steps that will help you write the best case study that you can include in your design portfolio.
Step-1: Introduction
If you don’t capture your reader’s attention in the introduction, they probably won’t continue reading. Make the introduction an engaging, concise way to set the stage for your article. Also, don’t forget to articulate the primary problem that you are aiming to solve.
Here are a few elements to include in the introduction that will make your content crisp and self-explanatory:-
i) Overview of the company: What is this company’s identity? What do they do, and what are their goals and mission statement?
ii) Challenge the company was facing: What was the pain point you decided to tackle? What was the ultimate question you were trying to answer? What difficulties do you encounter while addressing the problem at hand?
iii) How do you fit in the picture: What was your role in the project? What were the timelines? Were there any constraints that affected the project?
iv) Your Take: A methodology is a specified, systematic approach to solving problems or performing tasks. What methods did you use to comprehensively analyze your user data? What methods did you use to test your idea?
v) Conclusion: Elaborate on the conclusion for the end product and wrap up with a fully defined objective which you’ve completed and deliverables.
Reminder- Don’t go overboard with details in this section, we will get to it later.
Step-2: Process
When highlighting your process, make sure to be explicit about which UX research methods you used and how they helped influence your design decisions.
You should:
i) identify the UX design problems that you faced with a problem statement,
ii) show how you approached the project in terms of information architecture,
iii) show how you interacted with your users in order to gather relevant metrics and understand their needs through good ux
iv) show what research methods did you implement etc.
Explaining the methodology you used to accomplish a specific task is crucial for recruiters and hiring managers to know.

Step-3: User Research
Now is the time to walk everyone through your UX design case study process. It works like a hypothesis that can get approved or rejected based on your findings. So there’s no right or wrong answer to it. This gives you an opportunity to elaborate on the methods you came up with the former stage and bring action-oriented improvements to the process.
The way to go about it is to briefly explain the design research techniques you used (card sorting, user persona, usability testing, etc.), why you chose these specific techniques, and what outcome you hoped to achieve. Ultimately, your research ends with how effective your UX design solution proved for the users.
What are research methods for UX case study?
When creating a UX case study, you’ll need to gather data to understand your users and the problem you’re solving. Here are a few research methods:
- User Interviews: Talk to real users to understand their needs, pain points, and goals.
- Surveys: Collect data from a larger group of users to spot trends.
- Usability Testing: Watch users interact with your design to identify areas for improvement.
- Competitor Analysis: Study competitors’ products to find strengths and weaknesses.
Each method helps you gather insights to create better user-centered designs.
Step-4: UX Design Decisions
When you start the design phase, you look back at your research and start thinking about how you could design to accommodate your findings. Use the results of your research to inform your design decisions. This is an important part of user-centered design. Take the findings from your user research and apply them to your designs.
If your project is to build a new website or landing page, make sure each iteration includes visual design mockups. You can include steps such as:
- Sitemaps: A visual representation of a website’s structure, showing how pages are organized and linked together.
- User Flows: Diagrams that map out the steps a user takes to complete a task on a website or app.
- User Journeys: Visuals that tell the story of a user’s experience with a product, from start to finish.
- Paper Wireframes: Simple sketches of a layout, often used to brainstorm ideas quickly.
- Medium/High-Fidelity Wireframes: Detailed digital versions of wireframes, showing more precise layouts and design elements.
- Prototypes: Interactive models of a design that simulate how the final product will work, allowing for user testing.
Step-5: Result
Employers should be able to quickly and easily find the content that’s most relevant to what they want to know about. To show your final UX design, you can use any tool that suits your needs. It can be a wireframe, high-fidelity mockup, or even something more sophisticated like an interactive prototype. Don’t forget to link to the source and voila! You’re done! If you want to show off your skills and use an intuitive tool for that, try out UXPin. Take your interactive prototyping to a higher level.
How to Pick up a Topic for UX Case Study
These points will help ensure the chosen project showcases your strengths and thought process effectively:
- Choose a project that highlights your skills: Pick a project where you played a key role and can show the depth of your design thinking.
- Focus on challenges and solutions: Select a project that had clear problems and how your design process solved them.
- User impact: Choose a case where your design made a measurable difference for users.
- Relevance: Select a topic relevant to the type of job or client you’re targeting.
- Complexity: Choose a project that had multiple stages (research, ideation, testing) to show your full range of skills.
- Collaboration: Highlight projects where you worked closely with other team members (e.g., developers, stakeholders), demonstrating teamwork and communication.
- Personal Growth: Pick a project that challenged you and helped you learn new skills or tools.
- Scalability: Consider projects that evolved over time or could be expanded, showing your ability to think long-term.
UX Case Study Template
Here’s a UX Case Study Template to help guide your readers:
1. Project Overview
- Brief description of the project
- Your role and responsibilities
- Tools and methods used
2. Problem Statement
- What problem were you solving?
- Why was it important?
3. Research
- Research methods (e.g., user interviews, surveys)
- Key insights gathered
4. Design Process
- Ideation and brainstorming
- Wireframes (low/medium/high fidelity)
- Prototypes
5. Testing and Iteration
- Usability tests and feedback
- Changes made based on insights
6. Final Design
- Overview of the final solution
- Screenshots or mockups
7. Results and Impact
- Measurable outcomes
- How the design improved the user experience
8. Key Learnings
- Challenges faced
- What you learned from the project
Summary
By following these steps, you can turn a good case study into a relevant design portfolio piece that showcases your problem-solving skills while bringing your creative side to the table to achieve maximum harmony between functionality and aesthetically fine design work. At the end of the day, the whole point behind a case study is to establish expertise in the area of UX research and design and be perceived as a UX professional in the eyes of potential prospects. Use an intuitive design tool that will help you show your skills – sign up for a 14-day trial.