
The Web Design Process: 8 Essential Steps From Strategy to Launch (2026 Guide)
Master the web design process with this 8-step guide. Covers goal-setting, research, wireframing, prototyping, content strategy, development, QA, and post-launch optimization for modern teams in 2026.
A structured web design process ensures your site is user-friendly, visually consistent, technically sound, and aligned with business goals. Whether you’re a designer, developer, or project owner, understanding each phase — from initial planning through post-launch optimization — helps teams collaborate effectively and avoid costly rework.
This guide walks through the 8 key steps of the web design process in 2026, including how AI tools and code-backed design workflows are reshaping the way modern teams build websites and web applications.
UXPin helps teams move faster through the design-to-development pipeline. With UXPin Merge, you build prototypes using real, interactive code components — and with Forge, you generate layouts from text prompts using your production design system. Try UXPin for free.
Step 1: Define Goals and Requirements
Every web design project begins by answering foundational questions:
- What problems is the website solving for its users?
- What specific actions should users take (sign up, purchase, explore content)?
- What are the key value propositions to communicate?
- What platforms and devices will users access the site on?
- How will success be measured (conversion rate, time on site, bounce rate)?
Use frameworks like SMART goals (Specific, Measurable, Achievable, Relevant, Time-bound) or OKRs (Objectives and Key Results) to formalize objectives. Document everything in a project brief that includes scope, budget, deliverables, and constraints.
Engage all stakeholders early to ensure alignment on priorities. Misaligned expectations at this stage are the most common cause of delays and scope creep later in the process.
Step 2: Research and Strategy
Research transforms assumptions into informed design decisions. This step establishes the strategic foundation for everything that follows.
Competitor Analysis
Evaluate competitor websites to identify design patterns, content strategies, and gaps you can exploit. Use tools like SimilarWeb and Ahrefs for traffic and SEO insights, and platforms like Awwwards, Dribbble, and Behance for design inspiration.
User Personas and Research
Build detailed user personas covering demographics, goals, pain points, and technology preferences. Conduct user interviews, review analytics data, and analyze support tickets to ground your personas in real behavior rather than assumptions.
Content and SEO Strategy
Define your messaging hierarchy, content types (landing pages, blog, case studies), keyword targets, and internal linking plan. SEO considerations should inform the site structure from the beginning — not be added as an afterthought. Map out which pages target which keywords and how they connect to each other.
Step 3: Information Architecture and Wireframing
Creating a Sitemap
Map out the website’s page hierarchy and navigation structure. Organize pages based on user journeys, prioritize important content, and plan internal linking that supports both usability and SEO. A clear sitemap prevents disorganized navigation and helps search engines understand your content hierarchy.
Designing Wireframes
Wireframes define the placement of elements — headers, navigation, content areas, CTAs, and footers — without getting into visual styling. Focus on:
- Content placement — Position key elements strategically based on user priorities and reading patterns.
- Usability — Design for intuitive navigation and logical information flow.
- Responsive breakpoints — Plan how layouts adapt across mobile, tablet, and desktop.
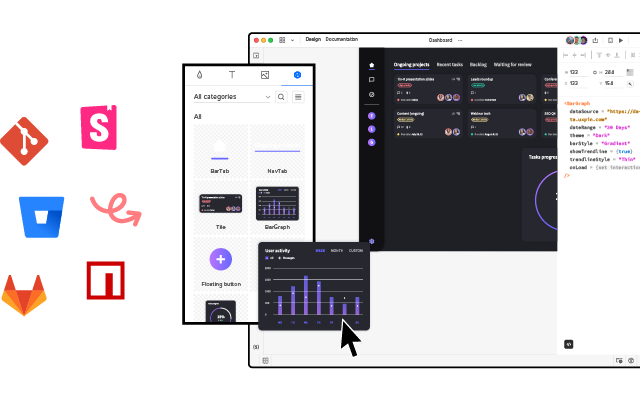
In UXPin, you can use the Pages Panel to structure your sitemap, then build wireframes using components from the built-in UI library or your own design system via Merge. Real-time collaboration features let your team leave comments directly on wireframe elements, speeding up iteration.
Step 4: Visual Design and Interactive Prototyping
This is where wireframes become polished, interactive designs that stakeholders and users can experience.
Establishing Visual Identity
Define (or apply) your brand’s color palette, typography, spacing system, and component styles. In UXPin, create a design system with reusable tokens and components so every screen is visually consistent. If you already have a design system, sync it directly via Git integration.
High-Fidelity Prototyping
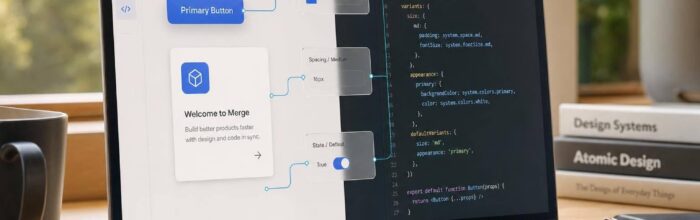
Build interactive prototypes that simulate the real user experience. With UXPin Merge, your prototypes use the exact code components that will ship in production — buttons, forms, modals, and navigation behave exactly as they will in the live site.
Accelerate this step with Forge. Describe a page layout in plain language — “Create a hero section with headline, subtitle, CTA button, and feature grid below” — and Forge assembles it using your real components. Iterate conversationally (“make the CTA more prominent,” “add a testimonial section”) without starting over.
User Testing Before Development
Test your interactive prototype with real users before committing to development. Because UXPin prototypes built with Merge function like the real product — with working forms, conditional logic, and state changes — the feedback you collect is significantly more reliable than what you’d get from static mockups.
Step 5: Content Creation and SEO Implementation
Writing Effective Web Content
Follow these principles for content that serves both users and search engines:
- Clarity and scannability — Use headers, bullet points, and short paragraphs. Design for scanning behavior, not linear reading.
- User-focused language — Address user pain points and goals directly. Match the tone to your brand and audience.
- Accessibility — Choose readable fonts and sufficient contrast. Add alt text to all images for screen reader compatibility.
- Structured data — Include JSON-LD schema markup (Article, FAQ, Breadcrumb) to enhance search result appearance and LLM discoverability.
Technical SEO Optimization
- Keyword integration — Use primary and secondary keywords naturally in headings, body text, and meta descriptions.
- Core Web Vitals — Optimize page load speed (LCP), reduce layout shift (CLS), and ensure interactivity responsiveness (INP).
- Internal linking — Connect related pages to help both users and search engines navigate your site effectively.
- Mobile-first indexing — Ensure all content and functionality works flawlessly on mobile devices, since Google indexes the mobile version of your site.
Step 6: Development and Implementation
Converting Designs to Production Code
This is where code-backed design workflows pay off. With UXPin Merge, the gap between design and code is minimal — the components in your prototype are the same ones in your React codebase. Developers can extract production-ready JSX directly, eliminating the manual translation that typically introduces inconsistencies and delays.
For teams using Merge, enterprise customers have reported up to 50% reduction in engineering time thanks to this single-source-of-truth approach.
Responsive Implementation
Ensure your site performs well across all devices. Use responsive design principles and test layouts at multiple breakpoints. UXPin’s Auto Layout feature helps designers visualize how elements resize and reflow before development begins.
Designer-Developer Collaboration
UXPin’s Spec Mode provides developers with detailed specifications — CSS properties, spacing measurements, component hierarchy, and downloadable assets — directly from the prototype. Combine this with real-time collaboration features (commenting, tagging, task assignment) to keep teams aligned throughout implementation.
Step 7: Testing and Quality Assurance
Thorough QA ensures your site works correctly and provides a positive experience across all conditions.
Types of Testing
- Usability testing — Observe real users completing tasks to identify friction, confusion, and navigation issues.
- Functionality testing — Verify that all interactive elements (buttons, forms, links, menus) work correctly.
- Performance testing — Measure page load times, server response, and behavior under load.
- Accessibility testing — Validate compliance with WCAG guidelines using both automated tools (axe, Lighthouse) and manual testing with assistive technologies.
Cross-Browser and Cross-Device Testing
Test on the browsers and devices your audience uses most (check analytics data). Tools like BrowserStack simulate different environments, helping you catch rendering inconsistencies and layout issues before launch.
Pre-Launch QA Checklist
Before launching, verify:
- All forms submit correctly and validate input
- Navigation works at every level of the site hierarchy
- Images load and display correctly across screen sizes
- Page load times meet Core Web Vitals thresholds (LCP < 2.5s, CLS < 0.1, INP < 200ms)
- SEO elements (title tags, meta descriptions, alt text, canonical URLs) are in place
- HTTPS is active with no mixed content errors
- Analytics and tracking scripts are installed and firing correctly
- Structured data validates without errors in Google’s Rich Results Test
Step 8: Launch and Post-Launch Optimization
Launch Day
Coordinate the launch with your marketing team. Have a rollback plan in case critical issues surface. Monitor server logs, analytics, and error tracking tools closely for the first 24–48 hours.
Post-Launch Activities
- Monitor performance — Use Google Analytics and Google Search Console to track traffic, bounce rates, conversion rates, and keyword rankings.
- Gather user feedback — Deploy on-site surveys, heatmaps, and session recordings to understand real user behavior.
- Iterate based on data — Identify underperforming pages, test improvements through A/B testing, and update content regularly.
- Schedule ongoing maintenance — Plan regular audits for broken links, outdated content, security patches, and performance optimization.
How AI Is Changing the Web Design Process in 2026
AI tools are accelerating nearly every step of the web design process:
- Ideation — AI generates layout ideas, suggests content structures, and produces initial wireframe concepts from text descriptions.
- Design — UXPin Forge generates page layouts using your real production components from a text prompt, image upload, or URL input. It gets you to 80% in seconds — then you use professional design tools for the final 20%.
- Content — AI writing assistants help draft copy, meta descriptions, and alt text, though human editing remains essential for tone and accuracy.
- Development — Code generation from AI-designed prototypes (especially with Merge) reduces the handoff gap and speeds up implementation.
- Testing — AI-assisted accessibility auditing and automated visual regression testing catch issues faster than manual review alone.
The key advantage of tools like Forge is that AI generation is constrained to your production design system. Design System Guidelines ensure brand rules are enforced across all AI output, so you get speed without sacrificing consistency or quality.
Frequently Asked Questions
What are the steps of the web design process?
The web design process typically follows 8 steps: (1) Define goals and requirements, (2) Research and strategy, (3) Information architecture and wireframing, (4) Visual design and prototyping, (5) Content creation and SEO, (6) Development and implementation, (7) Testing and QA, and (8) Launch and post-launch optimization.
How long does the web design process take?
Timelines vary based on project scope. A simple marketing website might take a few weeks; a complex enterprise application can take several months. Using code-backed design tools like UXPin Merge and AI assistants like Forge can significantly compress the design and prototyping phases.
What is the difference between wireframing and prototyping?
Wireframes define the layout and structure of a page — where elements go — without visual styling or interactivity. Prototypes add visual design, interaction, and functionality so stakeholders and users can experience the product before development. UXPin supports both stages in a single platform.
How does AI help in the web design process?
AI tools like UXPin Forge generate page layouts from text prompts, convert screenshots into component-based designs, and produce production-ready code. AI also assists with content drafting, accessibility auditing, and visual testing — accelerating every phase of the process.
What tools do I need for web design?
At minimum: a design and prototyping tool (like UXPin), a code editor, browser developer tools, and analytics/SEO tools (Google Analytics, Search Console). For modern workflows, add a component library (MUI, shadcn/ui), version control (Git), and project management software.
Why is prototyping important in web design?
Prototyping lets you test the user experience before writing production code — catching usability issues, gathering stakeholder feedback, and validating design decisions early. With UXPin Merge, prototypes use real code components, so testing results accurately reflect the final product’s behavior.

by UXPin on
UXPin is a web-based design collaboration tool. We’re pleased to share our knowledge here.