Product development and design: Tips to improve collaboration between designers and developers

Product development and design

Today’s technology means it’s never been easier to foster a collaborative culture between multi-discipline teams. Yet, here’s the rub: while 75% of employers say teamwork and collaboration are important, 39% of employees believe people don’t collaborate enough in their organization. 

In today’s article, we’re going to talk about:

  • What impacts team collaboration during design and development of products 
  • The tips to make work between designers and developers more effective during software product design
  • Share two brands that you can draw inspiration from.

Let’s dive right in. 

Product development and design – key factors that influence team collaboration

There are two major areas that impact the way teams work with each other. These are: the numbers and variety of roles and the design team setup. Let’s take a look at them below.

Numbers and types of design team roles

Design teams are an incredibly diverse group. In some organizations, it may only be one person, or it could be a large group, with each person bringing their own skills to a collaborative project.

In the pursuit of greater collaboration, it’s more practical to think of members like medical professionals (it’s not that far a reach) or a marketing team (perhaps, an easier comparison) with writers, social media handlers, data analysts, SEO execs. 

Similarly, each person on the design team has a unique role and specialization, from usability research and UX design, all the way through to user interface, branding, and interaction design. Every role connects with internal and external projects differently. 

Team setup

Design team structures, which influence how designers and developers work together, come in four flavors. 

1. Centralized

A centralized structure is characterized by a single decision-maker and a central base. It’s the most traditional and recognizable method of team management. Separate teams of designers work on separate projects under design managers who report to the UX VP or director. Centralized teams offer simpler collaboration and a shared vision for projects, however, design processes are slower and teams are siloed. 

2. Embedded

Embedded teams, sometimes known as decentralized or distributed teams, are cross-functional, with members from different departments working together on a particular project. For example, a new website landing page might bring together a designer, a back-end developer, a copywriter, all overseen by a project manager. Embedded teams foster greater company-wide trust and collaboration, focusing on each team member’s specific expertise, although it’s a structure that’s not always efficient. 

3. Flexible

Flexible teams take a pinch of centralized and a dab of embedded to form a hybrid hierarchy. Designers act as part of a multi-discipline cross-functional team, working day-to-day under a team leader, while being managed by a design manager. A flexible team is focused on the design process and is generally better suited to adapt to changing objectives. But the structure often leads to confusion over the chain of command, making it unsuitable for larger organizations.

4. Contractual

Contractual teams are external designers hired as freelancers. This method is often used by businesses that don’t have the budget for a full-time in-house team, or an existing team that needs additional support on a specific project. 

5 tips to improve collaboration between design & development teams

Let’s now take a look at the tips that will help you improve the design and development of products and boost cooperation between your teams. 

1. Assess what your current team setup is and what it needs

Hierarchies and processes will vary across organizations, and it’s important to explore the type that best works for your teams. This will depend on a number of factors, including:

  • Company size
  • Size of design team
  • Design project type
  • Design project demands.

Alongside key stakeholders, examine your current setup. Consider where it’s working and where you can make improvements. Where possible obtain feedback from those ‘in the thick of it’, who will likely have valuable insights into the process. 

This is an important – and often overlooked – aspect of any organizational transformation: employees want to feel valued and heard. Gaining buy-in from those affected by any change is critical if it is to be successfully embraced across teams. 

For example, you may currently deploy an embedded design team, but it’s apparent that multiple members are repeating the same tasks as each other. That’s a costly and inefficient endeavor (and it’s not going to have a positive impact on employee morale, either). At that stage, it may be time to trial a more flexible approach, which champions speedy, design-focused collaboration.

Always have a clear, attainable objective before making any changes to team structure. 

2. Designers should know to whom they report to

Every team in every business needs a clear chain of command. It establishes expectations, increases efficiencies, and helps team members seeking support.

It’s one of the biggest problems for designers in a flexible team setup. Designers find themselves wondering whether to discuss matters with the project manager or their own design team lead. It’s the sort of problem that’s all-too-easily papered over with quick fixes and promises of ‘next time…’, without ever addressing the real problem. 

At heart, it’s a communication breakdown. One wide-ranging study ‘cited an average loss per company of $62.4 million per year because of inadequate communication to and between employees.’ And poor communication kills collaboration. Teams face an endless carousel of projects with no direction, no purpose, no ownership, and no shared vision in an environment where no one dares innovate. 

Shifting to a centralized or embedded team type may be more desirable here. Both offer recognizable command hierarchies, improving communication either within a single team (centralized) or driving collaboration across departments (embedded). 

3. Make sure designers don’t feel disregarded

Developers almost always outnumber designers. It doesn’t matter the size of the business or the type of work. If there’s only one designer on a team with multiple devs, there’s always the risk that a designer’s opinions are disregarded. In emotional terms, it’s an empathy deficit. 

Developers and designers approach projects from very different angles. They don’t see what the other is seeing, because they’re not looking for it in the first place, so they can’t understand it.

This should be addressed swiftly to boost morale and team cohesion. Encourage mutual respect by highlighting the roles, responsibilities, and authority of every team member. Also, make sure to clearly define their areas of expertise. It’ll make it easier for designers to have their say and advocate from a design expert perspective. 

4. Give designers access to the right tools

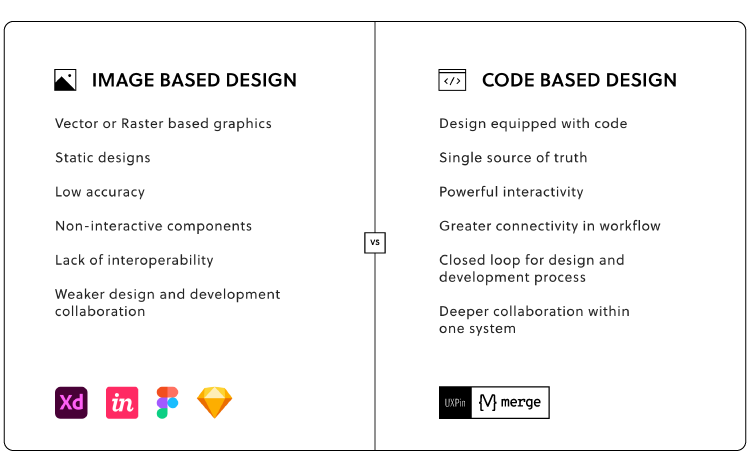
Technology has made collaboration quicker, faster, and easier than ever before – no matter where in the world your team is. But choosing the wrong technology or keeping outdated tools and obsolete systems can be a costly decision. Efficiency. Competitiveness. Innovation. All of these can be increased by making sure designers have access to not just the best tools but the right tools. 

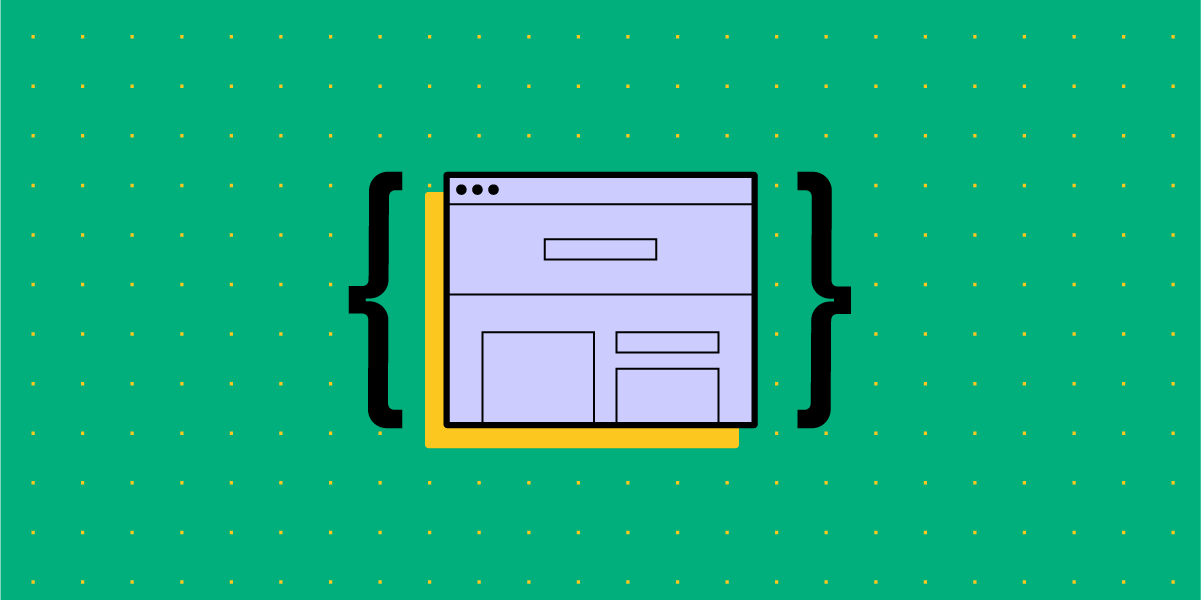
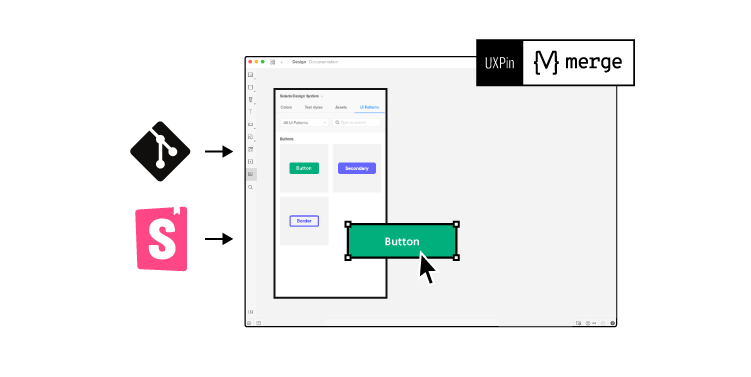
UXPin Merge transforms how designers and developers work together. 

And it works by bringing teams into the same ecosphere, instead of reinventing the wheel (or overhauling every system and process in the organization, at least).

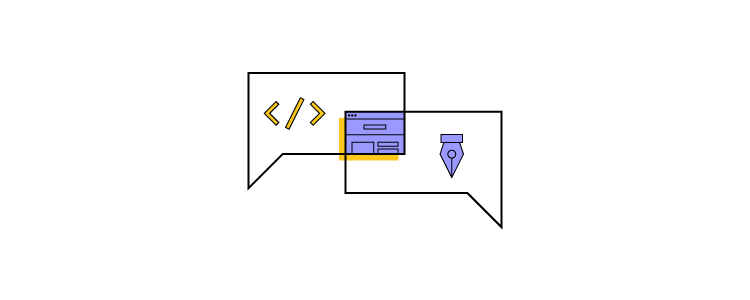
Featuring powerful Git and Storybook integrations, designers can either use the same React components or any components existing in Storybook. It lets designers use the same technology as developers to achieve full consistency with the final product. At the same time, designers can focus on what’s most important to them: be it a clean UI, perfect UX, or immersive interactions.

As an end-to-end collaboration tool, Merge facilitates smooth communication. Because the same system is used by your designers and devs, both will be working seamlessly together throughout the design process.

5. A framework for developer handoffs

The handoff process is one of the most important stages of the product development and design cycle. 

Among others, a good handoff will: 

  • Stop avoidable last-minute changes
  • Communicate clear next steps
  • Increase efficiencies and prevent delays
  • Plug information gaps
  • Gain internal buy-in from key stakeholders early on
  • Highlight what each team needs from the other.

Clarity and accessibility should take precedence to ensure a smooth transition as teams work simultaneously on development and design. 

Software product development – examples of effective cross-team collaboration

Here are a couple of brands that you can draw inspiration from when it comes to software product design. 

Segment

Segment, a leading customer data platform, focuses its software product development process on two stages: discovery and delivery

The discovery phase, driven by product managers and designers, explores whether an idea makes sense. It questions a product’s usability and value to the customer, whether it’s even feasible, and at what cost. 

During this stage, user feedback, data analytics, competitive analysis, and experiments are all deployed. For Segment, discovery ‘drives a shared understanding of the problems customers are facing — without any indication (yet) of how exactly they might be solved.’ 

The delivery phase occurs after a successful ‘discovery’ has been made and handed over to a mixed team of designers and engineers. At this stage, the focus is on how exactly the product works. This may involve creating and documenting interactive prototypes that meet the software design descriptions, showing devs how a product should look, feel, and behave. The team will also review and agree on the final designs. 

Airbnb

Online vacation home company Airbnb was among the first to start thinking of code as a software product design tool. 

Recognizing a collaboration gap at the company, Alex Schleifer, former CDO, said, ‘we’re investing in code as a design tool. Moving closer to working with assets that don’t only include layout and design, but also logic and data. This helps bridge the gap between engineers and designers, thus reducing the need for design specs or redlines and the steps between vision and reality.’ 

The Air/shots tool is one example. Starting life as an off-hand comment – according to design technologist Luke Carter, ‘Schleifer mentioned in passing that it would be cool if we had some sort of tool where designers could see all of the different views of our app. This was exactly the type of project I felt could affect several departments within Airbnb.’ 

Carter’s hunch was right. 

Not only was the product development and design initiative useful to software developers, but the entire company. Engineers found they could use Air/shots to run experimental flows before launch; the tool made it easier for the localization department to improve translations. 

Summary

Organizations today understand the power of collaboration to boost productivity and efficiency and build a workplace culture to be proud of. However, attaining that goal can feel somehow just out of reach. It’s all too expensive and too complicated. 

It’s true, successful projects like Airbnb’s Air/shot take time. And few organizations have the resources to spare creating design teams to research innovative ideas and build collaborative tools – but everyone can use powerful, accessible tools like UXPin Merge

Merge makes it easy to nurture true collaboration between teams, simplifying workflows and communication without curbing creativity. Take it for a test drive, and see for yourself! 

Why You Should Switch to Code-Based Design

Why You Should Switch to Code Based Design

Since the very beginning of digital product design, the default way of designing user interfaces has been image-based.

Designers have been drawing different states of the mobile app or web designs using graphic design tools – GIMP, Fireworks, Sketch, or now Figma, Invision, Adobe XD (which you can in Adobe Creative Cloud) – and then the development teams have been writing code that would replicate what has been drawn.

Over the years this method has proved to have considerable limitations. What limitations are those and is there an alternative? Read on to find out.

Drive design process improvements, take care of operations, and boost collaboration with engineers with UXPin Merge. Request access to see if this design technology is for you. Discover UXPin Merge.

Reach a new level of prototyping

Design with interactive components coming from your team’s design system.

The Problems with Image-Based Design

In the image-based design approach, designers produce a set of static artboards representing different states of the interface and forward them to software developers to code interactive interfaces on their basis. This brings about a lot of troubles for not only the UI design but also the whole product development process – let’s have a closer look at them.

  • Lack of interoperability: There is virtually no connection between designers’ and developers’ universes. Designers work outside of the constraints set up in code and therefore, unknowingly, create things that are very difficult and expensive to code. 
  • Lack of accuracy: As the image-based tools use completely different methods for rendering the result of the designers’ work, texts, gradients, and colors that have been carefully chosen look different in code when an engineer applies the same specs. Some details are missing and some ideas that looked great on a static image are simply impossible to recreate on an actual working product. The handoff then turns into a nightmare. 
  • Static designs: Image-based design only allows for building static artboards, so even simple behaviors (e.g. expanding a dropdown) quickly become unmanageable. Interactive components can’t be reused and there’s no way of setting states of elements, defining variables for content, or using conditional logic. There are prototyping tools out there that fake the interactions but none actually use the ultimate language that creates the clickable elements in real life – the code. 
  • Weak design-engineering collaboration: Even if you use a style guide or a design system, image-based design tools are completely separate from the engineering processes. They’re rather abstract and – unlike technologies used by developers – can’t be experienced by users as the final product. This lack of interactions or having very limited ones, and the inability to import components from code keeps engineers and designers disconnected and frustrated with one another. As a result, not only the handoff drift appears, but also the final user experience suffers.

The benefits of code-based design 

This alternative approach to product design allows designers to render their design intent directly in code… without even knowing how to code! Whenever they draw something, the tool creates relevant HTML, CSS or Javascript, and engages the browser, showing the result visually. This totally flips the entire software designing process, making it more efficient and beneficial for everyone involved. The benefits are as follows.

Code-Based Design Ensures High-Fidelity and Interactivity

Unlike image-based tools, the code-based approach provides 100% match between the intent of a designer and a code-able result. That’s because code-based tools use the same technology as those used in web development to render all of the design projects. As a result, designers can benefit from the full power of code without any coding expertise.

Code-based design tools allow for drawing objects that move, interact, and create complex patterns – on the highest level of interactivity. Before coding the final version, software developers can fully experience the product instead of just imagining how it should work.

There’s no redundant code, so the software works quickly and it’s easy to maintain it. And as the provided designs reflect the approved standards for software development, the final products created by a given company or a software house are consistent with one another. 

Code-Based Design Bridges Gap Between Design and Development 

The code-based design establishes a common language for both designers and software developers. Since everyone involved in the process uses the same technology, there are fewer misunderstandings between teams, especially on the handoff stage.

ou can even go a step further and use a technology such as Merge which allows you to take components that have already been coded by engineers and import them into your code-based design tool. It uses elements that can actually be coded – because those ready and interactive components come from developers.

This establishes a single source of truth for your entire software project – all the components and documentation are stored in a components library like Git (importing React components), npm or Storybook and designers and engineers are connected in one collaborative, creative process, preventing misunderstandings and frustrations from building up.

Also, it helps to avoid inconsistencies in the user interface, code, and documentation – which in the long run saves a lot of time and money by optimizing the design process.

Code-Based Design Provides Endless Possibilities 

Code-based design allows you to have richer prototyping options. And with the aforementioned Merge tool you can greatly extend them.

You can create your own components that can be reused all across interfaces of different products you work on. This saves your entire team a lot of time and effort on designing, coding, and testing particular elements – you only need to do it once. And this also means there are fewer bugs in your products.

Code-Based Design Allows for Powerful Interactions

Using code-based design allows you to create prototypes that look and behave exactly like the final product built by developers. Instead of linking artboards, code-based design tools use the most advanced interactions on the components level, allowing designers to create highly reusable interactive design systems.

Simply put: designers draw interfaces with text fields that can be clicked in, checkboxes that can be checked and unchecked, and so on. Goodbye, static artboards!

PayPal and Code-Based Design

Don’t just take our word for it – some of the top UX designers in the industry corroborate what we say. UX Design team at PayPal did a test of Merge, our new technology in our code-based design tool. Our solution has accelerated their work while giving them the power to easily create their own beautiful high fidelity prototypes consistent with their Developer Console standards.

When compared with an image-based tool, the design quality was much better and there were fewer errors. Also, unlike the competing image-based software, the drop-downs, calendar buttons, and data table controls made using UXPin Merge were interactive. And the entire designing process took less than 1/6th of the time spent doing the same job using the competing software!

Try it Out!

As you can see, switching from image-based to code-based design is a no-brainer. It can only save your team time, effort – and frustrations. To unleash the power of merging the design and development workflows, request access to UXPin Merge.

How Collaboration Makes You a Better Designer

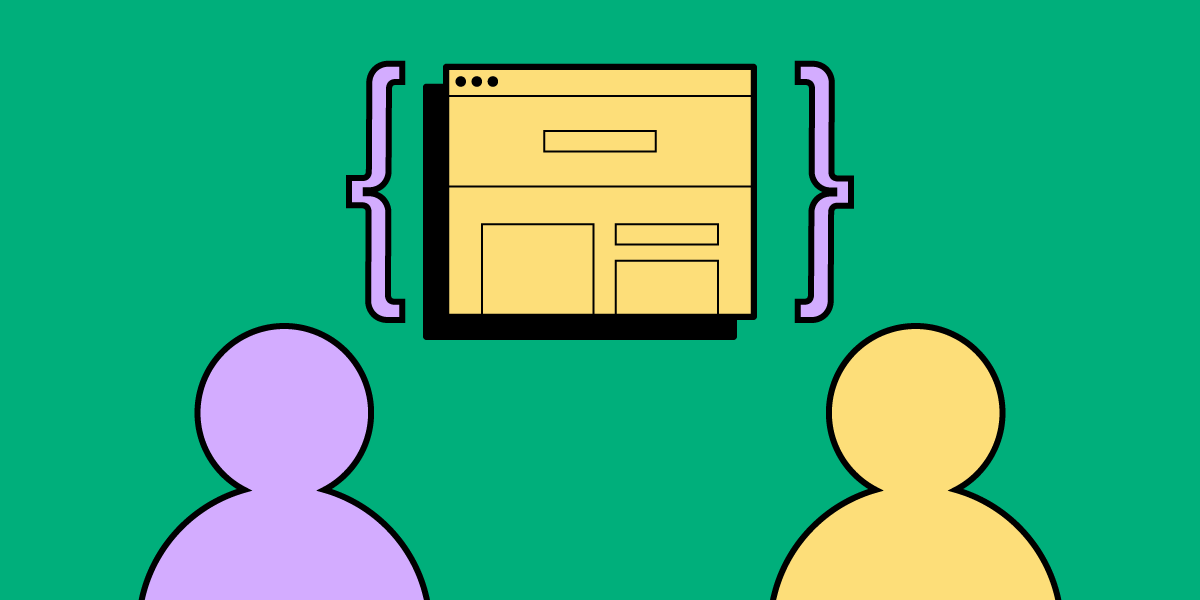
You probably think that you participate in design collaboration every day. You complete one stage of a design, then you hand it to someone else who works on the next step. That isn’t true collaboration, though. That’s more like working at an assembly line where everyone has assigned roles.

Real collaboration involves getting together with other people and contributing to every step of the design. This process could make you a better designer.

Use ideation to develop great design concepts

Ideation gives you a chance to consider the problem you want to solve and start looking for solutions.

You can think of ideas sitting in a room by yourself. Unless you have an extremely creative mind, though, you will probably find your thoughts returning to similar processes over and over. When an approach solves one problem, your brain uses it to answer the next question. It doesn’t take long before your brain falls into a pattern. The pattern might lead to solutions, but they get tired and boring after a while.

Making ideation a part of design collaboration opens your mind to new possibilities. Instead of having a conversation with yourself, you open your mind to ideas from other people. Suddenly, you have more approaches that could lead to a solution. Just as suddenly, your go-to ideas might not seem so great anymore.

Ideation techniques that you can use during design collaboration sessions include:

  • Brainstorming—when everyone shares ideas verbally.
  • Mind mapping—when people create visual ideas and use free association to add more thoughts connected to the original idea.
  • Storyboarding—when the group makes visual storylines that show how your product might work.
  • Worst possible idea—a rather fun approach that opens creative pathways by encouraging people to come up with their worst possible concepts.

Design collaboration doesn’t have to start when you begin drawing lines. It can start when people share ideas with each other.

Design collaboration gives you insights into your product

Design collaboration projects can include people who work outside of your skillset. No matter how much talent and experience you have with UX design, you need to get other people involved to make your products successful and gather their feedback.

Perhaps you don’t include them in every step of the collaboration, but you can get a lot of insight into your designs by requesting feedback from developers, sales reps, and customer service reps. Cross-team collaboration lets you see your product from multiple perspectives. If you can think about designing projects from a sales perspective, you might discover ways to make products more appealing to consumers. If you can see your design from the perspective of people who work in customer services, you could find that it makes sense for you to include features that answer questions for puzzled users.

How to make it seamless without going back-and-forth with email feedback? Make the most of your tool’s collaboration possibilities like leaving comments in the design, sharing access to the prototype with the people you want, and applying changes in real time – even while different teams are working on the same design. And went the project is ready, send its link with all the needed specifications to the developers.

Learn to accept constructive criticism

When you work in a creative field, you can become protective of your ideas. When someone criticizes your design choices, you can feel like you’ve been attacked personally. In most cases, the other person doesn’t intend to hurt your feelings. They just want to provide feedback on design that adds to the product’s success.

The more you open yourself to criticism and outside perspectives, the easier it becomes to accept constructive feedback without feeling defensive and improve the collaboration process

How does letting your guard down make you a better designer?

Imagine that you take your latest design concept to a meeting with four other people. Someone points out that they don’t think your navigation menu will go over well with the target audience. Perhaps you’ve made a design for highly sophisticated users when you should have created one for average users.

If you don’t know how to accept criticism, you feel hurt, and you return to your desk angry. You’re not in the right mood to do good work. You could waste precious hours nurturing your ego instead of looking for smart ways to solve the problem.

This level of defensive reaction rarely happens when you participate in a lot of design collaborations. You get so used to feedback that you don’t take it personally. It’s not about you, after all. It’s about making a product that users will love.

Unlearn your creative approach during design sprints

Building habits makes it easier for creative people to accomplish their goals. A process called “habit stacking” can even help you add useful habits to your day. The more habits you stack, the more you can move from one task to the next without putting much thought into the process.

At some point, habits can become limitations, though. When you use habit stacking to make sure you doodle design ideas while having your morning coffee, you get positive results. If you develop habits that force you to approach each project from the same perspective, though, you can hurt your creativity. It’s important to notice the difference between a positive and negative habit.

Participating in a design sprint with other people can knock you out of your humdrum process. Formal design sprints often take place over the workweek. During each day, you take steps toward your goal. Setting a time limit encourages you to think with your gut, which can lead to new creative ideas that never occurred to you before. 

If a week-long design sprint doesn’t fit your schedule, you can take a faster approach. The rapid sprints help people break the habit of worrying about the quality. When you only have a 25-minute design collaboration session, you work as quickly as possible. You make a lot of mistakes, but you make a lot of discoveries, too.

Add diversity to your design team’s skills

When you work alone, it’s easy to get stuck in a rut. Your designs get the job done, so you never think about developing new skills that could improve your work.

Design collaboration forces people to acknowledge their limitations and learn from other people. 

For the best results, seek out other professionals who have different backgrounds from you. Adding diversity to a workplace helps everyone perform better. You don’t have to rely on your team members to grow, though. Use social media to find potential collaborators who live in other parts of the world. You can learn a lot from each other.

Collaborating can improve your performance

Getting more work done doesn’t necessarily mean that you have to spend extra time fine-tuning your designs. Surveys find that collaborative work results in five times better performance.

Setting up a time to collaborate takes a little effort, but the result is worth it. 

Discover new design tools

Design collaboration gives you opportunities to see how other people work. You might find that some people use design tools you’ve never heard of. That’s like a painter discovering that someone uses a completely different type of canvas!

You can share UXPin easily with collaborators because it lets people experience your prototypes and leave feedback without creating accounts. As long as they have a link to your work, they can access it.

UXPin also has a real-time collaborative environment that lets you and others work on the same project simultaneously. Sign up for a free trial with UXPin now so you can start collaborating with other designers all over the world. You don’t even need to meet, you can collaborate virtually.

Share Sneak Previews of Your Prototypes With Device Frames

Device Frames

You no longer have to imagine what your final prototype will actually look like on a device. UXPin’s new Device Frames… at your service.

Imagine you’ve just poured your blood, sweat and tears into an important design project. You’re ready to shout it from the rooftops and share it with the world. But first, you want your stakeholders to preview it in its full glory—in real life. Enter Device Frames. Device Frames allow you to add mockups of mobile devices for a contextualized preview of your prototypes.

With this update, we’ve added two extra features:

  • You can change the color of the background and add/remove shadow for the device mockups on preview. This gives designers extra powers to control the presentation of their project to stakeholders.
  • Use user finger simulation on preview for mobile devices. Now for mobile prototypes, you’ll see a circle simulating finger instead of a desktop cursor. This adds to the realism of the experience on preview.

Why you’ll love it

Previously, you’d have to download a device mockup from somewhere and upload it to UXPin to preview it. Fortunately for everyone, now you’re able to automatically add the right device image/frame to your preview based on your canvas size. So not only can you beautifully present your design in the context of the right device, it’s automatic too!

Also, you can trust that they’ll see exactly what you intend for your prototype to look like. These digital mockups will help the viewer truly understand what you’re trying to present as the final result, on all its different displays. To show stakeholders the final UI in real world context. Additionally, it benefits designers’ workflow; so you can check out how the design looks like on the real device and adjust it wherever needed to get the best result.

The Device Frames for your designs are not interactive— they are static and for aesthetic preview purposes only. You can preview your prototypes on iPads, iPhones and WatchOS, as well as Android phones and tablets.

This is the first step in our plans to step up our Responsive and Mobile Design game. We’ll be releasing the UXPin Mirror app  soon, to preview your prototypes directly on an iOS/Android device. Stay tuned!

Exporting Prototypes to HTML or PDF Couldn’t Be Easier

Iterating through design doesn’t stop with prototypes. Many people find the ability to share PNGs, PDFs and HTML/CSS handy to have. Such versions are great for archiving drafts, printing out for whiteboard discussions, or testing in real browsers on mobile devices.

In this tutorial we’ll explain how to quickly export a prototype. If you want to follow along, get a free trial to UXPin.

Continue reading Exporting Prototypes to HTML or PDF Couldn’t Be Easier

When You’re Holding A Hammer Everything Seems Like A Nail

This post is inspired by a conversation with one of the winners of the UXBite competition, Tomek. We were talking about various wireframing tools and one of the things Tomek said caught my attention: I was trying to work with ***, but I felt like they gave me a hammer and now I’m obliged to only see nails around me. That made me thinking.

We are being limited by the names we give to specific objects and tools. We are being limited by our habits. We are being limited by habits of other people. And we are being limited by our own usual ways of using certain tools.

For example: what you can do with a hammer? First thing that comes to mind: hit the nails with it of course! What a stupid question?! But as you keep thinking you can find different ways of using a hammer. You can hit nails with it but you can take them out of wooden boards as well. Or you can kill someone with this tool. Everything depends on current needs.

I know that you may be thinking  prototyping / wireframing tool  is only for wireframing or prototyping. Period. Today I want to show you a little alternative way of using JustProto. How? See below.

Product Retrospect.

Product Retrospect is a simple yet effective way of summary after the project’s closed. You gather the whole team and discuss every pro and con that’s project related. You don’t point fingers saying “You screwed this up by not talking to me earlier” but say “This was badly executed due to lack of communication”. Sometimes when your team is spread all over the world it’s extremely difficult to do this kind of project retrospective – time difference and gathering everyone on the same page is hard. JustProto’s collaborative features come in handy in this time of need:

  • Multiple Collaborators,
  • Real-Time Collaboration,
  • Chat,
  • Project Preview with just One Link,
  • Live Preview.

How it works?

Each JustProto account have an Administrator/Owner, who can grant access to others – The Collaborators. Each Collaborator gets his unique login and password to login to the project at a certain time. Using nothing else but computer with Internet access everyone edit the same project at the same time and everyone see all changes in the real time (that’s the Real-Time Collaboration).Kinda like on Google Docs while editing the same spreadsheet or word document.

Each person choses note, tag or pin color they like and that’s that – by editing its text Collaborators – The Team add their point of view on a closed project. What is important – everyone can talk on a project Chat. Smart history will save all the conversations. This way everyone’s up to date even if the Internet connection dies: Chat history and current version of the retrospective is saved and always available online.

Any person who is not on the project team but gets the Preview Link will see the retrospective project. Let’s say your boss is not one of your project team but you’d like him to know the results of the retrospective – send him a Preview Link and that’s that!

What’s even more fun and handy and cool – if a person who get the Preview Link will open it while you and your team edit the notes, they will see everything in the real time too thanks to Realtime Preview! How the project retrospective can all look like? See here.

This example shows that you don’t ALWAYS need to stick to the tool’s purpose. Don’t be limited, try thinking of other ways you can use the tools you like : ) What it also shows is the fact that wireframing tool can be helpful not only while design happen – it can also become pretty useful after the project is done. Remember that the tool is just a hammer. You don’t need to see nails everywhere.

Case Study – Real Story, Real Users, Real Help!

Today We’d Like To Brag A Little (Humbly, Of Course) About One Of UXPin’s Great Users. We’ll Be Introducing You To SocialPaths And Their Real-Life UXPin Adventure With Interactive Wireframes!

“We are no longer able to work without UXPin…”

SocialPaths (a.k.a. The Great User)
SocialPaths is a social media agency that, in their own Creative Director Piotr Zaniewicz’s words – mainly takes care of supporting all kinds of social media marketing activities. Their house speciality is engaging social media games connected to different kinds of loyalty programs that make good use of social media’s viral nature. Among many cool projects, the team at SocialPaths have created contest apps for the Facebook page of one of the biggest trance music festivals in Europe as well as a very popular app called The Great Advice of Mieciu The Eternal Student. While their apps are mainly created for Facebook, they also build interactive tabs for websites and contests.

KISS (a.k.a. The Biggest Work-Related Headache ; )
Working with clients isn’t always a bed of roses, the SocialPaths crew can vouch for that. Putting up with those occasional clients who always know best is one of the most annoying little problems SocialPaths encounters. Of course, clients have every right to have their vision of their product realized, BUT painting that vision in the form of a working app is sooooo complex and difficult that it’s not the piece of cake that clients think it is upfront. Our main problem that we face on an everyday basis is meeting client’s high expectations and stick to the golden KISS (Keep It Simple, Stupid) rule at the same time. Sometimes it is a struggle to convince client not to interfere where we know better – says Piotr Zaniewicz, Creative Director of SocialPaths.

UXPin (a.k.a. The Solution)
After a major brainstorming session, the SocialPaths team came to a conclusion about creating wireframes and interactive prototypes that could solve this problem, so they decided to try out some of the prototyping and wireframing apps out there. One of their friends sent them an interactive prototype made with UXPin and that gave them their first glimpse of our little baby.

Piotr, Creative Director of SocialPaths talks about what they were looking for exactly – We were in great need of tool that lets you create really advanced prototypes step by step so that our team would instantly know what parameters to consider while building (i.e. size, style, layout etc.) and that lets you create prototypes that REALLY visualize all the looks and features to the client.

It’s not easy to find a tool that does both, of course, but the final thing that made UXPin their weapon of choice was its ability to do everything online, so that there is no problem with keeping the project up to date; The newest version is always available to every member of the team at any given time. Another big plus was that UXPin’s really easy to implement – there’s no bigger pain than when the learning curve steals time instead of saving it: We were afraid of the implementation of new tool, but UXPin is so easy to use that after just a little while a fully functioning prototype went to the Graphic Designer – says Piotr.

The Conclusion (a.k.a. How UXPin Helped SocialPaths)
In our team, UXPin is used mainly by Project Managers and Designers who collect feedback and make on-the-spot changes to the projects according to our client’s wishes. In the first phase of the project creation, UXPin is the link between clients and our team. After three months of using UXPin we can honestly say it really does make our job easier! Thanks to making fully interactive, clickable prototypes, we avoid misunderstandings and unnecessary changes after the implementation. Our clients and us both save a lot of time. -Piotr Zaniewicz, SocialPaths

SocialPaths case is a great example of how wireframing saves time, money and refines communication. So why haven’t YOU used interactive wireframes to help YOUR business?

Create an account today and see firsthand how UXPin helps your!

How customer helps us to improve JustProto

A while ago we got a message from one of the users. Here’s what Mark said:

I really wish that I could set the individual menu cell width for a horizontal menu so that when I am overlaying it on an existing web design that it will line up correctly with the existing menu tabs… is there any possible way to get that functionality in the software? I have been looking for this feature EVERYWHERE and nobody has it.

Well, now no one can say “nobody has it” ;)
We took Mark’s suggestion under consideration and now it’s possible to set individual height and width for the menu element. You can do it manually – just click on the menu and you’ll see highlighted sections that you can set exactly how you need them.
What seemed to be a little improvement ended up being a big programming pain but eventually, we were able to set it up for Mark and all of you!

Kudos for Buka and Dooshek for not abandoning ship mid-project!

You can all try out the improvement here!

We love to get your feedback and we take all suggestions very seriously.
If there’s anything we can improve for you – just drop us a line!

Chat or refining communication once again.

Soon JustProto’s getting new feature – chat:)

Thanks to chat all collaborators will have the chance to talk over the project in JustProto without using any other chatlike solutions. Chat history will be saved in JustProto so users gain access to conversations – even if they go out of town – directly in the web browser. Thanks to Chat option new users and clients will also have the chance to follow older conversations to check what’s going on with the project. Pretty cool, isn’t it? ;)

Prototype your world using JustProto!